终于还是用上了良心云的轻量应用服务器草

0x00.前言

怀疑是临时工,反正买到了就闷声发大财嘛,之前还苦恼cn-tx-bj1-c8这台好用的CentOS来年夏天就要过期了(2019-05-09 00:27:532022-05-09 00:27:54
然而现在又有新的机子实在是太开心了(2021-12-20 22:07:242024-12-20 22:07:24),假装自己还是学生党2333

0x01.修改主机名

还是万年不变的套路,毕竟是SSH连进去第一件要做的事情

1
2
3
4
5
6
7
8
9
10
11
12
13
14
15
16
17
18
19
20
21
22
[root@cn-tx-bj7-c8 ~]# hostnamectl set-hostname cn-tx-bj7-c8
[root@cn-tx-bj7-c8 ~]# hostnamectl status
Static hostname: cn-tx-bj7-c8
Icon name: computer-vm
Chassis: vm
Machine ID: 24955ebe6f454781b4db8ea70343d7eb
Boot ID: 2db66f2ce668440ea196c276e13866d8
Virtualization: kvm
Operating System: CentOS Linux 8
CPE OS Name: cpe:/o:centos:centos:8
Kernel: Linux 4.18.0-305.3.1.el8.x86_64
Architecture: x86-64
[root@cn-tx-bj7-c8 ~]# cat /etc/hosts
127.0.0.1 cn-tx-bj7-c8 cn-tx-bj7-c8
127.0.0.1 localhost.localdomain localhost
127.0.0.1 localhost4.localdomain4 localhost4

::1 cn-tx-bj7-c8 cn-tx-bj7-c8
::1 localhost.localdomain localhost
::1 localhost6.localdomain6 localhost6

[root@cn-tx-bj7-c8 ~]# reboot

0x02.修改SSH端口

感叹昨晚十点创建的机子,今天下午两点登录就看到爆破记录草

1
2
3
4
5
6
Activate the web console with: systemctl enable --now cockpit.socket

Last failed login: Tue Dec 21 09:53:50 CST 2021 from 45.141.84.10 on ssh:notty
There were 1917 failed login attempts since the last successful login.
Last login: Mon Dec 20 22:48:55 2021 from 123.185.64.217
[root@cn-tx-bj7-c8 ~]#

改成非22端口防止爆破,并且在你云的防火墙放行新的端口,阻断默认22端口

1
2
3
4
5
6
7
8
9
10
11
12
[root@cn-tx-bj7-c8 ~]# vim /etc/ssh/sshd_config
……
# If you want to change the port on a SELinux system, you have to tell
# SELinux about this change.
# semanage port -a -t ssh_port_t -p tcp #PORTNUMBER
#
Port <rm>
#AddressFamily any
#ListenAddress 0.0.0.0
#ListenAddress ::
……
[root@cn-tx-bj7-c8 ~]# systemctl restart sshd

注意一定要新开个shell测试新端口是否生效,生效则可关闭旧shell,否则需重新配置(其实也还好吧,大不了就VNC救场呗

0x03.安装Fail2ban

针对爆破,祭出Fail2ban神器

1
2
3
4
5
6
[root@cn-tx-bj7-c8 ~]# dnf install fail2ban -y
[root@cn-tx-bj7-c8 ~]# systemctl status fail2ban
● fail2ban.service - Fail2Ban Service
Loaded: loaded (/usr/lib/systemd/system/fail2ban.service; disabled; vendor preset: disabled)
Active: inactive (dead)
Docs: man:fail2ban(1)

配置开机自启并启动

1
2
3
4
5
6
7
8
9
10
11
12
13
14
15
16
17
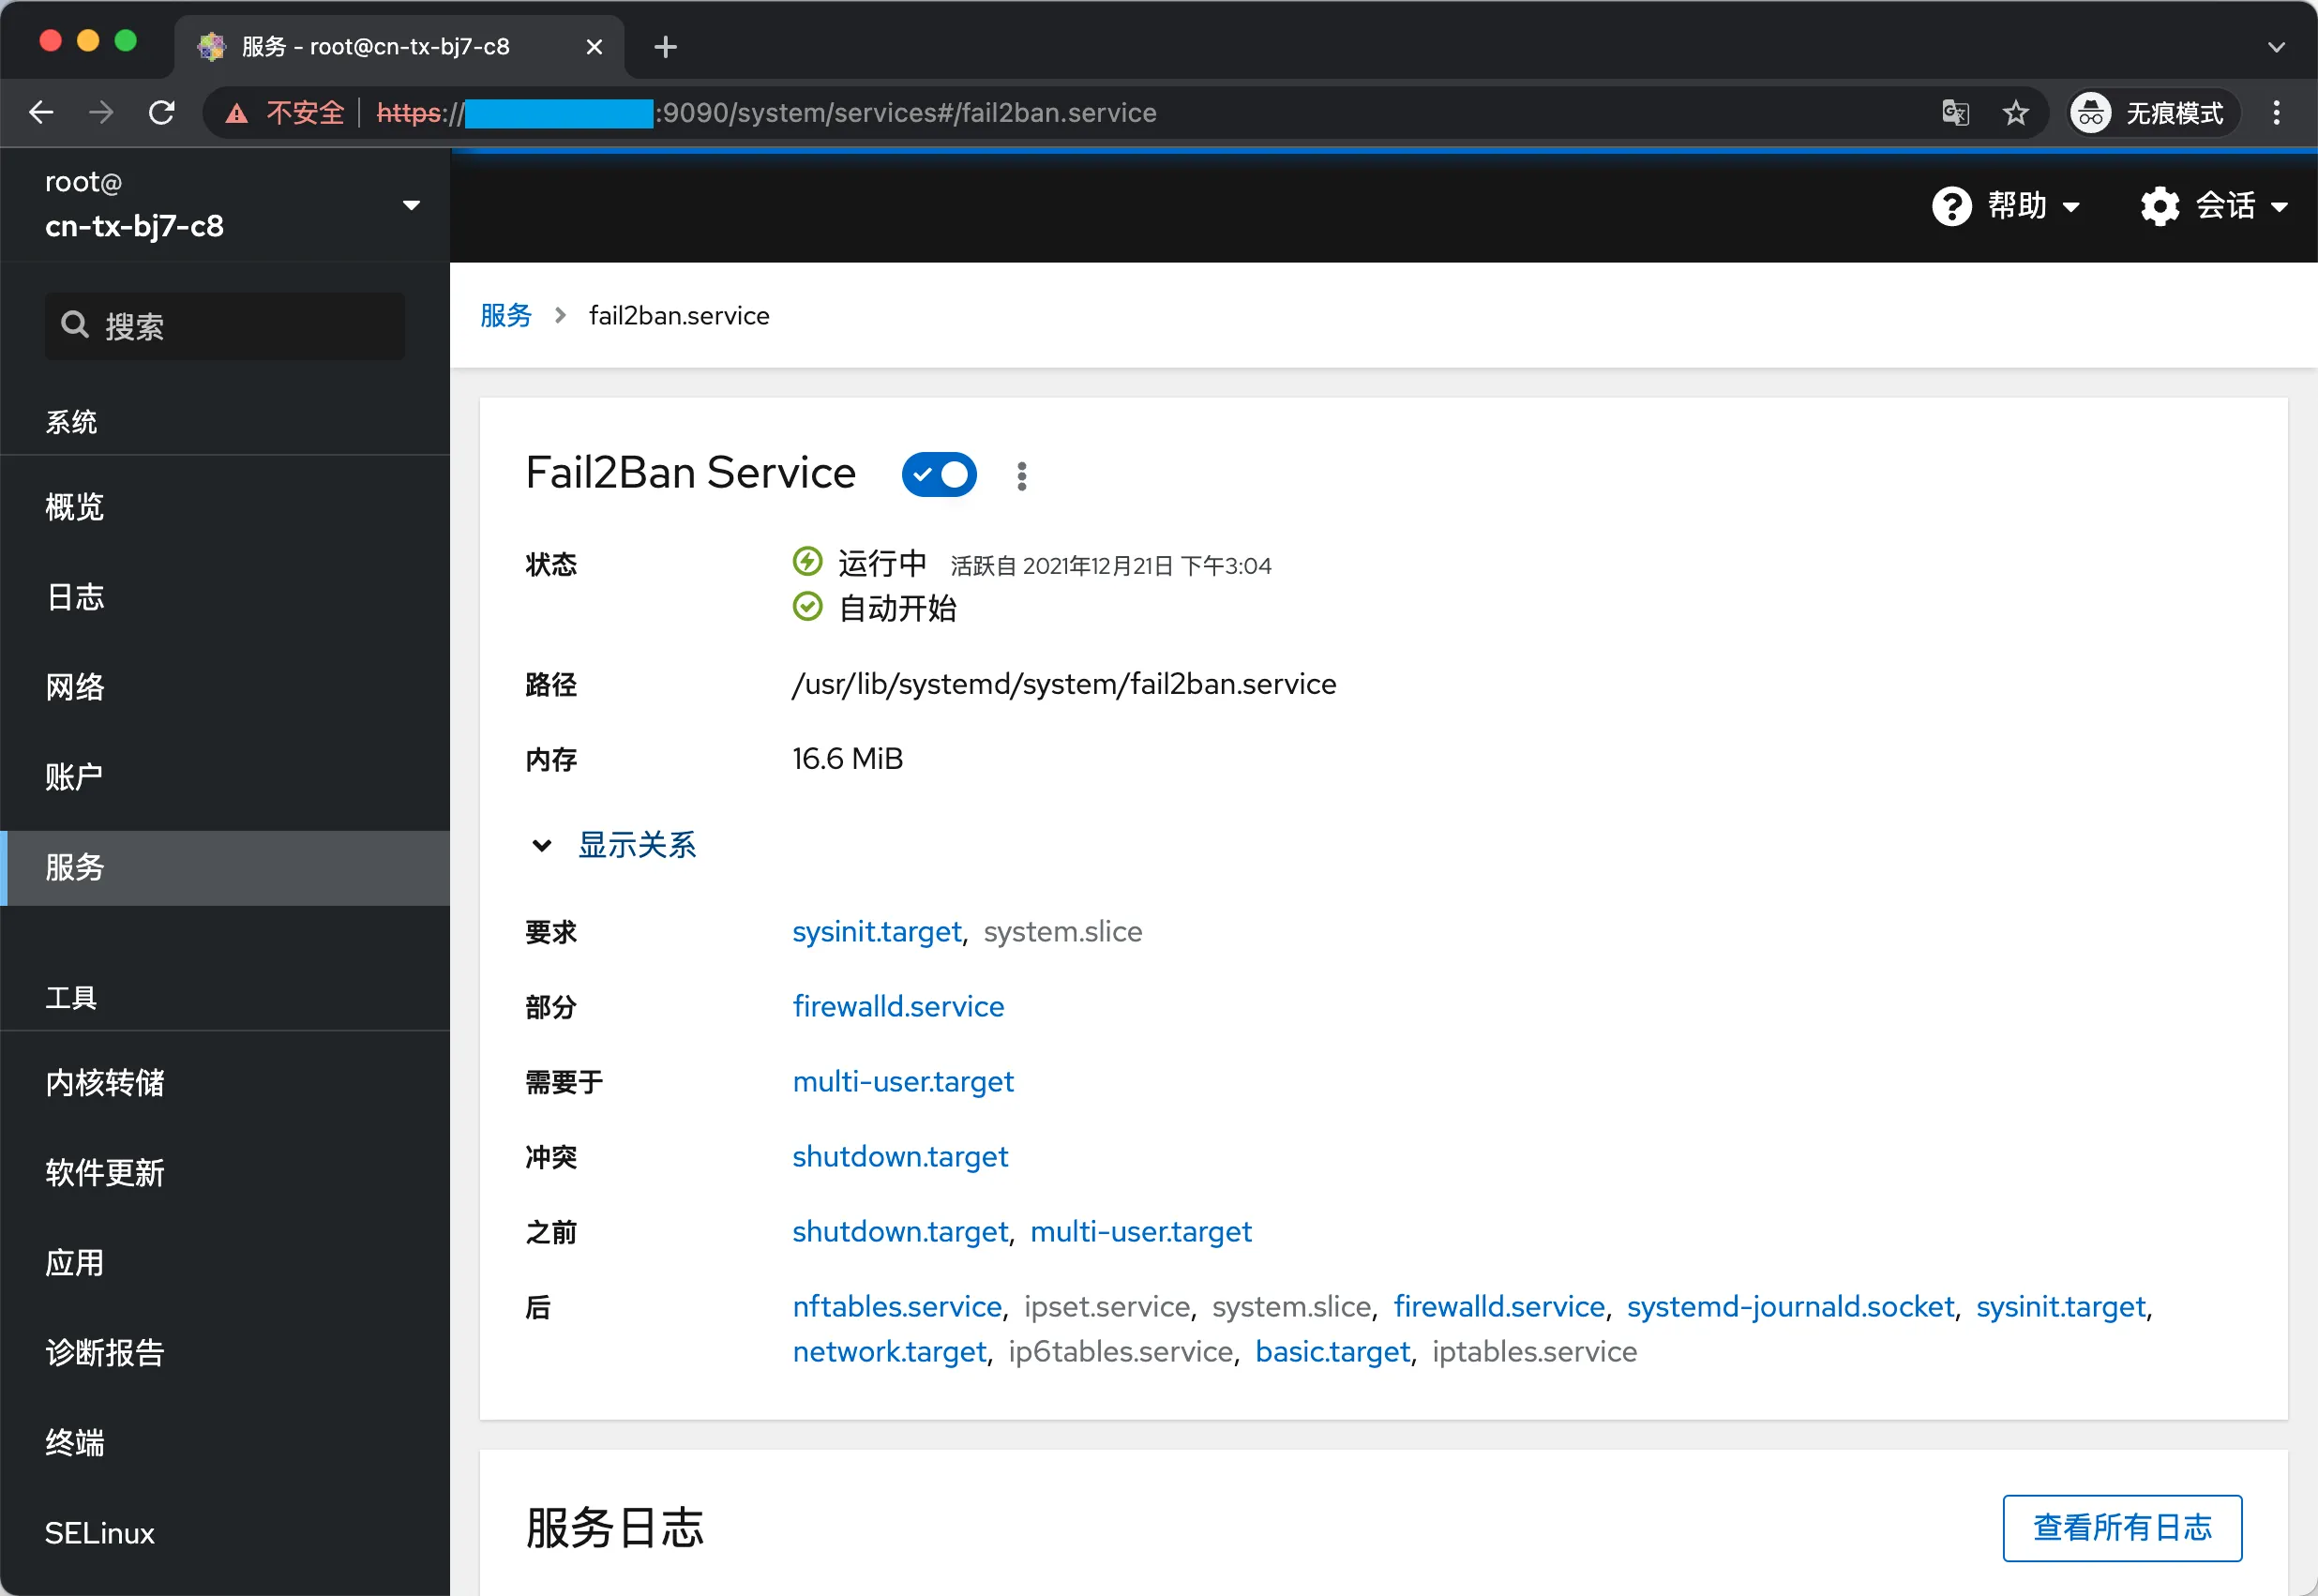
[root@cn-tx-bj7-c8 ~]# systemctl enable --now fail2ban
Created symlink /etc/systemd/system/multi-user.target.wants/fail2ban.service → /usr/lib/systemd/system/fail2ban.service.
[root@cn-tx-bj7-c8 ~]# systemctl status fail2ban
● fail2ban.service - Fail2Ban Service
Loaded: loaded (/usr/lib/systemd/system/fail2ban.service; enabled; vendor preset: disabled)
Active: active (running) since Tue 2021-12-21 14:53:30 CST; 2s ago
Docs: man:fail2ban(1)
Process: 277792 ExecStartPre=/bin/mkdir -p /run/fail2ban (code=exited, status=0/SUCCESS)
Main PID: 277794 (fail2ban-server)
Tasks: 3 (limit: 23722)
Memory: 10.7M
CGroup: /system.slice/fail2ban.service
└─277794 /usr/bin/python3.6 -s /usr/bin/fail2ban-server -xf start

Dec 21 14:53:30 cn-tx-bj7-c8 systemd[1]: Starting Fail2Ban Service...
Dec 21 14:53:30 cn-tx-bj7-c8 systemd[1]: Started Fail2Ban Service.
Dec 21 14:53:30 cn-tx-bj7-c8 fail2ban-server[277794]: Server ready

创建.local配置文件,防止更新时.conf可能被覆盖

1
2
3
4
5
6
7
8
9
10
11
12
13
14
15
16
17
18
19
20
21
22
[root@cn-tx-bj7-c8 ~]# ll /etc/fail2ban/
total 56
drwxr-xr-x 2 root root 4096 Dec 21 14:52 action.d
-rw-r--r-- 1 root root 2816 Nov 24 2020 fail2ban.conf
drwxr-xr-x 2 root root 4096 Nov 24 2020 fail2ban.d
drwxr-xr-x 3 root root 4096 Dec 21 14:52 filter.d
-rw-r--r-- 1 root root 24996 Nov 24 2020 jail.conf
drwxr-xr-x 2 root root 4096 Dec 21 14:52 jail.d
-rw-r--r-- 1 root root 2827 Nov 24 2020 paths-common.conf
-rw-r--r-- 1 root root 930 Nov 24 2020 paths-fedora.conf
[root@cn-tx-bj7-c8 ~]# cp /etc/fail2ban/jail.{conf,local}
[root@cn-tx-bj7-c8 ~]# ll /etc/fail2ban/
total 84
drwxr-xr-x 2 root root 4096 Dec 21 14:52 action.d
-rw-r--r-- 1 root root 2816 Nov 24 2020 fail2ban.conf
drwxr-xr-x 2 root root 4096 Nov 24 2020 fail2ban.d
drwxr-xr-x 3 root root 4096 Dec 21 14:52 filter.d
-rw-r--r-- 1 root root 24996 Nov 24 2020 jail.conf
drwxr-xr-x 2 root root 4096 Dec 21 14:52 jail.d
-rw-r--r-- 1 root root 24996 Dec 21 14:54 jail.local
-rw-r--r-- 1 root root 2827 Nov 24 2020 paths-common.conf
-rw-r--r-- 1 root root 930 Nov 24 2020 paths-fedora.conf

修改配置文件/etc/fail2ban/jail.local,开启SSH防火墙

1
2
3
4
5
6
7
8
9
10
11
12
13
14
15
16
17
18
19
20
21
……
# "bantime" is the number of seconds that a host is banned.
bantime = 1d

# A host is banned if it has generated "maxretry" during the last "findtime"
# seconds.
findtime = 10m

# "maxretry" is the number of failures before a host get banned.
maxretry = 5
……
[sshd]

# To use more aggressive sshd modes set filter parameter "mode" in jail.local:
# normal (default), ddos, extra or aggressive (combines all).
# See "tests/files/logs/sshd" or "filter.d/sshd.conf" for usage example and details.
enabled = true
#mode = normal
port = <rm>
logpath = %(sshd_log)s
backend = %(sshd_backend)s

最后就可以使用Fail2ban客户端查看状态了,是不是很简单?

1
2
3
4
5
6
7
8
9
10
11
12
13
14
[root@cn-tx-bj7-c8 ~]# fail2ban-client status
Status
|- Number of jail: 1
`- Jail list: sshd
[root@cn-tx-bj7-c8 ~]# fail2ban-client status sshd
Status for the jail: sshd
|- Filter
| |- Currently failed: 4
| |- Total failed: 37071
| `- Journal matches: _SYSTEMD_UNIT=sshd.service + _COMM=sshd
`- Actions
|- Currently banned: 170
|- Total banned: 3962
`- Banned IP list: <rm>

0x04.开启Cockpit

还记得之前登录时看到的Activate the web console with: systemctl enable --now cockpit.socket嘛?搞定了SSH之后可以尝鲜开启它了,之前倒还真没用过……

1
2
3
4
5
6
7
8
9
10
11
12
13
14
15
16
17
18
19
20
21
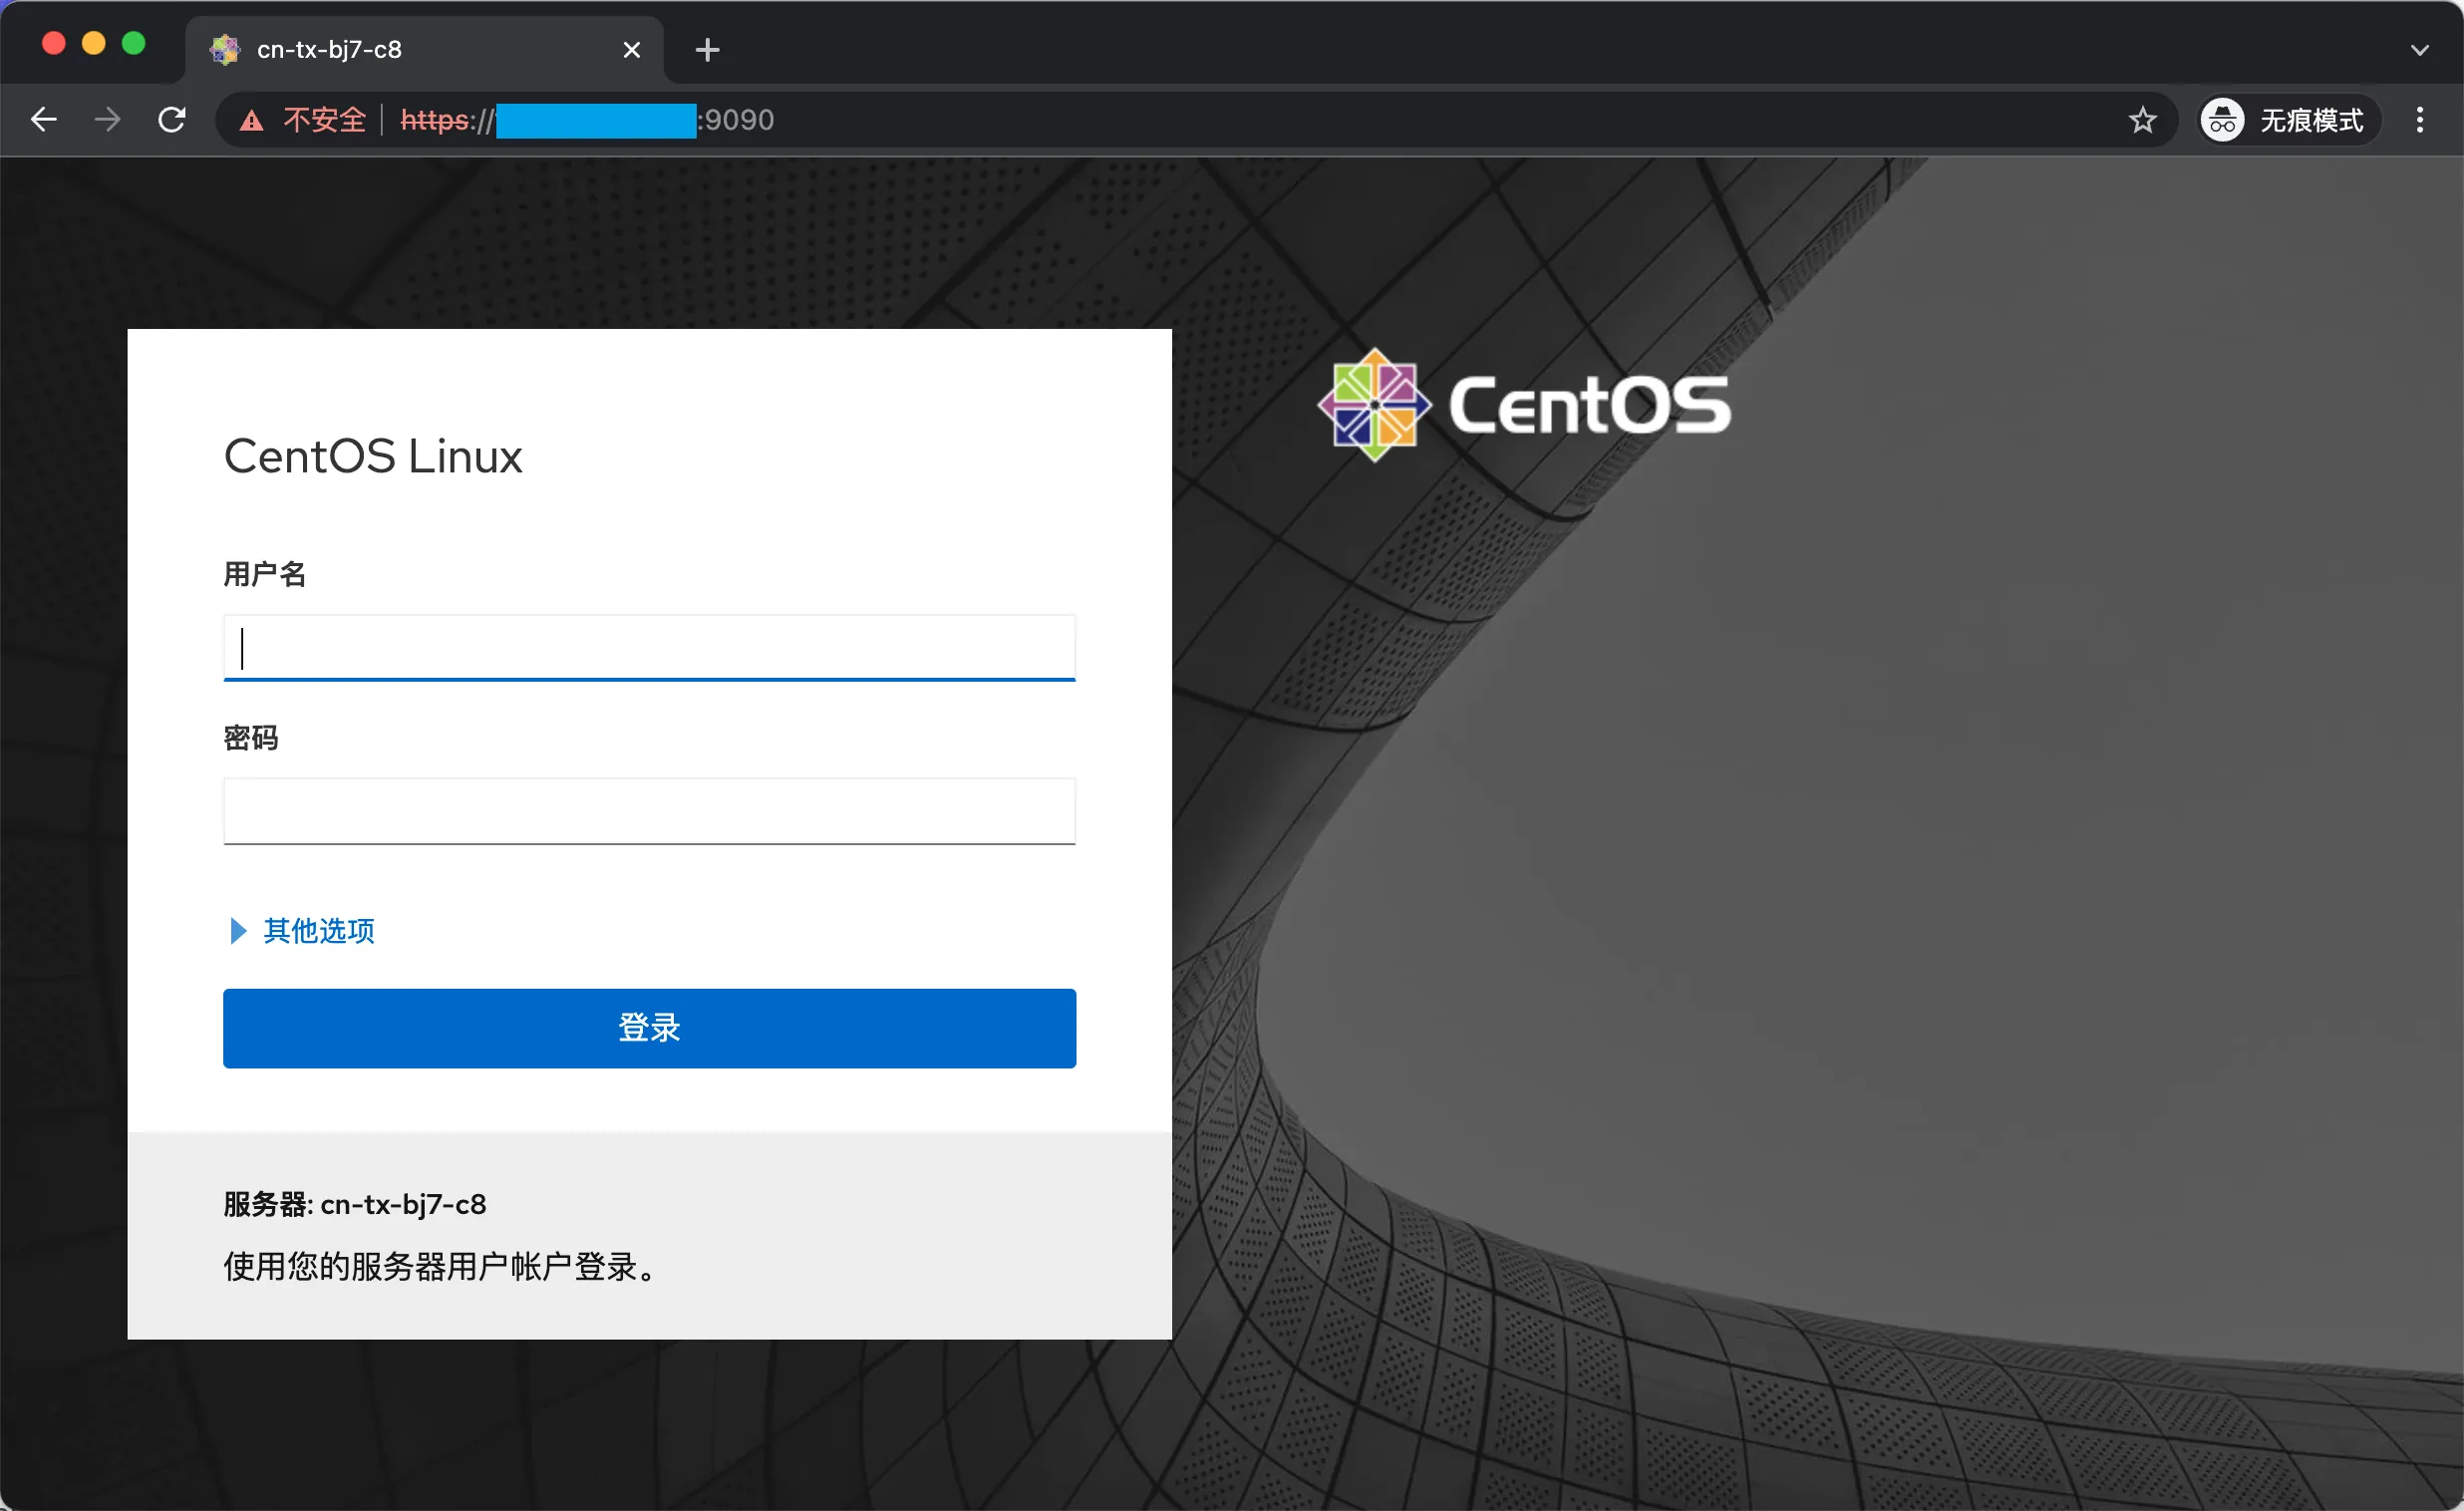
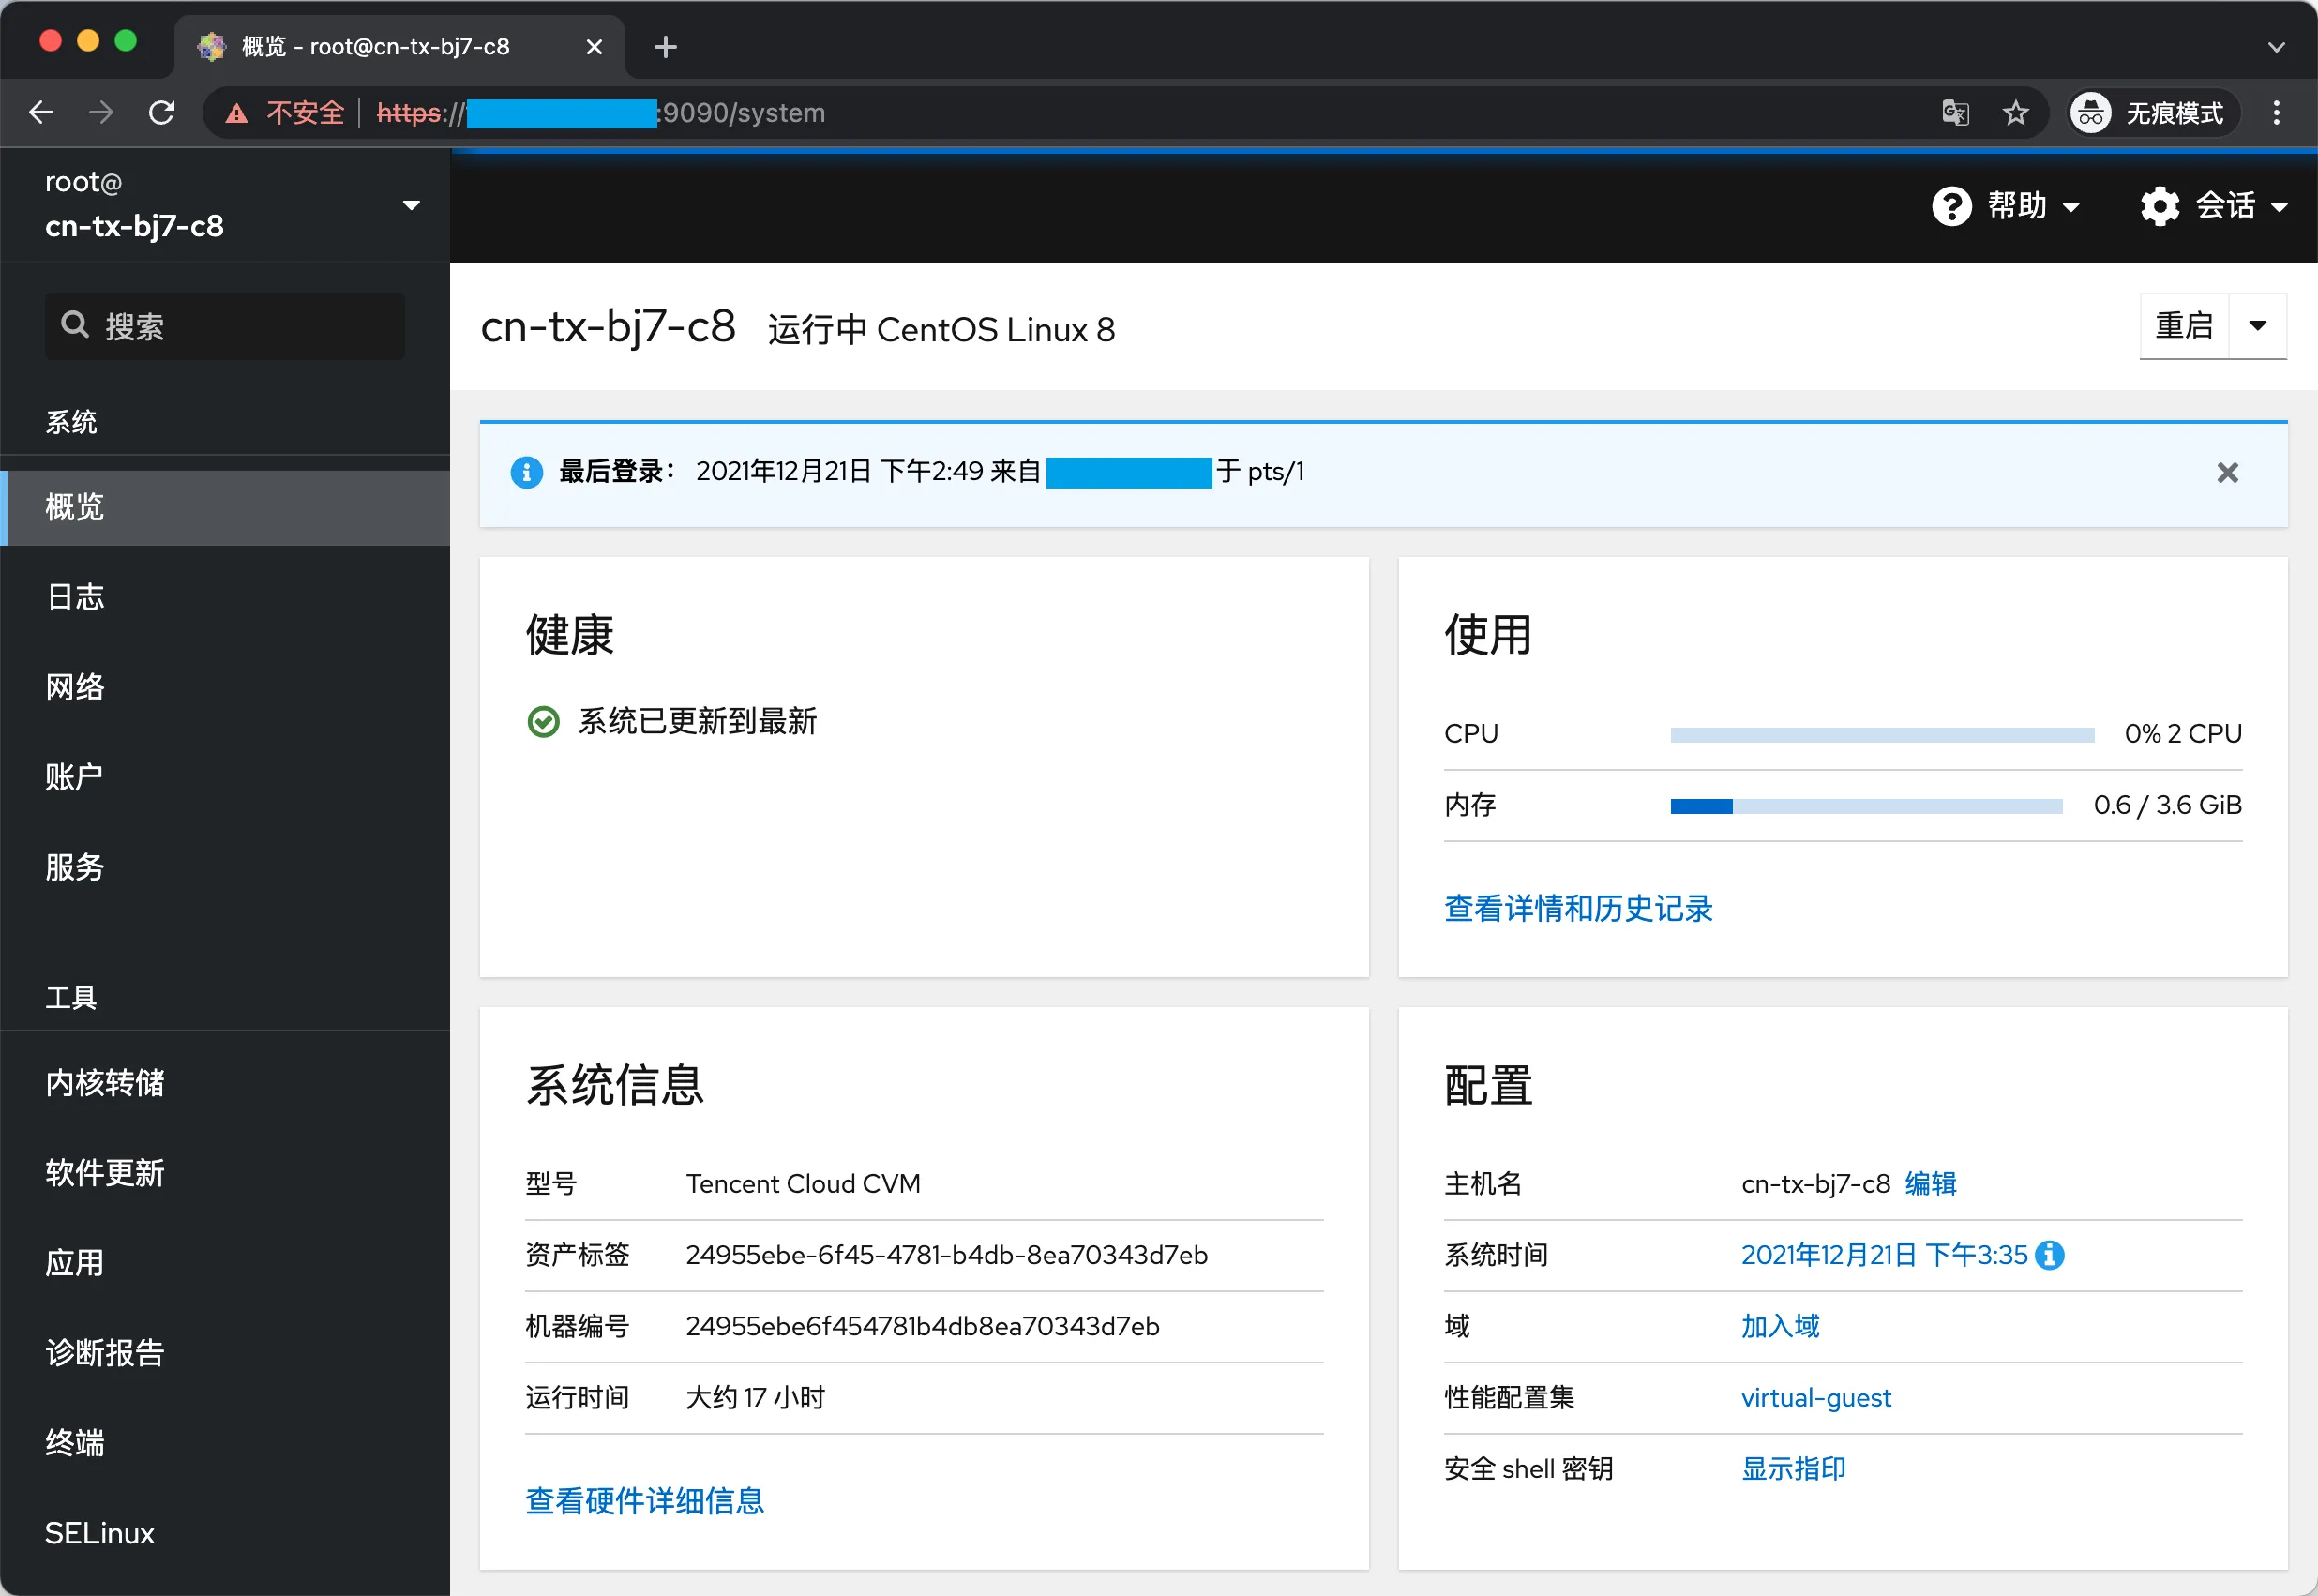
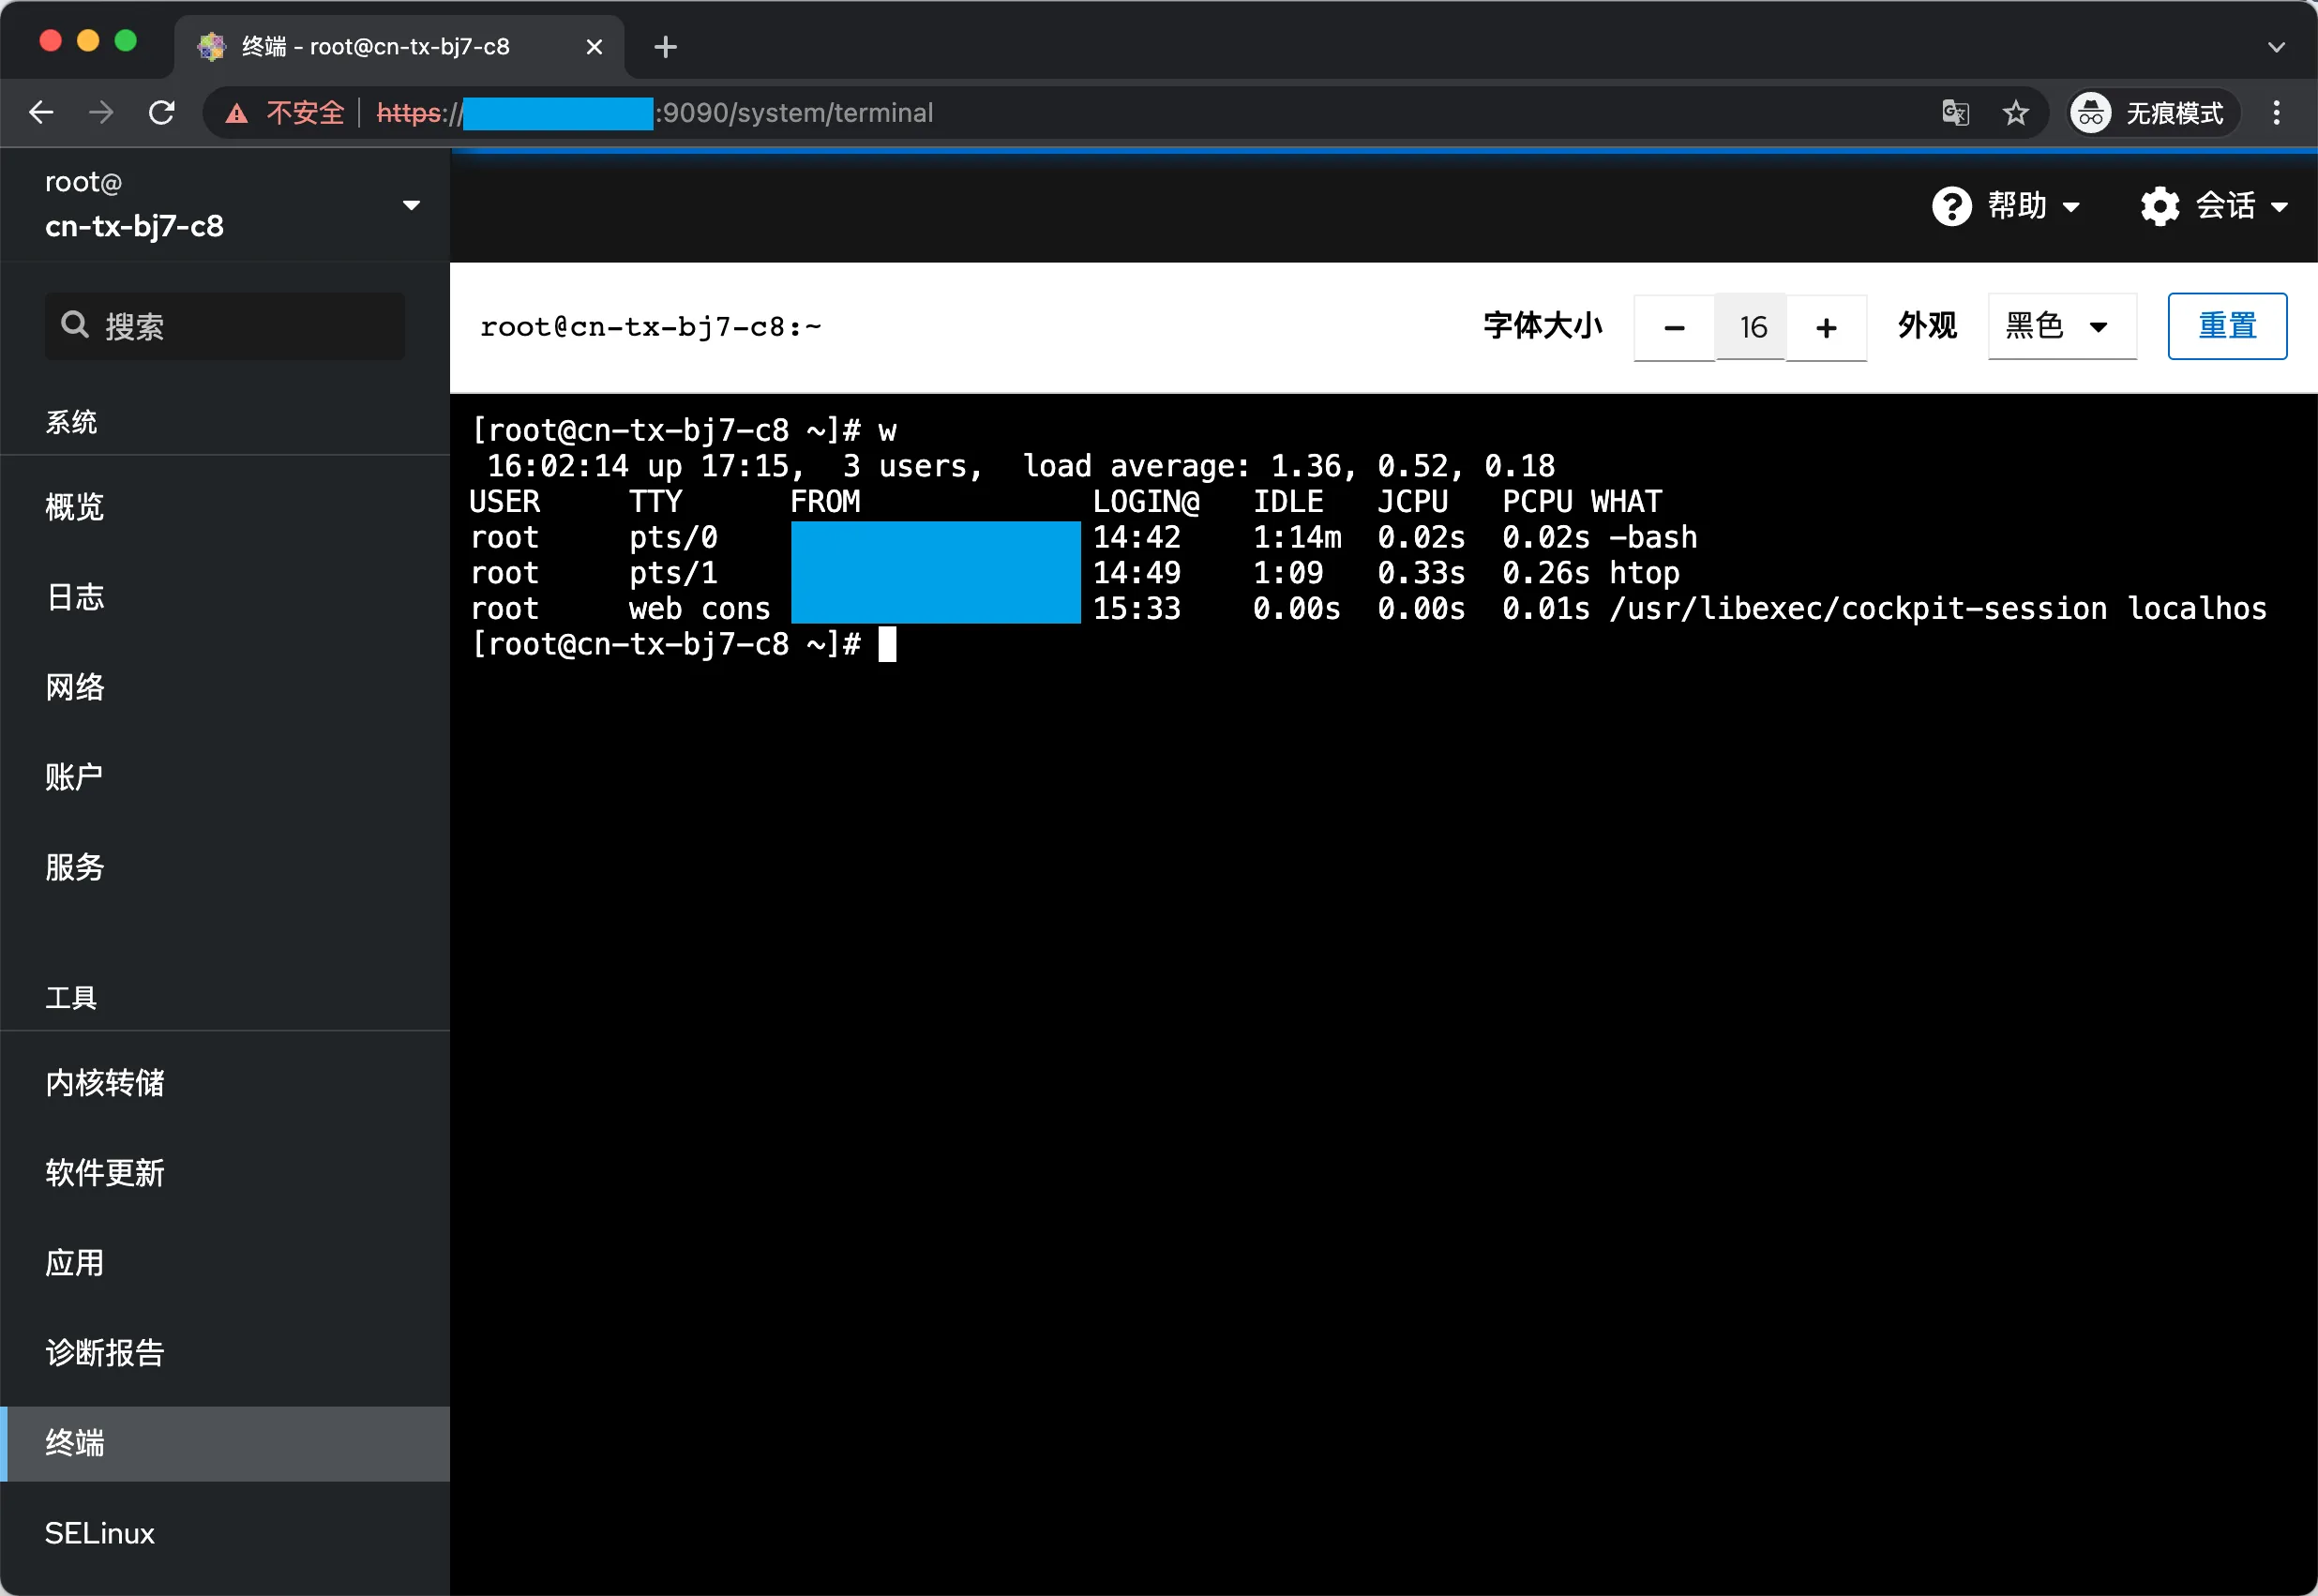
[root@cn-tx-bj7-c8 ~]# systemctl enable --now cockpit.socket
Created symlink /etc/systemd/system/sockets.target.wants/cockpit.socket → /usr/lib/systemd/system/cockpit.socket.
[root@cn-tx-bj7-c8 ~]# systemctl status cockpit.socket
● cockpit.socket - Cockpit Web Service Socket
Loaded: loaded (/usr/lib/systemd/system/cockpit.socket; enabled; vendor preset: disabled)
Active: active (listening) since Tue 2021-12-21 15:30:09 CST; 14s ago
Docs: man:cockpit-ws(8)
Listen: [::]:9090 (Stream)
Process: 285185 ExecStartPost=/bin/ln -snf active.motd /run/cockpit/motd (code=exited, status=0/SUCCESS)
Process: 285178 ExecStartPost=/usr/share/cockpit/motd/update-motd localhost (code=exited, status=0/SUCCESS)
Tasks: 0 (limit: 23722)
Memory: 4.0K
CGroup: /system.slice/cockpit.socket

Dec 21 15:30:09 cn-tx-bj7-c8 systemd[1]: Starting Cockpit Web Service Socket.
Dec 21 15:30:09 cn-tx-bj7-c8 systemd[1]: Listening on Cockpit Web Service Socket.
[root@cn-tx-bj7-c8 ~]# systemctl status cockpit
● cockpit.service - Cockpit Web Service
Loaded: loaded (/usr/lib/systemd/system/cockpit.service; static; vendor preset: disabled)
Active: inactive (dead)
Docs: man:cockpit-ws(8)

然后访问9090端口,使用SSH的账户登录,哇哦界面针不戳,有那味儿了

登录
登录
概览
概览

账户中还能看到有个已锁定的lighthouse用户草

账户
账户

也可以查看各服务的运行状态

服务
服务

当然最重要的终端自然也是有滴

终端
终端

0x05.导出MongoDB数据

cn-tx-bj3-w9dC盘又告急了草,spacesniffer一扫发现MongoDB的数据有7.4G,相比其他小文件还算挺大的

C
C
data
data

因为windows上默认安装不含mongodump可执行程序,需要手动下载mongodb-database-tools-windows-x86_64-100.5.1.zip工具包并解压,然后执行mongodump

1
2
3
4
5
6
7
8
9
E:\mongodb-database-tools-windows-x86_64-100.5.1\bin>mongodump -u<rm> -p<rm> -o "X:\\mongodb_data"
2021-12-21T21:04:12.503+0800 writing admin.system.users to X:\mongodb_data\admin\system.users.bson
2021-12-21T21:04:12.548+0800 done dumping admin.system.users (2 documents)
2021-12-21T21:04:12.548+0800 writing admin.system.version to X:\mongodb_data\admin\system.version.bson
2021-12-21T21:04:12.558+0800 done dumping admin.system.version (3 documents)
……
2021-12-21T21:16:42.272+0800 [#######################.] bilibili.bilibili_all_3 4355003/4369494 (99.7%)
2021-12-21T21:16:43.128+0800 [########################] bilibili.bilibili_all_3 4369494/4369494 (100.0%)
2021-12-21T21:16:45.550+0800 done dumping bilibili.bilibili_all_3 (4369494 documents)

并且迁移过程中cn-tx-bj3-w9d连文件复制的空间都木大了,又看了一圈占用空间较大的地方,把虚拟内存修改成了256-512重启后竟然报错说虚拟内存过低,又给调大到512-1024……

data
data

调时一时爽,卡爆火葬场……又被坑了数个小时,这个虚拟内存千万不能调小,调完之后系统巨卡无比(还是得设置成让系统自动管理才对
并且图形化挂载S3的工具频频报错也太不稳定了,只好pip安装coscmd,安装的时候发现pip也被设置成了你云的镜像源,C:\>coscmd upload -r --skipmd5 X:/mongodb_data mongo_data_bak这才算是终于把mongodump导出的数据拿出来了,耗时俩小时真是日了狗了
趣事:在upload某一个集合的时候,CPU会跑满,上行速度从几十兆每秒瞬间降低到几百K至一两兆,重启无果
后来看到集合的名称是wooyun突然恍然大悟,再结合占CPU高的进程是windows defender不难得出因为内容满是漏洞POC所以劲爆扫描草,于是就先跳过了这个集合

100
100
wooyun
wooyun

0x06.安装MongoDB

这里需要手动创建一个5.0的源

1
2
3
4
5
6
7
8
9
10
[root@cn-tx-bj7-c8 ~]# cat /etc/yum.repos.d/mongodb-org-5.0.repo
[mongodb-org-5.0]
name=MongoDB Repository
baseurl=https://repo.mongodb.org/yum/redhat/$releasever/mongodb-org/5.0/x86_64/
gpgcheck=1
enabled=1
gpgkey=https://www.mongodb.org/static/pgp/server-5.0.asc
[root@cn-tx-bj7-c8 ~]# dnf install mongodb-org -y
……
[root@cn-tx-bj7-c8 ~]# systemctl enable mongod --now

等到下一步#0x07-导入MongoDB数据再执行完数据导入后,修改配置文件

1
2
3
4
5
6
7
8
9
10
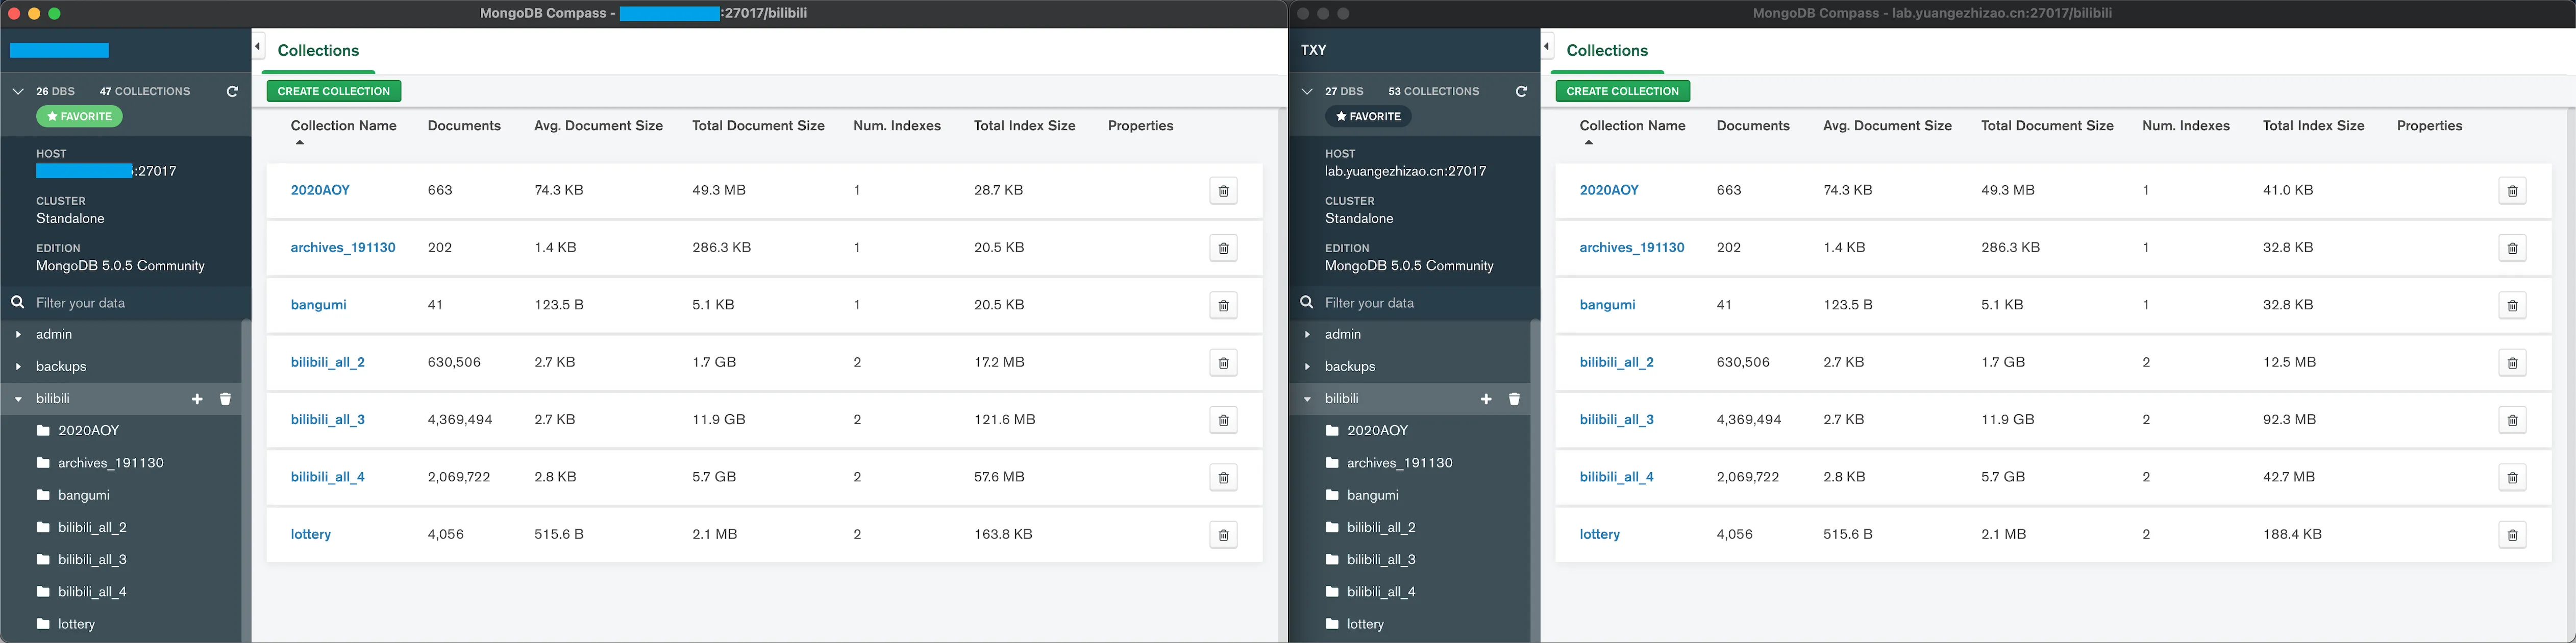
[root@cn-tx-bj7-c8 ~]# vim /etc/mongod.conf
# network interfaces
net:
port: 27017
bindIp: 0.0.0.0 # Enter 0.0.0.0,:: to bind to all IPv4 and IPv6 addresses or, alternatively, use the net.bindIpAll setting.


security:
authorization: enabled
[root@cn-tx-bj7-c8 ~]# systemctl restart mongod
终于搞定了
终于搞定了

0x07.导入MongoDB数据

途中去挂载cn-tx-bj3-w9d导出数据所在的CIFS文件系统的时候,发现文件存储竟然不支持和cn-tx-bj7-c8内网互通,血贵的云联网简直劝退,云联网同地域 5Gbps 及以下带宽免费
弱小无助的自己费尽周折上传到了COS,毕竟文件存储是按时付费的淦,越快操作完越省钱啊,结果后来发现只要开通云联网之后内网就可以互通了草

1
2
3
4
5
6
[root@cn-tx-bj7-c8 ~]# dnf install nfs-utils -y
[root@cn-tx-bj7-c8 ~]# mkdir localfolder
[root@cn-tx-bj7-c8 ~]# ls
localfolder
[root@cn-tx-bj7-c8 ~]# mount -t nfs -o vers=3,nolock,proto=tcp,noresvport 10.0.2.15:/<rm> localfolder
mount.nfs: Connection timed out

要从COS中转就也得安装coscmd,并且确认是内网域名,毕竟是大体积下载还是得确认一下,不能外网流量被反撸(国内带宽0.5/G太贵了

1
2
3
4
5
6
7
8
9
10
11
12
13
14
15
16
17
[root@cn-tx-bj7-c8 ~]# pip -V
pip 9.0.3 from /usr/lib/python3.6/site-packages (python 3.6)
[root@cn-tx-bj7-c8 ~]# pip3 -V
pip 9.0.3 from /usr/lib/python3.6/site-packages (python 3.6)
[root@cn-tx-bj7-c8 ~]# pip3 install coscmd
WARNING: Running pip install with root privileges is generally not a good idea. Try `pip3 install --user` instead.
Collecting coscmd
Downloading http://mirrors.tencentyun.com/pypi/packages/7b/68/00f9ea072d29d3692ebfdb08111cdce828e9590a03dfc8bfcf7b608167d7/coscmd-1.8.6.24.tar.gz
……
[root@cn-tx-bj7-c8 ~]# coscmd config -a <rm> -s <rm> -b centos-<rm> -r ap-beijing
Created configuration file in b'/root/.cos.conf'
[root@cn-tx-bj7-c8 ~]# nslookup centos-<rm>.cos.ap-beijing.myqcloud.com
Server: 183.60.82.98
Address: 183.60.82.98#53

Name: centos-<rm>.cos.ap-beijing.myqcloud.com
Address: 169.254.0.49

然后光速内网下载

1
2
3
4
5
6
7
8
9
10
11
12
13
14
15
16
17
18
19
20
21
22
23
24
25
26
27
28
29
30
[root@cn-tx-bj7-c8 ~]# coscmd download -r /mongo_data_bak mongo_data_bak
……
Downloading mongo_data_bak/bilibili/2020AOY.bson
100%|██████████████████████████████████████| 47.0M/47.0M [00:00<00:00, 64.3MB/s]
Download cos://centos-<rm>/mongo_data_bak/bilibili/bilibili_all_2.bson => mongo_data_bak/bilibili/bilibili_all_2.bson
Downloading mongo_data_bak/bilibili/bilibili_all_2.bson
1.57GB [00:20, 82.1MB/s]
Download cos://centos-<rm>/mongo_data_bak/bilibili/bilibili_all_3.bson => mongo_data_bak/bilibili/bilibili_all_3.bson
Downloading mongo_data_bak/bilibili/bilibili_all_3.bson
11.3GB [02:09, 93.3MB/s]
Download cos://centos-<rm>/mongo_data_bak/bilibili/bilibili_all_4.bson => mongo_data_bak/bilibili/bilibili_all_4.bson
Downloading mongo_data_bak/bilibili/bilibili_all_4.bson
6.46GB [01:09, 100MB/s]
Download cos://centos-<rm>/mongo_data_bak/biliplus/view.bson => mongo_data_bak/biliplus/view.bson
Downloading mongo_data_bak/biliplus/view.bson
691MB [00:01, 380MB/s]
Download cos://centos-<rm>/mongo_data_bak/jd_campus/feeds.bson => mongo_data_bak/jd_campus/feeds.bson
Downloading mongo_data_bak/jd_campus/feeds.bson
256MB [00:03, 79.4MB/s]
Download cos://centos-<rm>/mongo_data_bak/masadora/notes.bson => mongo_data_bak/masadora/notes.bson
Downloading mongo_data_bak/masadora/notes.bson
577MB [00:06, 90.1MB/s]
Download cos://centos-<rm>/mongo_data_bak/rbc/attend_class.bson => mongo_data_bak/rbc/attend_class.bson
Downloading mongo_data_bak/rbc/attend_class.bson
89.7MB [00:00, 120MB/s]
Download cos://centos-<rm>/mongo_data_bak/twitter/inoriminase.bson => mongo_data_bak/twitter/inoriminase.bson
Downloading mongo_data_bak/twitter/inoriminase.bson
25.8MB [00:00, 55.2MB/s]
90 files downloaded, 0 files skipped, 0 files failed
……

最后终于可以导入了,这一刻真就等了一天草,因为是在本地新安装的mongod所以也不用特意指定地址和端口辣,简直太方便了

1
2
3
4
5
6
7
8
9
10
11
12
13
14
[root@cn-tx-bj7-c8 ~]# mongorestore mongo_data_bak
2021-12-21T23:14:50.794+0800 preparing collections to restore from
……
2021-12-21T23:14:50.810+0800 reading metadata for bilibili.bilibili_all_3 from mongo_data_bak/bilibili/bilibili_all_3.metadata.json
……
2021-12-21T23:14:50.868+0800 restoring bilibili.bilibili_all_3 from mongo_data_bak/bilibili/bilibili_all_3.bson
……
2021-12-21T23:19:12.376+0800 [########################] bilibili.bilibili_all_3 11.1GB/11.1GB (100.0%)
2021-12-21T23:19:12.376+0800 finished restoring bilibili.bilibili_all_3 (4369494 documents, 0 failures)
……
2021-12-21T23:19:13.660+0800 restoring indexes for collection bilibili.bilibili_all_3 from metadata
2021-12-21T23:19:13.660+0800 index: &idx.IndexDocument{Options:primitive.M{"background":false, "name":"aid", "unique":true, "v":2}, Key:primitive.D{primitive.E{Key:"aid", Value:1}}, PartialFilterExpression:primitive.D(nil)}
……
2021-12-21T23:19:42.663+0800 7550066 document(s) restored successfully. 0 document(s) failed to restore.

备注:翻文档的时候还发现可以标准输入导入,不过限于外网带宽只有1m还是算了:mongodump --archive --db=test --port=27017 | mongorestore --archive --port=27018
2021-12-22 01:06:31:在开通云联网之后,去搞定最后一个wooyun集合,一顿操作猛如虎

1
2
3
4
5
6
7
8
9
10
11
12
13
14
15
16
17
18
19
20
E:\mongodb-database-tools-windows-x86_64-100.5.1\bin>mongodump -d wooyun -o "X:\\mongodb_data"
2021-12-21T23:53:20.157+0800 writing wooyun.wooyun_drops to X:\mongodb_data\wooyun\wooyun_drops.bson
2021-12-21T23:53:20.391+0800 writing wooyun.wooyun_list to X:\mongodb_data\wooyun\wooyun_list.bson
2021-12-21T23:53:22.095+0800 [#################.......] wooyun.wooyun_drops 936/1269 (73.8%)
2021-12-21T23:53:22.101+0800 [........................] wooyun.wooyun_list 1451/40293 (3.6%)
2021-12-21T23:53:22.103+0800
2021-12-21T23:53:22.742+0800 [########################] wooyun.wooyun_drops 1269/1269 (100.0%)
2021-12-21T23:53:23.302+0800 done dumping wooyun.wooyun_drops (1269 documents)
2021-12-21T23:53:25.083+0800 [##......................] wooyun.wooyun_list 4787/40293 (11.9%)
2021-12-21T23:53:28.159+0800 [#####...................] wooyun.wooyun_list 8395/40293 (20.8%)
2021-12-21T23:53:31.083+0800 [######..................] wooyun.wooyun_list 10725/40293 (26.6%)
2021-12-21T23:53:34.149+0800 [########................] wooyun.wooyun_list 13840/40293 (34.3%)
2021-12-21T23:53:37.132+0800 [##########..............] wooyun.wooyun_list 17739/40293 (44.0%)
2021-12-21T23:53:40.083+0800 [############............] wooyun.wooyun_list 21036/40293 (52.2%)
2021-12-21T23:53:43.083+0800 [##############..........] wooyun.wooyun_list 25147/40293 (62.4%)
2021-12-21T23:53:46.124+0800 [#################.......] wooyun.wooyun_list 29754/40293 (73.8%)
2021-12-21T23:53:49.087+0800 [###################.....] wooyun.wooyun_list 32785/40293 (81.4%)
2021-12-21T23:53:52.112+0800 [#####################...] wooyun.wooyun_list 36894/40293 (91.6%)
2021-12-21T23:53:54.499+0800 [########################] wooyun.wooyun_list 40293/40293 (100.0%)
2021-12-21T23:53:56.458+0800 done dumping wooyun.wooyun_list (40293 documents)

再还原

1
2
3
4
5
6
7
8
9
10
11
12
13
14
15
16
17
18
19
20
21
22
23
24
25
[root@cn-tx-bj7-c8 test]# mongorestore mongodb_data
2021-12-21T23:54:39.134+0800 preparing collections to restore from
2021-12-21T23:54:39.139+0800 reading metadata for wooyun.wooyun_drops from mongodb_data/wooyun/wooyun_drops.metadata.json
2021-12-21T23:54:39.142+0800 reading metadata for wooyun.wooyun_list from mongodb_data/wooyun/wooyun_list.metadata.json
2021-12-21T23:54:39.167+0800 restoring wooyun.wooyun_drops from mongodb_data/wooyun/wooyun_drops.bson
2021-12-21T23:54:39.178+0800 restoring wooyun.wooyun_list from mongodb_data/wooyun/wooyun_list.bson
2021-12-21T23:54:40.796+0800 finished restoring wooyun.wooyun_drops (1269 documents, 0 failures)
2021-12-21T23:54:42.134+0800 [##......................] wooyun.wooyun_list 182MB/1.63GB (10.9%)
2021-12-21T23:54:45.134+0800 [#####...................] wooyun.wooyun_list 369MB/1.63GB (22.1%)
2021-12-21T23:54:48.134+0800 [#######.................] wooyun.wooyun_list 554MB/1.63GB (33.2%)
2021-12-21T23:54:51.134+0800 [##########..............] wooyun.wooyun_list 729MB/1.63GB (43.7%)
2021-12-21T23:54:54.134+0800 [#############...........] wooyun.wooyun_list 925MB/1.63GB (55.5%)
2021-12-21T23:54:57.134+0800 [###############.........] wooyun.wooyun_list 1.07GB/1.63GB (65.5%)
2021-12-21T23:55:00.134+0800 [##################......] wooyun.wooyun_list 1.25GB/1.63GB (76.9%)
2021-12-21T23:55:03.134+0800 [####################....] wooyun.wooyun_list 1.41GB/1.63GB (86.9%)
2021-12-21T23:55:06.135+0800 [#######################.] wooyun.wooyun_list 1.60GB/1.63GB (98.0%)
2021-12-21T23:55:06.799+0800 [########################] wooyun.wooyun_list 1.63GB/1.63GB (100.0%)
2021-12-21T23:55:06.799+0800 finished restoring wooyun.wooyun_list (40293 documents, 0 failures)
2021-12-21T23:55:06.799+0800 restoring indexes for collection wooyun.wooyun_drops from metadata
2021-12-21T23:55:06.799+0800 index: &idx.IndexDocument{Options:primitive.M{"name":"datetime_1", "v":1}, Key:primitive.D{primitive.E{Key:"datetime", Value:1}}, PartialFilterExpression:primitive.D(nil)}
2021-12-21T23:55:06.799+0800 index: &idx.IndexDocument{Options:primitive.M{"name":"url", "unique":true, "v":2}, Key:primitive.D{primitive.E{Key:"url", Value:1}}, PartialFilterExpression:primitive.D(nil)}
2021-12-21T23:55:06.799+0800 restoring indexes for collection wooyun.wooyun_list from metadata
2021-12-21T23:55:06.799+0800 index: &idx.IndexDocument{Options:primitive.M{"name":"datetime_1", "v":1}, Key:primitive.D{primitive.E{Key:"datetime", Value:1}}, PartialFilterExpression:primitive.D(nil)}
2021-12-21T23:55:06.799+0800 index: &idx.IndexDocument{Options:primitive.M{"name":"wooyun_id", "unique":true, "v":2}, Key:primitive.D{primitive.E{Key:"wooyun_id", Value:1}}, PartialFilterExpression:primitive.D(nil)}
2021-12-21T23:55:08.285+0800 41562 document(s) restored successfully. 0 document(s) failed to restore.

最后卸载cn-tx-bj3-w9d上的MongoDB,寿终正寝已完成使命(这内存大户就是个定时炸弹,尤其是作死全文搜索的时候

卸载
卸载

修改MongoDB默认数据存储路径,自默认的SSD盘移至新购的大容量HDD

1
2
3
4
5
6
7
8
9
10
[root@cn-tx-bj7-c8 ~]# systemctl stop mongod
[root@cn-tx-bj7-c8 ~]# mv /var/lib/mongo /data/
[root@cn-tx-bj7-c8 ~]# vim /etc/mongod.conf
# Where and how to store data.
storage:
dbPath: /data/mongo
journal:
enabled: true
# engine:
# wiredTiger:

然后启动失败草,修改文件夹权限之后再次重启终于成功了

1
2
3
4
5
6
7
[root@cn-tx-bj7-c8 ~]# systemctl start mongod
[root@cn-tx-bj7-c8 ~]# chown -R mongod:mongod /data/mongo
[root@cn-tx-bj7-c8 ~]# chown -R mongod:mongod /data/mongo/WiredTiger
[root@cn-tx-bj7-c8 ~]# chmod -R 777 /data/mongo
[root@cn-tx-bj7-c8 ~]# chmod -R 777 /data/mongo/WiredTiger
[root@cn-tx-bj7-c8 ~]# mongod --repair --dbpath /data/mongo
[root@cn-tx-bj7-c8 ~]# systemctl status mongod

0x08.安装Redis

众所周知dnf上的版本(5.0.3)要落后于源码(6.2.6)的版本

1
2
3
4
5
6
7
8
9
10
11
12
13
14
15
16
17
18
19
20
21
22
23
24
25
26
27
28
29
30
31
32
33
34
35
36
[root@cn-tx-bj7-c8 ~]# dnf info redis.x86_64
Last metadata expiration check: 0:00:03 ago on Fri 31 Dec 2021 09:23:34 PM CST.
Available Packages
Name : redis
Version : 5.0.3
Release : 5.module_el8.4.0+955+7126e393
Architecture : x86_64
Size : 927 k
Source : redis-5.0.3-5.module_el8.4.0+955+7126e393.src.rpm
Repository : appstream
Summary : A persistent key-value database
URL : http://redis.io
License : BSD and MIT
Description : Redis is an advanced key-value store. It is often referred to as a data
: structure server since keys can contain strings, hashes, lists, sets and
: sorted sets.
:
: You can run atomic operations on these types, like appending to a string;
: incrementing the value in a hash; pushing to a list; computing set
: intersection, union and difference; or getting the member with highest
: ranking in a sorted set.
:
: In order to achieve its outstanding performance, Redis works with an
: in-memory dataset. Depending on your use case, you can persist it either
: by dumping the dataset to disk every once in a while, or by appending
: each command to a log.
:
: Redis also supports trivial-to-setup master-slave replication, with very
: fast non-blocking first synchronization, auto-reconnection on net split
: and so forth.
:
: Other features include Transactions, Pub/Sub, Lua scripting, Keys with a
: limited time-to-live, and configuration settings to make Redis behave like
: a cache.
:
: You can use Redis from most programming languages also.

于是去下载源码然后编译安装,这里直接执行了make而没有提前make test,而想要执行后者还得额外安装tcl

1
2
3
4
5
6
7
8
9
10
11
12
13
14
15
16
17
18
19
20
21
22
23
24
25
26
[root@cn-tx-bj7-c8 ~]# wget https://download.redis.io/releases/redis-6.2.6.tar.gz
[root@cn-tx-bj7-c8 ~]# tar xzf redis-6.2.6.tar.gz
[root@cn-tx-bj7-c8 ~]# cd redis-6.2.6
[root@cn-tx-bj7-c8 redis-6.2.6]# make
……
Hint: It's a good idea to run 'make test' ;)

make[1]: Leaving directory '/root/redis-6.2.6/src'
[root@cn-tx-bj7-c8 redis-6.2.6]# make test
cd src && make test
make[1]: Entering directory '/root/redis-6.2.6/src'
CC Makefile.dep
You need tcl 8.5 or newer in order to run the Redis test
make[1]: *** [Makefile:391: test] Error 1
make[1]: Leaving directory '/root/redis-6.2.6/src'
make: *** [Makefile:6: test] Error 2
[root@cn-tx-bj7-c8 redis-6.2.6]# make install
cd src && make install
make[1]: Entering directory '/root/redis-6.2.6/src'

Hint: It's a good idea to run 'make test' ;)

INSTALL redis-server
INSTALL redis-benchmark
INSTALL redis-cli
make[1]: Leaving directory '/root/redis-6.2.6/src'

然后去修改配置文件,结果发现/etc/redis.conf文件不存在,需要手动将当前目录下的redis.conf复制到那里,并且还缺少redis-server.service文件

1
2
3
4
5
[root@cn-tx-bj7-c8 redis-6.2.6]# make uninstall
cd src && make uninstall
make[1]: Entering directory '/root/redis-6.2.6/src'
rm -f /usr/local/bin/{redis-server,redis-benchmark,redis-cli,redis-check-rdb,redis-check-aof,redis-sentinel}
make[1]: Leaving directory '/root/redis-6.2.6/src'

有点怂了,这里先回退至dnf安装,之后再更改为编译安装

1
[root@cn-tx-bj7-c8 ~]# dnf install redis -y

然后去修改配置文件vim /etc/redis.conf

  1. bind 0.0.0.0
  2. requirepass <rm>

最后启动redis

1
2
3
4
5
6
7
8
9
10
11
12
13
14
15
16
17
18
[root@cn-tx-bj7-c8 ~]# systemctl enable redis --now
Created symlink /etc/systemd/system/multi-user.target.wants/redis.service → /usr/lib/systemd/system/redis.service.
[root@cn-tx-bj7-c8 ~]# systemctl status redis
● redis.service - Redis persistent key-value database
Loaded: loaded (/usr/lib/systemd/system/redis.service; enabled; vendor preset: disabled)
Drop-In: /etc/systemd/system/redis.service.d
└─limit.conf
Active: active (running) since Fri 2021-12-31 21:37:56 CST; 9s ago
Main PID: 3469856 (redis-server)
Tasks: 4 (limit: 23722)
Memory: 6.6M
CGroup: /system.slice/redis.service
└─3469856 /usr/bin/redis-server 0.0.0.0:6379

Dec 31 21:37:56 cn-tx-bj7-c8 systemd[1]: Starting Redis persistent key-value database...
Dec 31 21:37:56 cn-tx-bj7-c8 systemd[1]: Started Redis persistent key-value database.
[root@cn-tx-bj7-c8 ~]# ss -an | grep 6379
tcp LISTEN 0 128 0.0.0.0:6379 0.0.0.0:*

0x09.安装Docker

1
2
3
4
5
6
7
8
9
10
11
12
13
14
15
16
17
18
19
20
21
22
23
24
25
26
27
28
29
30
31
32
33
34
35
36
37
[root@cn-tx-bj7-c8 ~]# dnf install yum-utils -y
[root@cn-tx-bj7-c8 ~]# yum-config-manager \
> --add-repo \
> https://download.docker.com/linux/centos/docker-ce.repo
Adding repo from: https://download.docker.com/linux/centos/docker-ce.repo
[root@cn-tx-bj7-c8 ~]# dnf install docker-ce docker-ce-cli containerd.io docker-compose-plugin -y
[root@cn-tx-bj7-c8 ~]# systemctl start docker
[root@cn-tx-bj7-c8 ~]# docker run hello-world
Unable to find image 'hello-world:latest' locally
latest: Pulling from library/hello-world
2db29710123e: Pull complete
Digest: sha256:2498fce14358aa50ead0cc6c19990fc6ff866ce72aeb5546e1d59caac3d0d60f
Status: Downloaded newer image for hello-world:latest

Hello from Docker!
This message shows that your installation appears to be working correctly.

To generate this message, Docker took the following steps:
1. The Docker client contacted the Docker daemon.
2. The Docker daemon pulled the "hello-world" image from the Docker Hub.
(amd64)
3. The Docker daemon created a new container from that image which runs the
executable that produces the output you are currently reading.
4. The Docker daemon streamed that output to the Docker client, which sent it
to your terminal.

To try something more ambitious, you can run an Ubuntu container with:
$ docker run -it ubuntu bash

Share images, automate workflows, and more with a free Docker ID:
https://hub.docker.com/

For more examples and ideas, visit:
https://docs.docker.com/get-started/
[root@cn-tx-bj7-c8 ~]# systemctl enable docker.service containerd.service
Created symlink /etc/systemd/system/multi-user.target.wants/docker.service → /usr/lib/systemd/system/docker.service.
Created symlink /etc/systemd/system/multi-user.target.wants/containerd.service → /usr/lib/systemd/system/containerd.service.

并安装portainer可视化

1
2
3
4
5
6
7
8
9
[root@cn-tx-bj7-c8 ~]# docker pull portainer/portainer-ce:latest
latest: Pulling from portainer/portainer-ce
Digest: sha256:52f9fdee1e4acfb1b5c4ddd15c88905287efb6e8f8058d2c5a2543ddc72e9dc0
Status: Image is up to date for portainer/portainer-ce:latest
docker.io/portainer/portainer-ce:latest
[root@cn-tx-bj7-c8 ~]# docker volume create portainer_data
portainer_data
[root@cn-tx-bj7-c8 ~]# docker run -d -p 9000:9000 --name portainer --restart=always -v /var/run/docker.sock:/var/run/docker.sock -v portainer_data:/data portainer/portainer-ce:latest
334877764accdc1068bef0663f8147e010838f001077fc1e4e3cd4f680d30ad1

如果需要镜像源的话,可参照Docker Hub 源使用帮助

1
2
3
4
5
[root@txy ~]# mkdir /etc/docker
[root@txy ~]# cat /etc/docker/daemon.json
{
"registry-mirrors": ["https://docker.mirrors.ustc.edu.cn/"]
}

0x10.安装Compose

curl下载不能

1
2
3
4
5
[root@cn-py-dl-a8 ~]# wget https://github.com/docker/compose/releases/download/v2.8.0/docker-compose-Linux-x86_64
[root@cn-py-dl-a8 ~]# mv docker-compose-Linux-x86_64 /usr/local/bin/docker-compose
[root@cn-py-dl-a8 ~]# chmod +x /usr/local/bin/docker-compose
[root@cn-py-dl-a8 ~]# docker-compose --version
Docker Compose version v2.8.0

0x11.安装Mastodon

这里选择的是Mashiro魔改版:mashirozx@mastodon,官版最新Releasev3.4.4,并做了自定义修改yuangezhizao@mastodon
昨日第一次在cn-tx-bj7-c8生产环境安装,今日补充在家中的cn-py-dl-c8测试环境安装,首先克隆仓库

1
2
3
4
5
6
7
8
9
10
11
12
13
14
15
16
17
18
19
20
21
22
23
24
[root@cn-py-dl-c8 ~]# yum install git -y
[root@cn-py-dl-c8 ~]# git config --global -e
[root@cn-py-dl-c8 ~]# git config --list
fatal: bad config line 6 in file /root/.gitconfig
[root@cn-py-dl-c8 ~]# vim .gitconfig
[root@cn-py-dl-c8 ~]# git config --list
user.name=yuangezhizao-serveraccount
user.email=yuangezhizao@gmail.com
http.https://github.com.proxy=socks5://192.168.25.248:1080
[root@cn-py-dl-c8 ~]# git clone https://github.com/yuangezhizao/mastodon.git
[root@cn-py-dl-c8 ~]# cd mastodon/
[root@cn-py-dl-c8 mastodon]# git pull
warning: Pulling without specifying how to reconcile divergent branches is
discouraged. You can squelch this message by running one of the following
commands sometime before your next pull:

git config pull.rebase false # merge (the default strategy)
git config pull.rebase true # rebase
git config pull.ff only # fast-forward only

You can replace "git config" with "git config --global" to set a default
preference for all repositories. You can also pass --rebase, --no-rebase,
or --ff-only on the command line to override the configured default per
invocation.

然后拉取docker镜像docker pull yuangezhizao/mastodon
运行镜像仅生成各种secretkey

1
2
3
4
5
6
7
8
9
10
11
[root@cn-py-dl-c8 mastodon]# cp .env.production.sample .env.production
[root@cn-py-dl-c8 mastodon]# docker-compose run --rm web bundle exec rake secret
Creating mastodon_web_run ... done
<rm>
[root@cn-py-dl-c8 mastodon]# docker-compose run --rm web bundle exec rake secret
Creating mastodon_web_run ... done
<rm>
[root@cn-py-dl-c8 mastodon]# docker-compose run --rm web bundle exec rake mastodon:webpush:generate_vapid_key
Creating mastodon_web_run ... done
VAPID_PRIVATE_KEY=<rm>
VAPID_PUBLIC_KEY=<rm>

写入生产环境配置文件

1
2
3
[root@cn-py-dl-c8 mastodon]# vim .env.production
SECRET_KEY_BASE=
OTP_SECRET=

初始化pg数据库

1
2
3
4
5
6
7
[root@cn-py-dl-c8 mastodon]# docker exec -it mastodon_db_1 psql -U postgres
psql (14.1)
Type "help" for help.

postgres=# CREATE USER mastodon WITH PASSWORD 'mastodon' CREATEDB;
CREATE ROLE
postgres=# exit

交互初始化

1
2
3
4
5
6
7
8
9
10
11
12
13
14
15
16
17
18
19
20
21
22
23
24
25
26
27
28
29
30
31
32
33
34
35
36
37
38
39
40
41
42
43
44
45
46
47
48
49
50
51
52
53
54
55
56
57
58
59
60
61
62
63
64
65
66
67
68
69
70
71
72
[root@cn-py-dl-c8 mastodon]# docker-compose run --rm web bundle exec rake mastodon:setup
Creating mastodon_web_run ... done
Your instance is identified by its domain name. Changing it afterward will break things.
Domain name: test.yuangezhizao.cn

Single user mode disables registrations and redirects the landing page to your public profile.
Do you want to enable single user mode? No

Are you using Docker to run Mastodon? Yes

PostgreSQL host: db
PostgreSQL port: 5432
Name of PostgreSQL database: mastodon_development
Name of PostgreSQL user: mastodon
Password of PostgreSQL user:
Database configuration works! 🎆

Redis host: redis
Redis port: 6379
Redis password:
Redis configuration works! 🎆

Do you want to store uploaded files on the cloud? No

Do you want to send e-mails from localhost? No
SMTP server: smtp.qq.com
SMTP port: 465
SMTP username: yuangezhizao
SMTP password:
SMTP authentication: plain
SMTP OpenSSL verify mode: none
E-mail address to send e-mails "from": (Mastodon <notifications@test.yuangezhizao.cn>) yuangezhE-mail address to send e-mails "from": yuangezhizao@qq.com
Send a test e-mail with this configuration right now? no

This configuration will be written to .env.production
Save configuration? Yes
Below is your configuration, save it to an .env.production file outside Docker:

# Generated with mastodon:setup on 2022-01-03 05:01:05 UTC
……
SINGLE_USER_MODE=false
……
SMTP_AUTH_METHOD=plain
SMTP_OPENSSL_VERIFY_MODE=none
……

It is also saved within this container so you can proceed with this wizard.

Now that configuration is saved, the database schema must be loaded.
If the database already exists, this will erase its contents.
Prepare the database now? Yes
Running `RAILS_ENV=production rails db:setup` ...


Created database 'mastodon_development'
Error connecting to Redis on localhost:6379 (Errno::ECONNREFUSED)
Switching object-storage-safely from green to red because Redis::CannotConnectError Error connecting to Redis on localhost:6379 (Errno::ECONNREFUSED)
Error connecting to Redis on localhost:6379 (Errno::ECONNREFUSED)
Done!

All done! You can now power on the Mastodon server 🐘

Do you want to create an admin user straight away? Yes
Username: admin
E-mail: root@yuangezhizao.cn
Error connecting to Redis on localhost:6379 (Errno::ECONNREFUSED)
Switching object-storage-safely from green to red because Redis::CannotConnectError Error connecting to Redis on localhost:6379 (Errno::ECONNREFUSED)
Error connecting to Redis on localhost:6379 (Errno::ECONNREFUSED)
You can login with the password: <rm>
You can change your password once you login.

注 ①:sed -i "s/SECRET_KEY_BASE=$/&$(docker-compose run --rm web bundle exec rake secret)/" .env.production不可用,因为这个版本的代码中ruby打印一些warning导致sed报错-bash: /usr/bin/sed: Argument list too long
注 ②:记得最后输入Y,否则不会打印配置

1
2
3
This configuration will be written to .env.production
Save configuration? no
Nothing saved. Bye!

注 ③:结果访问报错了草,去查了下Rails 6 adds guard against DNS rebinding attacks

1
2
3
4
5
6
7
<header>
<h1>Blocked host: localhost</h1>
</header>
<div id="container">
<h2>To allow requests to localhost, add the following to your environment configuration:</h2>
<pre>config.hosts &lt;&lt; "localhost"</pre>
</div>

允许config.hosts << "localhost"
注 ④:草,还发现SELinux竟然是开着的,一把梭关掉并重启

1
2
3
4
5
6
7
8
9
10
11
12
13
[root@cn-py-dl-c8 environments]# /usr/sbin/sestatus
SELinux status: enabled
SELinuxfs mount: /sys/fs/selinux
SELinux root directory: /etc/selinux
Loaded policy name: targeted
Current mode: enforcing
Mode from config file: enforcing
Policy MLS status: enabled
Policy deny_unknown status: allowed
Memory protection checking: actual (secure)
Max kernel policy version: 33
[root@cn-py-dl-c8 environments]# vim /etc/selinux/config
[root@cn-py-dl-c8 environments]# reboot

注 ⑤:chown 1000:1000 -R elasticsearch
参照:Using the Docker images in production

1
2
3
4
5
6
[root@cn-tx-bj7-c8 ~]# grep vm.max_map_count /etc/sysctl.conf
[root@cn-tx-bj7-c8 ~]#
[root@cn-tx-bj7-c8 ~]# sysctl -w vm.max_map_count=262144
vm.max_map_count = 262144
[root@cn-tx-bj7-c8 ~]# grep vm.max_map_count /etc/sysctl.conf
[root@cn-tx-bj7-c8 ~]#

拉取elasticsearch-oss:7.10.2多次超时,于是采用下载镜像再导入的方式

1
2
3
4
5
6
7
8
9
10
11
12
13
14
15
16
17
[root@cn-tx-bj7-c8 mastodon]# docker-compose up
Pulling es (docker.elastic.co/elasticsearch/elasticsearch-oss:7.10.2)...
ERROR: Head "https://docker.elastic.co/v2/elasticsearch/elasticsearch-oss/manifests/7.10.2": net/http: TLS handshake timeout
[root@cn-tx-bj7-c8 mastodon]# docker-compose up
Pulling es (docker.elastic.co/elasticsearch/elasticsearch-oss:7.10.2)...
7.10.2: Pulling from elasticsearch/elasticsearch-oss
ddf49b9115d7: Downloading [========================================> ] 68.05MB/84.72MB
a752d85b289a: Download complete
57c9a166c575: Download complete
44fabf20c8a1: Downloading [==========================> ] 131.7MB/252.2MB
45ea1d560ab5: Download complete
0dc15e54b214: Download complete
cf11b2a25e23: Download complete
3a66822889ec: Download complete
be7444f2e9d6: Download complete
^CGracefully stopping... (press Ctrl+C again to force)
[root@cn-tx-bj7-c8 mastodon]# cd ~

先下载镜像,确认访问COS是内网,于是光速下载,这四十兆每秒的下载速度可就阳间多了……

1
2
3
4
5
6
7
8
9
10
11
12
13
14
15
16
17
18
[root@cn-tx-bj7-c8 ~]# ping mastodon-<rm>.cos.ap-beijing.myqcloud.com
PING mastodon-<rm>.cos.ap-beijing.myqcloud.com (169.254.0.49) 56(84) bytes of data.
64 bytes from 169.254.0.49 (169.254.0.49): icmp_seq=1 ttl=64 time=0.205 ms
^C
--- mastodon-<rm>.cos.ap-beijing.myqcloud.com ping statistics ---
1 packets transmitted, 1 received, 0% packet loss, time 0ms
rtt min/avg/max/mdev = 0.205/0.205/0.205/0.000 ms
[root@cn-tx-bj7-c8 ~]# wget https://mastodon-<rm>.cos.ap-beijing.myqcloud.com/es.tar
--2022-01-03 23:20:09-- https://mastodon-<rm>.cos.ap-beijing.myqcloud.com/es.tar
Resolving mastodon-<rm>.cos.ap-beijing.myqcloud.com (mastodon-<rm>.cos.ap-beijing.myqcloud.com)... 169.254.0.49
Connecting to mastodon-<rm>.cos.ap-beijing.myqcloud.com (mastodon-<rm>.cos.ap-beijing.myqcloud.com)|169.254.0.49|:443... connected.
HTTP request sent, awaiting response... 200 OK
Length: 709773312 (677M) [application/x-tar]
Saving to: ‘es.tar’

es.tar 100%[=======================================>] 676.89M 40.8MB/s in 19s

2022-01-03 23:20:29 (35.3 MB/s) - ‘es.tar’ saved [709773312/709773312]

再导入,并手动打上标签

1
2
3
4
5
6
7
8
9
10
11
12
13
14
15
16
17
18
19
20
21
22
23
24
25
[root@cn-tx-bj7-c8 ~]# docker load < es.tar
2653d992f4ef: Loading layer 216.5MB/216.5MB
7d054489f6eb: Loading layer 71.64MB/71.64MB
56319c3e73b9: Loading layer 314.4kB/314.4kB
ec3900b77411: Loading layer 420.7MB/420.7MB
719b01194e7c: Loading layer 25.6kB/25.6kB
02f56ad574d0: Loading layer 4.608kB/4.608kB
a1b5f2939457: Loading layer 7.168kB/7.168kB
d66f67be6b73: Loading layer 55.3kB/55.3kB
0dcc68aca185: Loading layer 466.4kB/466.4kB
Loaded image ID: sha256:b313026e6fbdbf01894ef8c67d558d3c7d89c70214d4c9e2a147ba10540a7738
[root@cn-tx-bj7-c8 ~]# docker images
REPOSITORY TAG IMAGE ID CREATED SIZE
<none> <none> 8bb8cc28a62d 29 hours ago 922MB
<none> <none> 20b438069ba6 31 hours ago 378MB
<none> <none> b2d017b74965 31 hours ago 1.8GB
postgres 14-alpine 2302d5724f71 4 weeks ago 209MB
redis 6-alpine 3900abf41552 4 weeks ago 32.4MB
tootsuite/mastodon latest 2289f94fb9f2 5 weeks ago 2.52GB
tootsuite/mastodon v3.4.4 2289f94fb9f2 5 weeks ago 2.52GB
ubuntu 20.04 ba6acccedd29 2 months ago 72.8MB
hello-world latest feb5d9fea6a5 3 months ago 13.3kB
portainer/portainer latest 580c0e4e98b0 9 months ago 79.1MB
<none> <none> b313026e6fbd 11 months ago 699MB
[root@cn-tx-bj7-c8 ~]# docker tag b313026e6fbd docker.elastic.co/elasticsearch/elasticsearch-oss:7.10.2

最终使用docker-compose启动,然后就看到ES报错了

1
2
3
4
5
6
7
8
9
10
11
12
13
14
15
16
17
18
19
20
21
22
23
24
25
es_1         | ElasticsearchException[failed to bind service]; nested: AccessDeniedException[/usr/share/elasticsearch/data/nodes];
es_1 | Likely root cause: java.nio.file.AccessDeniedException: /usr/share/elasticsearch/data/nodes
es_1 | at java.base/sun.nio.fs.UnixException.translateToIOException(UnixException.java:90)
es_1 | at java.base/sun.nio.fs.UnixException.rethrowAsIOException(UnixException.java:106)
es_1 | at java.base/sun.nio.fs.UnixException.rethrowAsIOException(UnixException.java:111)
es_1 | at java.base/sun.nio.fs.UnixFileSystemProvider.createDirectory(UnixFileSystemProvider.java:388)
es_1 | at java.base/java.nio.file.Files.createDirectory(Files.java:694)
es_1 | at java.base/java.nio.file.Files.createAndCheckIsDirectory(Files.java:801)
es_1 | at java.base/java.nio.file.Files.createDirectories(Files.java:787)
es_1 | at org.elasticsearch.env.NodeEnvironment.lambda$new$0(NodeEnvironment.java:275)
es_1 | at org.elasticsearch.env.NodeEnvironment$NodeLock.<init>(NodeEnvironment.java:212)
es_1 | at org.elasticsearch.env.NodeEnvironment.<init>(NodeEnvironment.java:272)
es_1 | at org.elasticsearch.node.Node.<init>(Node.java:362)
es_1 | at org.elasticsearch.node.Node.<init>(Node.java:289)
es_1 | at org.elasticsearch.bootstrap.Bootstrap$5.<init>(Bootstrap.java:227)
es_1 | at org.elasticsearch.bootstrap.Bootstrap.setup(Bootstrap.java:227)
es_1 | at org.elasticsearch.bootstrap.Bootstrap.init(Bootstrap.java:393)
es_1 | at org.elasticsearch.bootstrap.Elasticsearch.init(Elasticsearch.java:170)
es_1 | at org.elasticsearch.bootstrap.Elasticsearch.execute(Elasticsearch.java:161)
es_1 | at org.elasticsearch.cli.EnvironmentAwareCommand.execute(EnvironmentAwareCommand.java:86)
es_1 | at org.elasticsearch.cli.Command.mainWithoutErrorHandling(Command.java:127)
es_1 | at org.elasticsearch.cli.Command.main(Command.java:90)
es_1 | at org.elasticsearch.bootstrap.Elasticsearch.main(Elasticsearch.java:126)
es_1 | at org.elasticsearch.bootstrap.Elasticsearch.main(Elasticsearch.java:92)
es_1 | For complete error details, refer to the log at /usr/share/elasticsearch/logs/es-mastodon.log

需要给数据存储路径赋予权限chown 1000:1000 -R elasticsearch,然后为使用ES之前的嘟文创建索引(水了39

1
2
3
4
5
6
7
8
9
10
11
12
13
14
15
16
17
18
19
20
[root@cn-tx-bj7-c8 mastodon]# docker-compose run --rm web bin/tootctl search deploy
Creating mastodon_web_run ... done
/opt/ruby/lib/ruby/2.7.0/net/protocol.rb:66: warning: already initialized constant Net::ProtocRetryError
/opt/mastodon/vendor/bundle/ruby/2.7.0/gems/net-protocol-0.1.0/lib/net/protocol.rb:66: warning: previous definition of ProtocRetryError was here
/opt/ruby/lib/ruby/2.7.0/net/protocol.rb:206: warning: already initialized constant Net::BufferedIO::BUFSIZE
/opt/mastodon/vendor/bundle/ruby/2.7.0/gems/net-protocol-0.1.0/lib/net/protocol.rb:206: warning: previous definition of BUFSIZE was here
/opt/ruby/lib/ruby/2.7.0/net/protocol.rb:503: warning: already initialized constant Net::NetPrivate::Socket
/opt/mastodon/vendor/bundle/ruby/2.7.0/gems/net-protocol-0.1.0/lib/net/protocol.rb:503: warning: previous definition of Socket was here
warning: 299 Elasticsearch-7.10.2-747e1cc71def077253878a59143c1f785afa92b9 "[types removal] Using include_type_name in create index requests is deprecated. The parameter will be removed in the next major version."
warning: 299 Elasticsearch-7.10.2-747e1cc71def077253878a59143c1f785afa92b9 "[types removal] Specifying types in bulk requests is deprecated."
39/39 |=========================================================================| Time: 00:00:04 (9 docs/s)
Indexed 39 records, de-indexed 0

最后docker-compose up -d

0x12.安装Nginx

1
2
3
4
5
6
7
8
[root@cn-tx-bj7-c8 mastodon]# dnf install nginx -y
[root@cn-tx-bj7-c8 conf.d]# cd /etc/nginx/conf.d
[root@cn-tx-bj7-c8 conf.d]# cp ~/mastodon/dist/nginx.conf mastodon.conf
[root@cn-tx-bj7-c8 conf.d]# vim mastodon.conf
[root@cn-tx-bj7-c8 conf.d]# vim /etc/nginx/nginx.conf
[root@cn-py-dl-c8 conf.d]# nginx -t
nginx: the configuration file /etc/nginx/nginx.conf syntax is ok
nginx: configuration file /etc/nginx/nginx.conf test is successful

0x13.安装frp

1
2
3
4
5
6
7
8
9
10
11
12
13
14
15
16
17
18
19
20
21
22
23
24
25
26
27
28
29
30
31
32
33
34
35
36
37
38
39
40
41
42
43
44
45
46
47
48
49
50
51
52
53
54
[root@cn-tx-bj7-c8 ~]# wget https://github.com/fatedier/frp/releases/download/v0.39.0/frp_0.39.0_linux_amd64.tar.gz^C
[root@cn-tx-bj7-c8 ~]# wget http://proxy-cf.yuangezhizao.cn/dl/frp_0.39.0_linux_amd64.tar.gz
[root@cn-tx-bj7-c8 ~]# tar -zxvf frp_0.39.0_linux_amd64.tar.gz
[root@cn-tx-bj7-c8 ~]# cd frp_0.39.0_linux_amd64/
[root@cn-tx-bj7-c8 frp_0.39.0_linux_amd64]# tree
.
├── frpc
├── frpc_full.ini
├── frpc.ini
├── frps
├── frps_full.ini
├── frps.ini
├── LICENSE
└── systemd
├── frpc.service
├── frpc@.service
├── frps.service
└── frps@.service

1 directory, 11 files
[root@cn-tx-bj7-c8 frp_0.39.0_linux_amd64]# cp systemd/frps.service /etc/systemd/system/
[root@cn-tx-bj7-c8 frp_0.39.0_linux_amd64]# cat /etc/systemd/system/frps.service
[Unit]
Description=Frp Server Service
After=network.target

[Service]
Type=simple
User=nobody
Restart=on-failure
RestartSec=5s
ExecStart=/usr/bin/frps -c /etc/frp/frps.ini
LimitNOFILE=1048576

[Install]
WantedBy=multi-user.target
[root@cn-tx-bj7-c8 frp_0.39.0_linux_amd64]# cp frps /usr/bin/
[root@cn-tx-bj7-c8 frp_0.39.0_linux_amd64]# mkdir /etc/frp/
[root@cn-tx-bj7-c8 frp_0.39.0_linux_amd64]# cp frps_full.ini /etc/frp/frps.ini
[root@cn-tx-bj7-c8 frp_0.39.0_linux_amd64]# vim /etc/frp/frps.ini
[root@cn-tx-bj7-c8 frp_0.39.0_linux_amd64]# mkdir /var/log/frps
[root@cn-tx-bj7-c8 frp_0.39.0_linux_amd64]# touch /var/log/frps/frps.log
[root@cn-tx-bj7-c8 frp_0.39.0_linux_amd64]# systemctl enable frps --now
[root@cn-tx-bj7-c8 frp_0.39.0_linux_amd64]# systemctl status frps
● frps.service - Frp Server Service
Loaded: loaded (/etc/systemd/system/frps.service; enabled; vendor preset: disabled)
Active: active (running) since Wed 2022-02-09 11:39:00 CST; 4s ago
Main PID: 1504474 (frps)
Tasks: 5 (limit: 23722)
Memory: 10.6M
CGroup: /system.slice/frps.service
└─1504474 /usr/bin/frps -c /etc/frp/frps.ini

Feb 09 11:39:00 cn-tx-bj7-c8 systemd[1]: Started Frp Server Service.

参照安全地暴露内网服务点对点内网穿透
未完待续……

0x14.安装Wiki.js

官方竟然给了通过Portainer的安装手顺,有了Mastodon的前车之鉴这次自然也要使用docker-compose
但是用Portainer创建之后不确定位置在哪,于是还是克隆代码然后docker-compose up -d更稳妥参照:https://web.archive.org/web/20220113153343/https://docs.requarks.io/install/docker

1
2
3
4
5
6
7
8
9
10
11
12
13
14
15
16
17
18
19
20
21
22
23
24
25
26
27
28
29
30
31
32
33
34
35
36
37
38
39
40
41
42
43
44
45
46
[root@cn-tx-bj7-c8 ~]# git clone https://github.com/Requarks/wiki.git^C
sftp> put wiki.zip
Uploading wiki.zip to /root/wiki.zip
100% 35732KB 3970KB/s 00:00:09
/Users/yuangezhizao/Downloads/wiki.zip: 36589768 bytes transferred in 9 seconds (3970 KB/s)
[root@cn-tx-bj7-c8 ~]# unzip wiki.zip
[root@cn-tx-bj7-c8 ~]# cd wiki/
[root@cn-tx-bj7-c8 wiki]# vim docker-compose.yml
[root@cn-tx-bj7-c8 wiki]# vim docker-compose.yml
[root@cn-tx-bj7-c8 wiki]# cat docker-compose.yml
version: "3"
services:
db:
image: postgres:11-alpine
environment:
POSTGRES_DB: wiki
POSTGRES_PASSWORD: wikijsrocks
POSTGRES_USER: wikijs
# logging:
# driver: "none"
restart: unless-stopped
volumes:
- db-data:/var/lib/postgresql/data

wiki:
image: requarks/wiki:2.5.268
depends_on:
- db
environment:
DB_TYPE: postgres
DB_HOST: db
DB_PORT: 5432
DB_USER: wikijs
DB_PASS: wikijsrocks
DB_NAME: wiki
restart: unless-stopped
ports:
- "8080:3000"

volumes:
db-data:
[root@cn-tx-bj7-c8 wiki]# docker-compose up -d
Creating network "wiki_default" with the default driver
Creating volume "wiki_db-data" with default driver
Creating wiki_db_1 ... done
Creating wiki_wiki_1 ... done

0x15.安装x-ui

1
2
3
4
5
6
7
8
9
10
11
12
13
14
15
16
17
18
19
20
21
22
23
24
sftp> put x-ui-linux-amd64.tar.gz
Uploading x-ui-linux-amd64.tar.gz to /root/x-ui-linux-amd64.tar.gz
100% 16122KB 1151KB/s 00:00:14
/Users/yuangezhizao/Downloads/x-ui-linux-amd64.tar.gz: 16509803 bytes transferred in 14 seconds (1151 KB/s)
[root@cn-tx-bj7-c8 ~]# pwd
/root
[root@cn-tx-bj7-c8 ~]# rm x-ui/ /usr/local/x-ui/ /usr/bin/x-ui -rf
[root@cn-tx-bj7-c8 ~]# tar zxvf x-ui-linux-amd64.tar.gz
x-ui/
x-ui/x-ui
x-ui/bin/
x-ui/x-ui.sh
x-ui/x-ui.service
x-ui/bin/geoip.dat
x-ui/bin/geosite.dat
x-ui/bin/xray-linux-amd64
[root@cn-tx-bj7-c8 ~]# chmod +x x-ui/x-ui x-ui/bin/xray-linux-* x-ui/x-ui.sh
[root@cn-tx-bj7-c8 ~]# cp x-ui/x-ui.sh /usr/bin/x-ui
[root@cn-tx-bj7-c8 ~]# cp -f x-ui/x-ui.service /etc/systemd/system/
[root@cn-tx-bj7-c8 ~]# mv x-ui/ /usr/local/
[root@cn-tx-bj7-c8 ~]# systemctl daemon-reload
[root@cn-tx-bj7-c8 ~]# systemctl enable x-ui
Created symlink /etc/systemd/system/multi-user.target.wants/x-ui.service → /etc/systemd/system/x-ui.service.
[root@cn-tx-bj7-c8 ~]# systemctl restart x-ui

0x16.安装wakapi

首先配置docker pull时的代理,因为要从gh的源拉取镜像

1
2
3
4
5
6
7
8
9
10
[root@cn-tx-bj7-c8 ~]# mkdir -p /etc/systemd/system/docker.service.d
[root@cn-tx-bj7-c8 ~]# touch /etc/systemd/system/docker.service.d/proxy.conf
[root@cn-tx-bj7-c8 ~]# vim /etc/systemd/system/docker.service.d/proxy.conf
[root@cn-tx-bj7-c8 ~]# cat /etc/systemd/system/docker.service.d/proxy.conf
[Service]
Environment="HTTP_PROXY=http://10.0.2.2:1081"
Environment="HTTPS_PROXY=http://10.0.2.2:1081"
Environment="NO_PROXY=localhost,127.0.0.1,.example.com"
[root@cn-tx-bj7-c8 ~]# systemctl daemon-reload
[root@cn-tx-bj7-c8 ~]# systemctl restart docker

然后照着文档🐳 Option 3: Use Docker进行安装

1
2
3
4
5
6
7
8
9
10
11
12
13
14
15
16
17
18
19
20
21
22
23
24
[root@cn-tx-bj7-c8 ~]# docker volume create wakapi-data
wakapi-data
[root@cn-tx-bj7-c8 ~]# docker volume ls
DRIVER VOLUME NAME
local 8964bfb2c71239747ba993f85c232daabd763d8cc0c789faee8e3b2a1a055afa
local ae15994f0439c9f12e99b09c82990bbf21d19db6bd2b5f0cb20fb6cd06cc8d41
local db-data
local portainer_data
local wakapi-data
local wiki_db-data
local wikijs_db-data
[root@cn-tx-bj7-c8 ~]# docker pull ghcr.io/muety/wakapi:latest
latest: Pulling from muety/wakapi
Digest: sha256:6a9ac9cce93c0fc3256dde7865c54ec4121979ad3091dbf851110ebec01f9a54
Status: Image is up to date for ghcr.io/muety/wakapi:latest
ghcr.io/muety/wakapi:latest
[root@cn-tx-bj7-c8 ~]# SALT="$(cat /dev/urandom | tr -dc 'a-zA-Z0-9' | fold -w ${1:-32} | head -n 1)"
[root@cn-tx-bj7-c8 ~]# docker run -d \
> -p 3333:3000 \
> -e "WAKAPI_PASSWORD_SALT=$SALT" \
> -v wakapi-data:/data \
> --name wakapi \
> ghcr.io/muety/wakapi:latest
9be6c1024db7a54c38883d3a528ba612fe37dd644e58ef8c8138bb45a3e7ca55

结果导入报错2022-03-16T16:07:59.877000621Z [WARN ] failed to insert imported heartbeat, already existing? - too many SQL variables
毕竟是SQLite报错还可以理解,决定换成pg

1
2
3
4
5
6
7
8
9
10
11
12
13
14
15
16
17
18
19
20
21
22
23
24
25
26
27
28
29
30
31
32
33
34
35
36
[root@cn-tx-bj7-c8 wakapi]# cat docker-compose.yml 
version: '3.7'

services:
wakapi:
image: ghcr.io/muety/wakapi:2.2.5
#build: .
ports:
- 3333:3000
restart: always
environment:
# See README.md and config.default.yml for all config options
WAKAPI_DB_TYPE: "postgres"
WAKAPI_DB_NAME: "wakapi"
WAKAPI_DB_USER: "wakapi"
WAKAPI_DB_PASSWORD: "wakapi"
WAKAPI_DB_HOST: "db"
WAKAPI_DB_PORT: "5432"
ENVIRONMENT: "prod"

db:
image: postgres:12.3
environment:
POSTGRES_USER: "wakapi"
POSTGRES_PASSWORD: "wakapi"
POSTGRES_DB: "wakapi"
[root@cn-tx-bj7-c8 wakapi]# docker-compose up -d
Pulling wakapi (ghcr.io/muety/wakapi:2.2.5)...
2.2.5: Pulling from muety/wakapi
Digest: sha256:6a9ac9cce93c0fc3256dde7865c54ec4121979ad3091dbf851110ebec01f9a54
Pulling db (postgres:12.3)...
12.3: Pulling from library/postgres
Digest: sha256:a06e6e6e519b7a329c419f8221edec66cfc45511e8b80e262c12103ba745cf19
Status: Downloaded newer image for postgres:12.3
Creating wakapi_db_1 ... done
Creating wakapi_wakapi_1 ... done

然后又出现新的报错了草

1
2
3
4
5
6
7
wakapi_1  | 2022-03-16T16:31:06.180468706Z [INFO ] potentially running migration '20220313-index_generation_hint'
db_1 | 2022-03-16 16:31:06.180 UTC [73] ERROR: relation "key_string_values" does not exist at character 15
db_1 | 2022-03-16 16:31:06.180 UTC [73] STATEMENT: SELECT * FROM "key_string_values" WHERE key = $1 ORDER BY "key_string_values"."key" LIMIT 1
wakapi_1 | 2022-03-16T16:31:06.180835365Z [INFO ] please note: the following migrations might take a few minutes, as column types are changed and new indexes are created, have some patience
db_1 | 2022-03-16 16:31:06.181 UTC [73] ERROR: relation "key_string_values" does not exist at character 13
db_1 | 2022-03-16 16:31:06.181 UTC [73] STATEMENT: INSERT INTO "key_string_values" ("key","value") VALUES ($1,$2)
wakapi_1 | 2022-03-16T16:31:06.181352991Z [ERROR] failed to mark migration 20220313-index_generation_hint as run - ERROR: relation "key_string_values" does not exist (SQLSTATE 42P01)

想了下wakapi.dev又不是不能用,工地英语启动!并去提了ISSUEFailed to mark migration using postgres

0x17.安装qBittorrent

使用linuxserver的镜像,果然docker-compose用习惯简直太舒服了

1
2
3
4
5
6
7
8
9
10
11
12
13
14
15
16
17
18
19
20
21
[root@cn-tx-bj7-c8 qbittorrent]# cat docker-compose.yml 
---
version: "2.1"
services:
qbittorrent:
image: lscr.io/linuxserver/qbittorrent:4.4.0
container_name: qbittorrent
environment:
- PUID=1000
- PGID=1000
- TZ=Asic/Shanghai
- WEBUI_PORT=8080
volumes:
- /root/qbittorrent/config:/config
- /data/qbittorrent:/downloads
ports:
- 6881:6881
- 6881:6881/udp
- 8080:8080
restart: unless-stopped
[root@cn-tx-bj7-c8 qbittorrent]# docker-compose up -d

还是用docker-compose管理吧

1
2
3
4
5
6
7
8
9
10
11
12
13
14
15
16
17
18
19
20
21
22
23
24
25
26
27
28
29
30
31
32
33
34
[root@cn-tx-bj7-c8 fpm]# docker-compose up -d
Creating network "fpm_default" with the default driver
Creating volume "fpm_db" with default driver
Creating volume "fpm_nextcloud" with default driver
Pulling db (postgres:alpine)...
alpine: Pulling from library/postgres
Digest: sha256:dfd144937916a40521248f82c7e1acdcdfd0bf79db20ebc91f25f6842c689322
Status: Downloaded newer image for postgres:alpine
Pulling redis (redis:alpine)...
alpine: Pulling from library/redis
Digest: sha256:609765f7b8f4fc3dc27f0a90698733c6aa6cc98d6829162794967322496dadb8
Status: Downloaded newer image for redis:alpine
Pulling app (nextcloud:fpm-alpine)...
fpm-alpine: Pulling from library/nextcloud
Digest: sha256:641e9c554b23268179c0d1ce390401e824be3cd86dd17410b52bcc8a49865ea0
Status: Downloaded newer image for nextcloud:fpm-alpine
Building web
Sending build context to Docker daemon 10.24kB
Step 1/2 : FROM nginx:alpine
alpine: Pulling from library/nginx
Digest: sha256:77cc350019d0188d3115084265483dcefdd8489ccf719ff4e4c956b48de8ff6a
Status: Downloaded newer image for nginx:alpine
---> 7d73f57a7cf7
Step 2/2 : COPY nginx.conf /etc/nginx/nginx.conf
---> 1d8afd4ecaea
Successfully built 1d8afd4ecaea
Successfully tagged fpm_web:latest
WARNING: Image for service web was built because it did not already exist. To rebuild this image you must use `docker-compose build` or `docker-compose up --build`.
Creating fpm_db_1 ... done
Creating fpm_redis_1 ... done
Creating fpm_cron_1 ... done
Creating fpm_app_1 ... done
Creating fpm_web_1 ... done

0x18.Failed to download metadata for repo 'appstream'

1
2
3
[root@cn-tx-bj7-c8 ~]# dnf update -y
CentOS Linux 8 - AppStream 32 B/s | 38 B 00:01
Error: Failed to download metadata for repo 'appstream': Cannot prepare internal mirrorlist: No URLs in mirrorlist

嗯?啥都没干,一脸黑人问号……果去谷歌搜下,觉得应该是个通用的问题

1
2
3
4
5
6
7
8
9
10
11
12
13
14
15
16
17
18
19
20
21
22
23
24
25
26
27
28
29
30
31
32
33
34
35
36
37
38
39
40
41
42
43
44
45
46
47
48
49
50
51
52
[root@cn-tx-bj7-c8 ~]# ll /etc/yum.repos.d/
total 88
-rw-r--r-- 1 root root 228 Oct 26 2020 CentOS-AppStream.repo.rpmsave
-rw-r--r-- 1 root root 214 Oct 26 2020 CentOS-Base.repo.rpmsave
-rw-r--r-- 1 root root 226 Oct 26 2020 CentOS-centosplus.repo.rpmsave
-rw-r--r-- 1 root root 249 Oct 26 2020 CentOS-Devel.repo.rpmsave
-rw-r--r-- 1 root root 231 Dec 31 21:23 CentOS-Epel.repo
-rw-r--r-- 1 root root 216 Oct 26 2020 CentOS-Extras.repo.rpmsave
-rw-r--r-- 1 root root 232 Oct 26 2020 CentOS-HA.repo.rpmsave
-rw-r--r-- 1 root root 719 Sep 15 2021 CentOS-Linux-AppStream.repo
-rw-r--r-- 1 root root 704 Sep 15 2021 CentOS-Linux-BaseOS.repo
-rw-r--r-- 1 root root 1130 Sep 15 2021 CentOS-Linux-ContinuousRelease.repo
-rw-r--r-- 1 root root 318 Sep 15 2021 CentOS-Linux-Debuginfo.repo
-rw-r--r-- 1 root root 732 Sep 15 2021 CentOS-Linux-Devel.repo
-rw-r--r-- 1 root root 704 Sep 15 2021 CentOS-Linux-Extras.repo
-rw-r--r-- 1 root root 719 Sep 15 2021 CentOS-Linux-FastTrack.repo
-rw-r--r-- 1 root root 740 Sep 15 2021 CentOS-Linux-HighAvailability.repo
-rw-r--r-- 1 root root 693 Sep 15 2021 CentOS-Linux-Media.repo
-rw-r--r-- 1 root root 706 Sep 15 2021 CentOS-Linux-Plus.repo
-rw-r--r-- 1 root root 724 Sep 15 2021 CentOS-Linux-PowerTools.repo
-rw-r--r-- 1 root root 1124 Sep 15 2021 CentOS-Linux-Sources.repo
-rw-r--r-- 1 root root 231 Oct 26 2020 CentOS-PowerTools.repo.rpmsave
-rw-r--r-- 1 root root 1919 Jan 2 15:05 docker-ce.repo
-rw-r--r-- 1 root root 201 Dec 21 16:44 mongodb-org-5.0.repo
[root@cn-tx-bj7-c8 ~]# cd /etc/yum.repos.d/
[root@cn-tx-bj7-c8 yum.repos.d]# cat CentOS-AppStream.repo.rpmsave
# Qcloud-AppStream.repo

[AppStream]
name=Qcloud-$releasever - AppStream
baseurl=http://mirrors.tencentyun.com/centos/$releasever/AppStream/$basearch/os/
gpgcheck=1
enabled=1
gpgkey=file:///etc/pki/rpm-gpg/RPM-GPG-KEY-Qcloud-8
[root@cn-tx-bj7-c8 yum.repos.d]# cat CentOS-Linux-AppStream.repo
# CentOS-Linux-AppStream.repo
#
# The mirrorlist system uses the connecting IP address of the client and the
# update status of each mirror to pick current mirrors that are geographically
# close to the client. You should use this for CentOS updates unless you are
# manually picking other mirrors.
#
# If the mirrorlist does not work for you, you can try the commented out
# baseurl line instead.

[appstream]
name=CentOS Linux $releasever - AppStream
mirrorlist=http://mirrorlist.centos.org/?release=$releasever&arch=$basearch&repo=AppStream&infra=$infra
#baseurl=http://mirror.centos.org/$contentdir/$releasever/AppStream/$basearch/os/
gpgcheck=1
enabled=1
gpgkey=file:///etc/pki/rpm-gpg/RPM-GPG-KEY-centosofficial

解决方法是注释mirrorlist,然后使用http://vault.centos.org替换baseurl
也可以使用红帽官方提供的一键脚本
sed -i 's/^mirrorlist/#mirrorlist/g' /etc/yum.repos.d/CentOS-Linux-*
sed -i 's|#baseurl=http://mirror.centos.org|baseurl=http://vault.centos.org|g' /etc/yum.repos.d/CentOS-Linux-*

1
2
3
4
5
6
7
8
9
10
11
12
13
14
15
16
17
18
19
20
21
22
23
24
25
26
27
28
29
30
31
32
33
34
35
36
[root@cn-tx-bj7-c8 yum.repos.d]# cat CentOS-Linux-AppStream.repo 
# CentOS-Linux-AppStream.repo
#
# The mirrorlist system uses the connecting IP address of the client and the
# update status of each mirror to pick current mirrors that are geographically
# close to the client. You should use this for CentOS updates unless you are
# manually picking other mirrors.
#
# If the mirrorlist does not work for you, you can try the commented out
# baseurl line instead.

[appstream]
name=CentOS Linux $releasever - AppStream
#mirrorlist=http://mirrorlist.centos.org/?release=$releasever&arch=$basearch&repo=AppStream&infra=$infra
baseurl=http://vault.centos.org/$contentdir/$releasever/AppStream/$basearch/os/
gpgcheck=1
enabled=1
gpgkey=file:///etc/pki/rpm-gpg/RPM-GPG-KEY-centosofficial
[root@cn-tx-bj7-c8 yum.repos.d]# cat CentOS-Linux-BaseOS.repo
# CentOS-Linux-BaseOS.repo
#
# The mirrorlist system uses the connecting IP address of the client and the
# update status of each mirror to pick current mirrors that are geographically
# close to the client. You should use this for CentOS updates unless you are
# manually picking other mirrors.
#
# If the mirrorlist does not work for you, you can try the commented out
# baseurl line instead.

[baseos]
name=CentOS Linux $releasever - BaseOS
#mirrorlist=http://mirrorlist.centos.org/?release=$releasever&arch=$basearch&repo=BaseOS&infra=$infra
baseurl=http://vault.centos.org/$contentdir/$releasever/BaseOS/$basearch/os/
gpgcheck=1
enabled=1
gpgkey=file:///etc/pki/rpm-gpg/RPM-GPG-KEY-centosofficial

顺便去重新去查阅了CentOS 6/7/8CentOS StreamRHEL的关系

We’re making CentOS Stream the collaboration hub for RHEL, with the landscape looking like this:

  • Fedora Linux is the place for major new operating system innovations, thoughts, and ideas - essentially, this is where the next major version of Red Hat Enterprise Linux is born.
  • CentOS Stream is the continuously delivered platform that becomes the next minor version of RHEL.
  • RHEL is the intelligent operating system for production workloads, used in nearly every industry in the world, from cloud-scale deployments in mission-critical data centers and localized server rooms to public clouds and out to far-flung edges of enterprise networks.

原来Stream的定位是滚动发布的中间版本,并不建议在生产环境使用,自己之前的理解有误区……
并且除了切换至AlmaLinux之外,官方工具almalinux-deploy可以从CentOS 8.5切换AlmaLinux
还可以去使用企业版本的RHEL,因为针对 16 台系统及其以下的授权是免费的,迁移参考官方文档CONVERTING FROM AN RPM-BASED LINUX DISTRIBUTION TO RHEL

0x19.安装PostgreSQL

安装

1
2
3
4
5
6
7
8
9
10
11
12
13
14
15
16
17
18
19
20
21
22
23
24
25
26
27
28
29
30
31
[root@cn-tx-bj7-c8 ~]# dnf install -y https://download.postgresql.org/pub/repos/yum/reporpms/EL-8-x86_64/pgdg-redhat-repo-latest.noarch.rpm
[root@cn-tx-bj7-c8 ~]# dnf -qy module disable postgresql
[root@cn-tx-bj7-c8 ~]# export HTTP_PROXY=http://10.0.2.2:1081
[root@cn-tx-bj7-c8 ~]# export HTTPS_PROXY=http://10.0.2.2:1081
[root@cn-tx-bj7-c8 ~]# dnf install -y postgresql14-server
[root@cn-tx-bj7-c8 ~]# /usr/pgsql-14/bin/postgresql-14-setup initdb
Initializing database ... OK
[root@cn-tx-bj7-c8 ~]# systemctl start postgresql-14 --now
[root@cn-tx-bj7-c8 ~]# systemctl status postgresql-14
● postgresql-14.service - PostgreSQL 14 database server
Loaded: loaded (/usr/lib/systemd/system/postgresql-14.service; disabled; vendor preset: disabled)
Active: active (running) since Sat 2022-04-23 17:51:42 CST; 4s ago
Docs: https://www.postgresql.org/docs/14/static/
Process: 2982922 ExecStartPre=/usr/pgsql-14/bin/postgresql-14-check-db-dir ${PGDATA} (code=exited, status=0/SUCCESS)
Main PID: 2982956 (postmaster)
Tasks: 8 (limit: 23718)
Memory: 16.8M
CGroup: /system.slice/postgresql-14.service
├─2982956 /usr/pgsql-14/bin/postmaster -D /var/lib/pgsql/14/data/
├─2983019 postgres: logger
├─2983042 postgres: checkpointer
├─2983043 postgres: background writer
├─2983044 postgres: walwriter
├─2983047 postgres: autovacuum launcher
├─2983049 postgres: stats collector
└─2983050 postgres: logical replication launcher

Apr 23 17:51:42 cn-tx-bj7-c8 systemd[1]: Starting PostgreSQL 14 database server...
Apr 23 17:51:42 cn-tx-bj7-c8 postmaster[2982956]: 2022-04-23 17:51:42.811 CST [2982956] LOG: redirecting log output to logging collector process
Apr 23 17:51:42 cn-tx-bj7-c8 postmaster[2982956]: 2022-04-23 17:51:42.811 CST [2982956] HINT: Future log output will appear in directory "log".
Apr 23 17:51:42 cn-tx-bj7-c8 systemd[1]: Started PostgreSQL 14 database server.

修改默认用户密码

1
2
3
4
5
6
7
8
9
10
[root@cn-tx-bj7-c8 ~]# su - postgres
Last failed login: Sat Apr 23 09:51:23 CST 2022 from 144.91.101.39 on ssh:notty
There were 28 failed login attempts since the last successful login.
[postgres@cn-tx-bj7-c8 ~]$ psql
psql (14.2)
Type "help" for help.

postgres=# alter user postgres with password '<rm>';
ALTER ROLE
postgres=# \q

修改配置文件/var/lib/pgsql/14/data/postgresql.conf,开启外网访问listen_addresses = '*'
再修改配置文件/var/lib/pgsql/14/data/pg_hba.conf追加host all all 0.0.0.0/0 md5
最后重启即可systemctl restart postgresql-14
修改PG默认数据存储路径,自默认的SSD盘移至新购的大容量HDD

1
2
3
4
5
6
7
8
9
10
11
12
13
14
15
16
17
18
19
20
21
22
23
24
25
26
27
[root@cn-tx-bj7-c8 ~]# mkdir /data/pgsql
[root@cn-tx-bj7-c8 ~]# cp -r /var/lib/pgsql/14/data/* /data/pgsql
[root@cn-tx-bj7-c8 ~]# chown -R postgres:postgres /data/pgsql
[root@cn-tx-bj7-c8 ~]# chmod 700 /data/pgsql
[root@cn-tx-bj7-c8 ~]# vim /var/lib/pgsql/14/data/postgresql.conf
data_directory = '/data/pgsql'
[root@cn-tx-bj7-c8 ~]# vim /usr/lib/systemd/system/postgresql-14.service
Environment=PGDATA=/data/pgsql/
[root@cn-tx-bj7-c8 ~]# systemctl start postgresql-14
[root@cn-tx-bj7-c8 ~]# psql
psql: error: connection to server on socket "/var/run/postgresql/.s.PGSQL.5432" failed: FATAL: role "root" does not exist
[root@cn-tx-bj7-c8 ~]# su - postgres
Last login: Sat Apr 23 17:54:03 CST 2022 on pts/0
Last failed login: Sat Apr 23 20:21:04 CST 2022 from 125.162.251.218 on ssh:notty
There was 1 failed login attempt since the last successful login.
[postgres@cn-tx-bj7-c8 ~]$ psql
psql (14.2)
Type "help" for help.

postgres=# show data_directory;
data_directory
----------------
/data/pgsql
(1 row)

postgres=# \q
[postgres@cn-tx-bj7-c8 ~]$

0x20.安装MySQL

1
2
3
4
5
6
7
8
9
10
11
12
13
14
15
16
17
18
19
20
21
22
23
24
25
26
27
28
29
30
31
32
33
34
35
36
37
38
39
40
41
42
43
44
45
46
47
48
49
50
51
52
53
54
55
56
57
58
59
60
61
62
63
64
65
66
67
68
69
70
71
72
73
74
75
76
77
[root@cn-tx-bj7-c8 mysql_for_docker]# tree
.
├── config
│   └── docker.cnf
└── docker-compose.yml

1 directory, 2 files
[root@cn-tx-bj7-c8 mysql_for_docker]# cat config/docker.cnf
[client]
# 客户端来源数据的默认字符集
default-character-set=utf8mb4

[mysqld]
# 服务端默认字符集
character-set-server=utf8mb4
# 连接层默认字符集
collation-server=utf8mb4_unicode_ci

#performance_schema_max_table_instances=400
table_definition_cache=400
table_open_cache=64
performance_schema=off

skip-host-cache
skip-name-resolve

#innodb_buffer_pool_chunk_size=64M
innodb_buffer_pool_size=64M

#query_cache_size=16M
#tmp_table_size=18M
#key_buffer_size=32m

#skip-grant-tables

[mysql]
# 数据库默认字符集
default-character-set=utf8mb4
[root@cn-tx-bj7-c8 mysql_for_docker]# cat docker-compose.yml
# Use root/example as user/password credentials
version: '3.1'

services:

db:
image: mysql:5.7.38
# NOTE: use of "mysql_native_password" is not recommended: https://dev.mysql.com/doc/refman/8.0/en/upgrading-from-previous-series.html#upgrade-caching-sha2-password
# (this is just an example, not intended to be a production configuration)
# privileged: true
restart: always
ports:
- "3306:3306"
command:
# --wait_timeout=31536000
# --interactive_timeout=31536000
--max_connections=100
--default-authentication-plugin=mysql_native_password
environment:
MYSQL_ROOT_PASSWORD: <rm>
TZ: Asia/Shanghai
volumes:
- /data/mysql:/var/lib/mysql
- /root/mysql_for_docker/config:/etc/mysql/conf.d
networks:
- internal_network
- external_network

networks:
external_network:
internal_network:
internal: true

# adminer:
# image: adminer
# restart: always
# ports:
# - 8080:8080

character-set-server=utf8mb4参数确实生效

1
2
3
4
5
6
7
8
9
10
11
12
13
14
15
16
17
18
19
20
21
22
23
24
25
26
27
28
29
30
31
32
33
34
35
36
37
38
39
40
41
42
43
44
45
46
47
48
49
50
51
52
53
54
55
56
57
58
59
60
61
62
63
64
65
66
67
68
[root@cn-tx-bj7-c8 config]# docker exec -it 6e48563b9576 /bin/bash
root@6e48563b9576:/# mysql -uroot -p<rm>
mysql: [Warning] Using a password on the command line interface can be insecure.
Welcome to the MySQL monitor. Commands end with ; or \g.
Your MySQL connection id is 2
Server version: 5.7.38 MySQL Community Server (GPL)

Copyright (c) 2000, 2022, Oracle and/or its affiliates.

Oracle is a registered trademark of Oracle Corporation and/or its
affiliates. Other names may be trademarks of their respective
owners.

Type 'help;' or '\h' for help. Type '\c' to clear the current input statement.

mysql> show variables like '%character%';
+--------------------------+----------------------------+
| Variable_name | Value |
+--------------------------+----------------------------+
| character_set_client | utf8mb4 |
| character_set_connection | utf8mb4 |
| character_set_database | latin1 |
| character_set_filesystem | binary |
| character_set_results | utf8mb4 |
| character_set_server | latin1 |
| character_set_system | utf8 |
| character_sets_dir | /usr/share/mysql/charsets/ |
+--------------------------+----------------------------+
8 rows in set (0.01 sec)

mysql> exit
Bye
root@6e48563b9576:/# exit
exit
[root@cn-tx-bj7-c8 config]# docker exec -it 6e48563b9576 /bin/bash
root@6e48563b9576:/# mysql -uroot -p<rm>
mysql: [Warning] Using a password on the command line interface can be insecure.
Welcome to the MySQL monitor. Commands end with ; or \g.
Your MySQL connection id is 2
Server version: 5.7.38 MySQL Community Server (GPL)

Copyright (c) 2000, 2022, Oracle and/or its affiliates.

Oracle is a registered trademark of Oracle Corporation and/or its
affiliates. Other names may be trademarks of their respective
owners.

Type 'help;' or '\h' for help. Type '\c' to clear the current input statement.

mysql> show variables like '%character%';
+--------------------------+----------------------------+
| Variable_name | Value |
+--------------------------+----------------------------+
| character_set_client | utf8mb4 |
| character_set_connection | utf8mb4 |
| character_set_database | utf8mb4 |
| character_set_filesystem | binary |
| character_set_results | utf8mb4 |
| character_set_server | utf8mb4 |
| character_set_system | utf8 |
| character_sets_dir | /usr/share/mysql/charsets/ |
+--------------------------+----------------------------+
8 rows in set (0.00 sec)

mysql> exit
Bye
root@6e48563b9576:/# exit
exit

0x21.分配虚拟内存

1
2
3
4
5
6
7
8
9
10
11
12
13
14
15
16
[root@cn-tx-bj7-c8 ~]# dd if=/dev/zero of=~/swap bs=1M count=5120
5120+0 records in
5120+0 records out
5368709120 bytes (5.4 GB, 5.0 GiB) copied, 35.679 s, 150 MB/s
[root@cn-tx-bj7-c8 ~]# chmod 600 swap
[root@cn-tx-bj7-c8 ~]# mkswap swap
Setting up swapspace version 1, size = 5 GiB (5368705024 bytes)
no label, UUID=42e7c1ca-8664-4b30-a2c8-01b59adee896
[root@cn-tx-bj7-c8 ~]# swapon ~/swap
[root@cn-tx-bj7-c8 ~]# swapon -s
Filename Type Size Used Priority
/root/swap file 5242876 9532 -2
[root@cn-tx-bj7-c8 ~]# free -h
total used free shared buff/cache available
Mem: 3.6Gi 2.5Gi 161Mi 69Mi 981Mi 648Mi
Swap: 5.0Gi 15Mi 5.0Gi

0x22.安装Zabbix

1
2
3
4
5
6
7
8
9
10
11
12
13
14
15
16
17
[root@cn-tx-bj7-c8 ~]# git clone https://github.com/zabbix/zabbix-docker
[root@cn-tx-bj7-c8 ~]# rpm -Uvh https://repo.zabbix.com/zabbix/6.0/rhel/8/x86_64/zabbix-release-6.0-2.el8.noarch.rpm
[root@cn-tx-bj7-c8 ~]# dnf clean all
[root@cn-tx-bj7-c8 ~]# dnf install zabbix-server-pgsql zabbix-web-pgsql zabbix-nginx-conf zabbix-sql-scripts zabbix-selinux-policy zabbix-agent -y
[root@cn-tx-bj7-c8 ~]# sudo -u postgres createuser --pwprompt zabbix
[root@cn-tx-bj7-c8 ~]# sudo -u postgres createdb -O zabbix zabbix
[root@cn-tx-bj7-c8 ~]# zcat /usr/share/doc/zabbix-sql-scripts/postgresql/server.sql.gz | sudo -u zabbix psql zabbix
[root@cn-tx-bj7-c8 ~]# vim /etc/zabbix/zabbix_server.conf
DBPassword=
[root@cn-tx-bj7-c8 ~]# vim /etc/nginx/conf.d/zabbix.conf
listen 81;
server_name mastodon.yuangezhizao.cn;
[root@cn-tx-bj7-c8 ~]# systemctl restart zabbix-server zabbix-agent nginx php-fpm
[root@cn-tx-bj7-c8 ~]# systemctl enable zabbix-server zabbix-agent nginx php-fpm
Created symlink /etc/systemd/system/multi-user.target.wants/zabbix-server.service → /usr/lib/systemd/system/zabbix-server.service.
Created symlink /etc/systemd/system/multi-user.target.wants/zabbix-agent.service → /usr/lib/systemd/system/zabbix-agent.service.
Created symlink /etc/systemd/system/multi-user.target.wants/php-fpm.service → /usr/lib/systemd/system/php-fpm.service.

0x23.后记

折腾了一天好累,反正万事开头难

0x24.引用

如何在CentOS 8上安装和配置Fail2ban
如何实时观察TCP和UDP端口
如何在Linux中安装netstat命令
如何在CentOS 8中安装Cockpit Web Console
Cockpit - 使用Web浏览器监视和管理多个Linux服务器的强大工具
如何在CentOS 8上安装MongoDB
Docker可视化工具Portainer
Docker CE 源使用帮助

centos8 docker安装mastodon
Mastodon Docker Setup
如何利用Docker搭建Mastodon实例(一):基础搭建篇
使用Docker安装Mastodon
CentOS8(即其余RHEL衍生版系统)搭建mastodon(嘟文)教程
Mastodonサーバを立ててみた【CentOS 8】
Mastodon搭建小记

Proxying object storage through nginx

CentOS 8でyum/dnfに失敗! Failed to download metadata for repo ‘AppStream’
CentOS Stream 还适合用于生产环境吗
New Year, new Red Hat Enterprise Linux programs: Easier ways to access RHEL

在CentOS 7上安装&配置PostgreSQL 12
在CentOS7.5中基于docker-compose安装mysql5.7
docker mysql 内存大小_docker容器内存占用过高(例如mysql)
docker 中 mysql 5.7 8.0 消耗内存大问题办法