The configured repository is disabled by default. This eliminates the possibility of accidentally upgrading elasticsearch when upgrading the rest of the system. Each install or upgrade command must explicitly enable the repository as indicated in the sample commands above.
# Configure restart on package upgrade (true, every other setting will lead to not restarting) #RESTART_ON_UPGRADE=true
################################ # Elasticsearch service ################################
# SysV init.d # # The number of seconds to wait before checking if Elasticsearch started successfully as a daemon process ES_STARTUP_SLEEP_TIME=5
################################ # System properties ################################
# Specifies the maximum file descriptor number that can be opened by this process # When using Systemd, this setting is ignored and the LimitNOFILE defined in # /usr/lib/systemd/system/elasticsearch.service takes precedence #MAX_OPEN_FILES=65535
# The maximum number of bytes of memory that may be locked into RAM # Set to "unlimited" if you use the 'bootstrap.memory_lock: true' option # in elasticsearch.yml. # When using systemd, LimitMEMLOCK must be set in a unit file such as # /etc/systemd/system/elasticsearch.service.d/override.conf. #MAX_LOCKED_MEMORY=unlimited
# Maximum number of VMA (Virtual Memory Areas) a process can own # When using Systemd, this setting is ignored and the 'vm.max_map_count' # property is set at boot time in /usr/lib/sysctl.d/elasticsearch.conf #MAX_MAP_COUNT=262144 [root@cn-py-dl-c8 ~]#
# Specifies the maximum file descriptor number that can be opened by this process
LimitNOFILE=65535

# Specifies the maximum number of processes
LimitNPROC=4096

# Specfies the memory not to be swapped out to disk
LimitMEMLOCK=infinity
这里插一句题外话,工作中遇到了一种情况就是修改ES配置文件中的IP之后,重启会发生启动不能的情况,现象是被systemd直接给kill掉了 猜测是因为更换环境之后启动时进行了某些额外检查导致启动时间巨长,还没等完全启动就被systemd杀掉了,没有调查到根本原因,暂时将TimeoutStartSec=75改成了TimeoutStartSec=500 这个数值默认被设置到了75,详见Set the systemd initial timeout to 75 seconds
# StandardOutput is configured to redirect to journalctl since # some error messages may be logged in standard output before # elasticsearch logging system is initialized. Elasticsearch # stores its logs in /var/log/elasticsearch and does not use # journalctl by default. If you also want to enable journalctl # logging, you can simply remove the "quiet" option from ExecStart. StandardOutput=journal StandardError=inherit
# Specifies the maximum file descriptor number that can be opened by this process LimitNOFILE=65535
# Specifies the maximum number of processes LimitNPROC=4096
# Specifies the maximum size of virtual memory LimitAS=infinity
# Specifies the maximum file size LimitFSIZE=infinity
# Disable timeout logic and wait until process is stopped TimeoutStopSec=0
# SIGTERM signal is used to stop the Java process KillSignal=SIGTERM
# Send the signal only to the JVM rather than its control group KillMode=process
# Java process is never killed SendSIGKILL=no
# When a JVM receives a SIGTERM signal it exits with code 143 SuccessExitStatus=143
# Allow a slow startup before the systemd notifier module kicks in to extend the timeout TimeoutStartSec=75
[Install] WantedBy=multi-user.target
# Built for packages-7.14.0 (packages) [root@cn-py-dl-c8 ~]#
# ---------------------------------- Cluster -----------------------------------
# Use a descriptive name for your cluster:
cluster.name: elasticsearch
# ------------------------------------ Node ------------------------------------
# Use a descriptive name for the node:
node.name: cn-py-dl-c8
# ----------------------------------- Memory -----------------------------------
# Lock the memory on startup:
bootstrap.memory_lock: true
# Make sure that the heap size is set to about half the memory available
# on the system and that the owner of the process is allowed to use this
# limit.
# Elasticsearch performs poorly when the system is swapping the memory.
# ---------------------------------- Network -----------------------------------
# By default Elasticsearch is only accessible on localhost. Set a different
# address here to expose this node on the network:
network.host: 0.0.0.0
# --------------------------------- Discovery ----------------------------------
# Bootstrap the cluster using an initial set of master-eligible nodes:
cluster.initial_master_nodes: ["cn-py-dl-c8"]
# For more information, consult the discovery and cluster formation module documentation.
xpack.license.self_generated.type: basic
xpack.security.enabled: true
xpack.security.http.ssl.enabled: true
xpack.security.http.ssl.keystore.path: /etc/elasticsearch/ssl/home.yuangezhizao.cn.jks
xpack.security.http.ssl.keystore.password: <rm>
xpack.security.transport.ssl.enabled: true
xpack.security.authc.api_key.enabled: true
[root@cn-py-dl-c8 elasticsearch]# cd /usr/share/elasticsearch/bin/
[root@cn-py-dl-c8 bin]# ll
total 21116
-rwxr-xr-x. 1 root root     2896 Mar 18 14:30 elasticsearch
-rwxr-xr-x. 1 root root      501 Mar 18 14:19 elasticsearch-certgen
-rwxr-xr-x. 1 root root      493 Mar 18 14:19 elasticsearch-certutil
-rwxr-xr-x. 1 root root      996 Mar 18 14:30 elasticsearch-cli
-rwxr-xr-x. 1 root root      443 Mar 18 14:19 elasticsearch-croneval
-rwxr-xr-x. 1 root root     4825 Mar 18 14:30 elasticsearch-env
-rwxr-xr-x. 1 root root     1828 Mar 18 14:30 elasticsearch-env-from-file
-rwxr-xr-x. 1 root root      184 Mar 18 14:30 elasticsearch-keystore
-rwxr-xr-x. 1 root root      450 Mar 18 14:19 elasticsearch-migrate
-rwxr-xr-x. 1 root root      126 Mar 18 14:30 elasticsearch-node
-rwxr-xr-x. 1 root root      172 Mar 18 14:30 elasticsearch-plugin
-rwxr-xr-x. 1 root root      441 Mar 18 14:19 elasticsearch-saml-metadata
-rwxr-xr-x. 1 root root      448 Mar 18 14:19 elasticsearch-setup-passwords
-rwxr-xr-x. 1 root root      118 Mar 18 14:30 elasticsearch-shard
-rwxr-xr-x. 1 root root      483 Mar 18 14:19 elasticsearch-sql-cli
-rwxr-xr-x. 1 root root 21529276 Mar 18 14:19 elasticsearch-sql-cli-7.12.0.jar
-rwxr-xr-x. 1 root root      436 Mar 18 14:19 elasticsearch-syskeygen
-rwxr-xr-x. 1 root root      436 Mar 18 14:19 elasticsearch-users
-rwxr-xr-x. 1 root root      332 Mar 18 14:26 systemd-entrypoint
-rwxr-xr-x. 1 root root      356 Mar 18 14:19 x-pack-env
-rwxr-xr-x. 1 root root      364 Mar 18 14:19 x-pack-security-env
-rwxr-xr-x. 1 root root      363 Mar 18 14:19 x-pack-watcher-env
[root@cn-py-dl-c8 bin]# ./elasticsearch-setup-passwords interactive
Initiating the setup of passwords for reserved users elastic,apm_system,kibana,kibana_system,logstash_system,beats_system,remote_monitoring_user.
You will be prompted to enter passwords as the process progresses.
Please confirm that you would like to continue [y/N]y
Enter password for [elastic]:
Reenter password for [elastic]:
Enter password for [apm_system]:
Reenter password for [apm_system]:
Enter password for [kibana_system]:
Reenter password for [kibana_system]:
Enter password for [logstash_system]:
Reenter password for [logstash_system]:
Enter password for [beats_system]:
Reenter password for [beats_system]:
Enter password for [remote_monitoring_user]:
Reenter password for [remote_monitoring_user]:
Changed password for user [apm_system]
Changed password for user [kibana_system]
Changed password for user [kibana]
Changed password for user [logstash_system]
Changed password for user [beats_system]
Changed password for user [remote_monitoring_user]
Changed password for user [elastic]
[root@cn-py-dl-c8 ~]# cd /etc/kibana
[root@cn-py-dl-c8 kibana]# ll
total 16
-rw-rw----. 1 root kibana  130 Mar 28 12:08 kibana.keystore
-rw-rw----. 1 root kibana 5065 Mar 18 13:55 kibana.yml
-rw-r--r--. 1 root kibana  216 Mar 18 13:55 node.options

# Specifies the address to which the Kibana server will bind. IP addresses and host names are both valid values.
# The default is 'localhost', which usually means remote machines will not be able to connect.
# To allow connections from remote users, set this parameter to a non-loopback address.
server.host: "0.0.0.0"
# The Kibana server's name.  This is used for display purposes.
server.name: "cn-py-dl-c8"
# The URLs of the Elasticsearch instances to use for all your queries.
elasticsearch.hosts: ["https://home.yuangezhizao.cn:9200"]
# If your Elasticsearch is protected with basic authentication, these settings provide
# the username and password that the Kibana server uses to perform maintenance on the Kibana
# index at startup. Your Kibana users still need to authenticate with Elasticsearch, which
# is proxied through the Kibana server.
elasticsearch.username: "kibana_system"
# elasticsearch.password: "<rm>"
# Enables SSL and paths to the PEM-format SSL certificate and SSL key files, respectively.
# These settings enable SSL for outgoing requests from the Kibana server to the browser.
server.ssl.enabled: true
server.ssl.certificate: /etc/kibana/ssl/1_home.yuangezhizao.cn_bundle.crt
server.ssl.key: /etc/kibana/ssl/2_home.yuangezhizao.cn.key
# Specifies locale to be used for all localizable strings, dates and number formats.
# Supported languages are the following: English - en , by default , Chinese - zh-CN .
i18n.locale: "zh-CN"
xpack.security.enabled: true
xpack.encryptedSavedObjects.encryptionKey: "something_at_least_32_characters"
xpack.ingestManager.fleet.tlsCheckDisabled: true
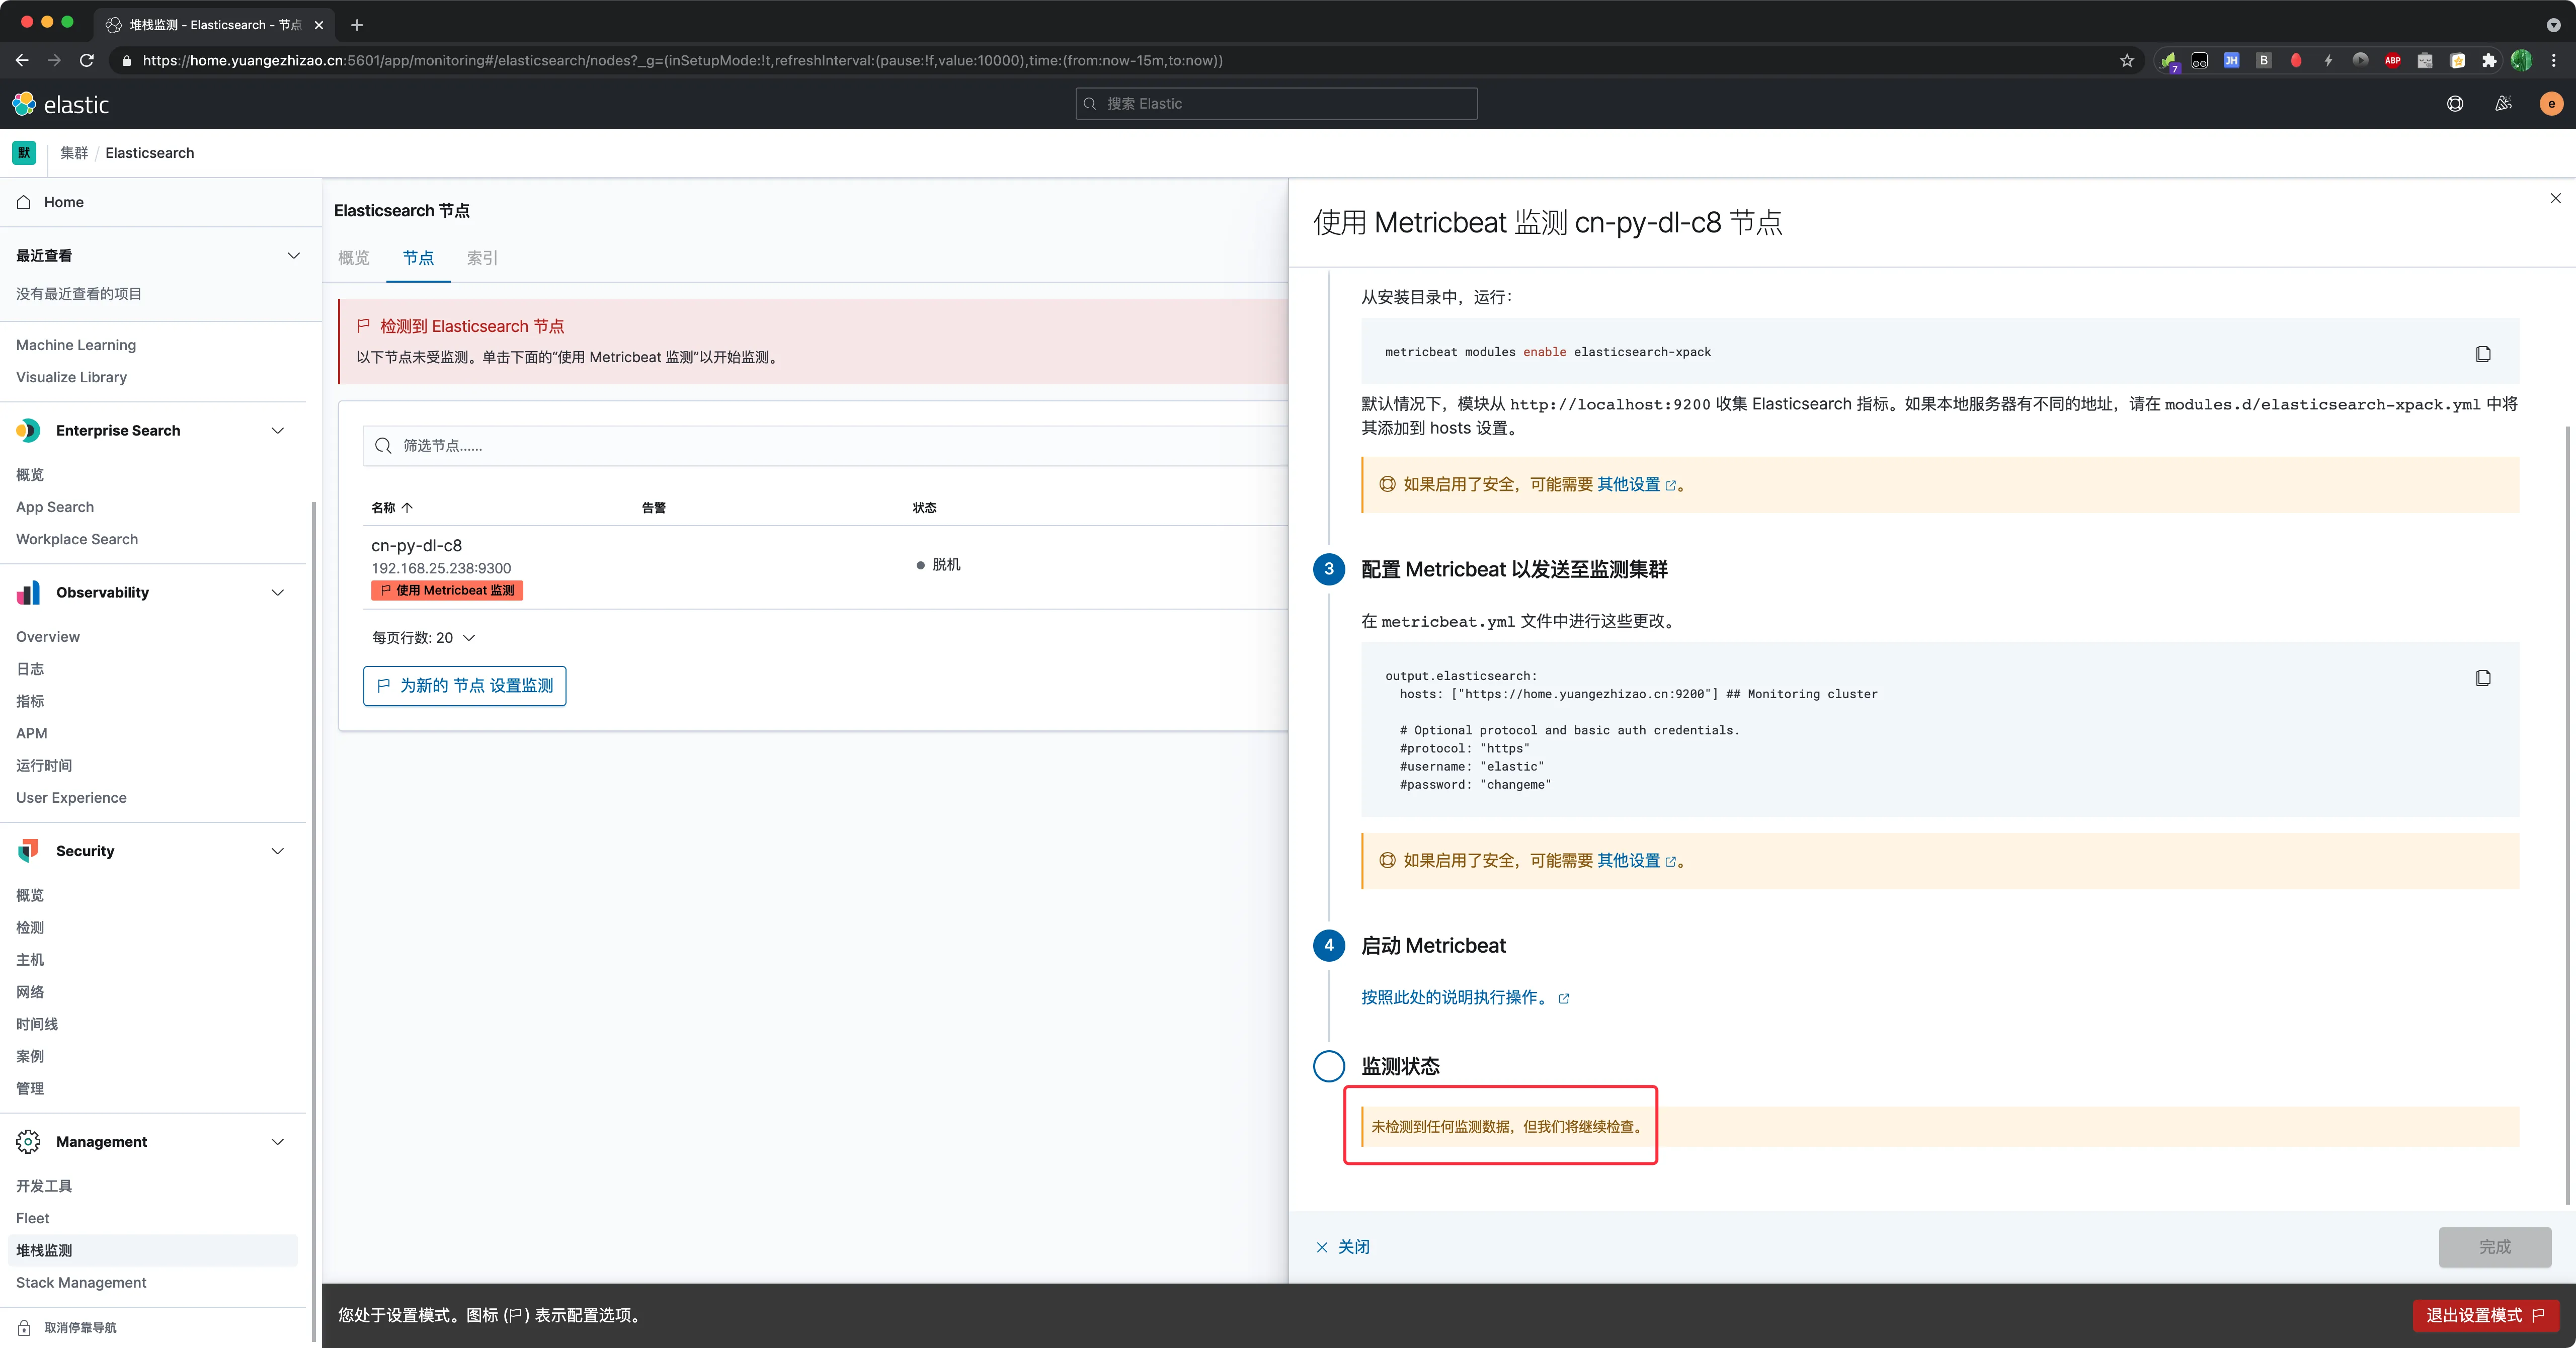
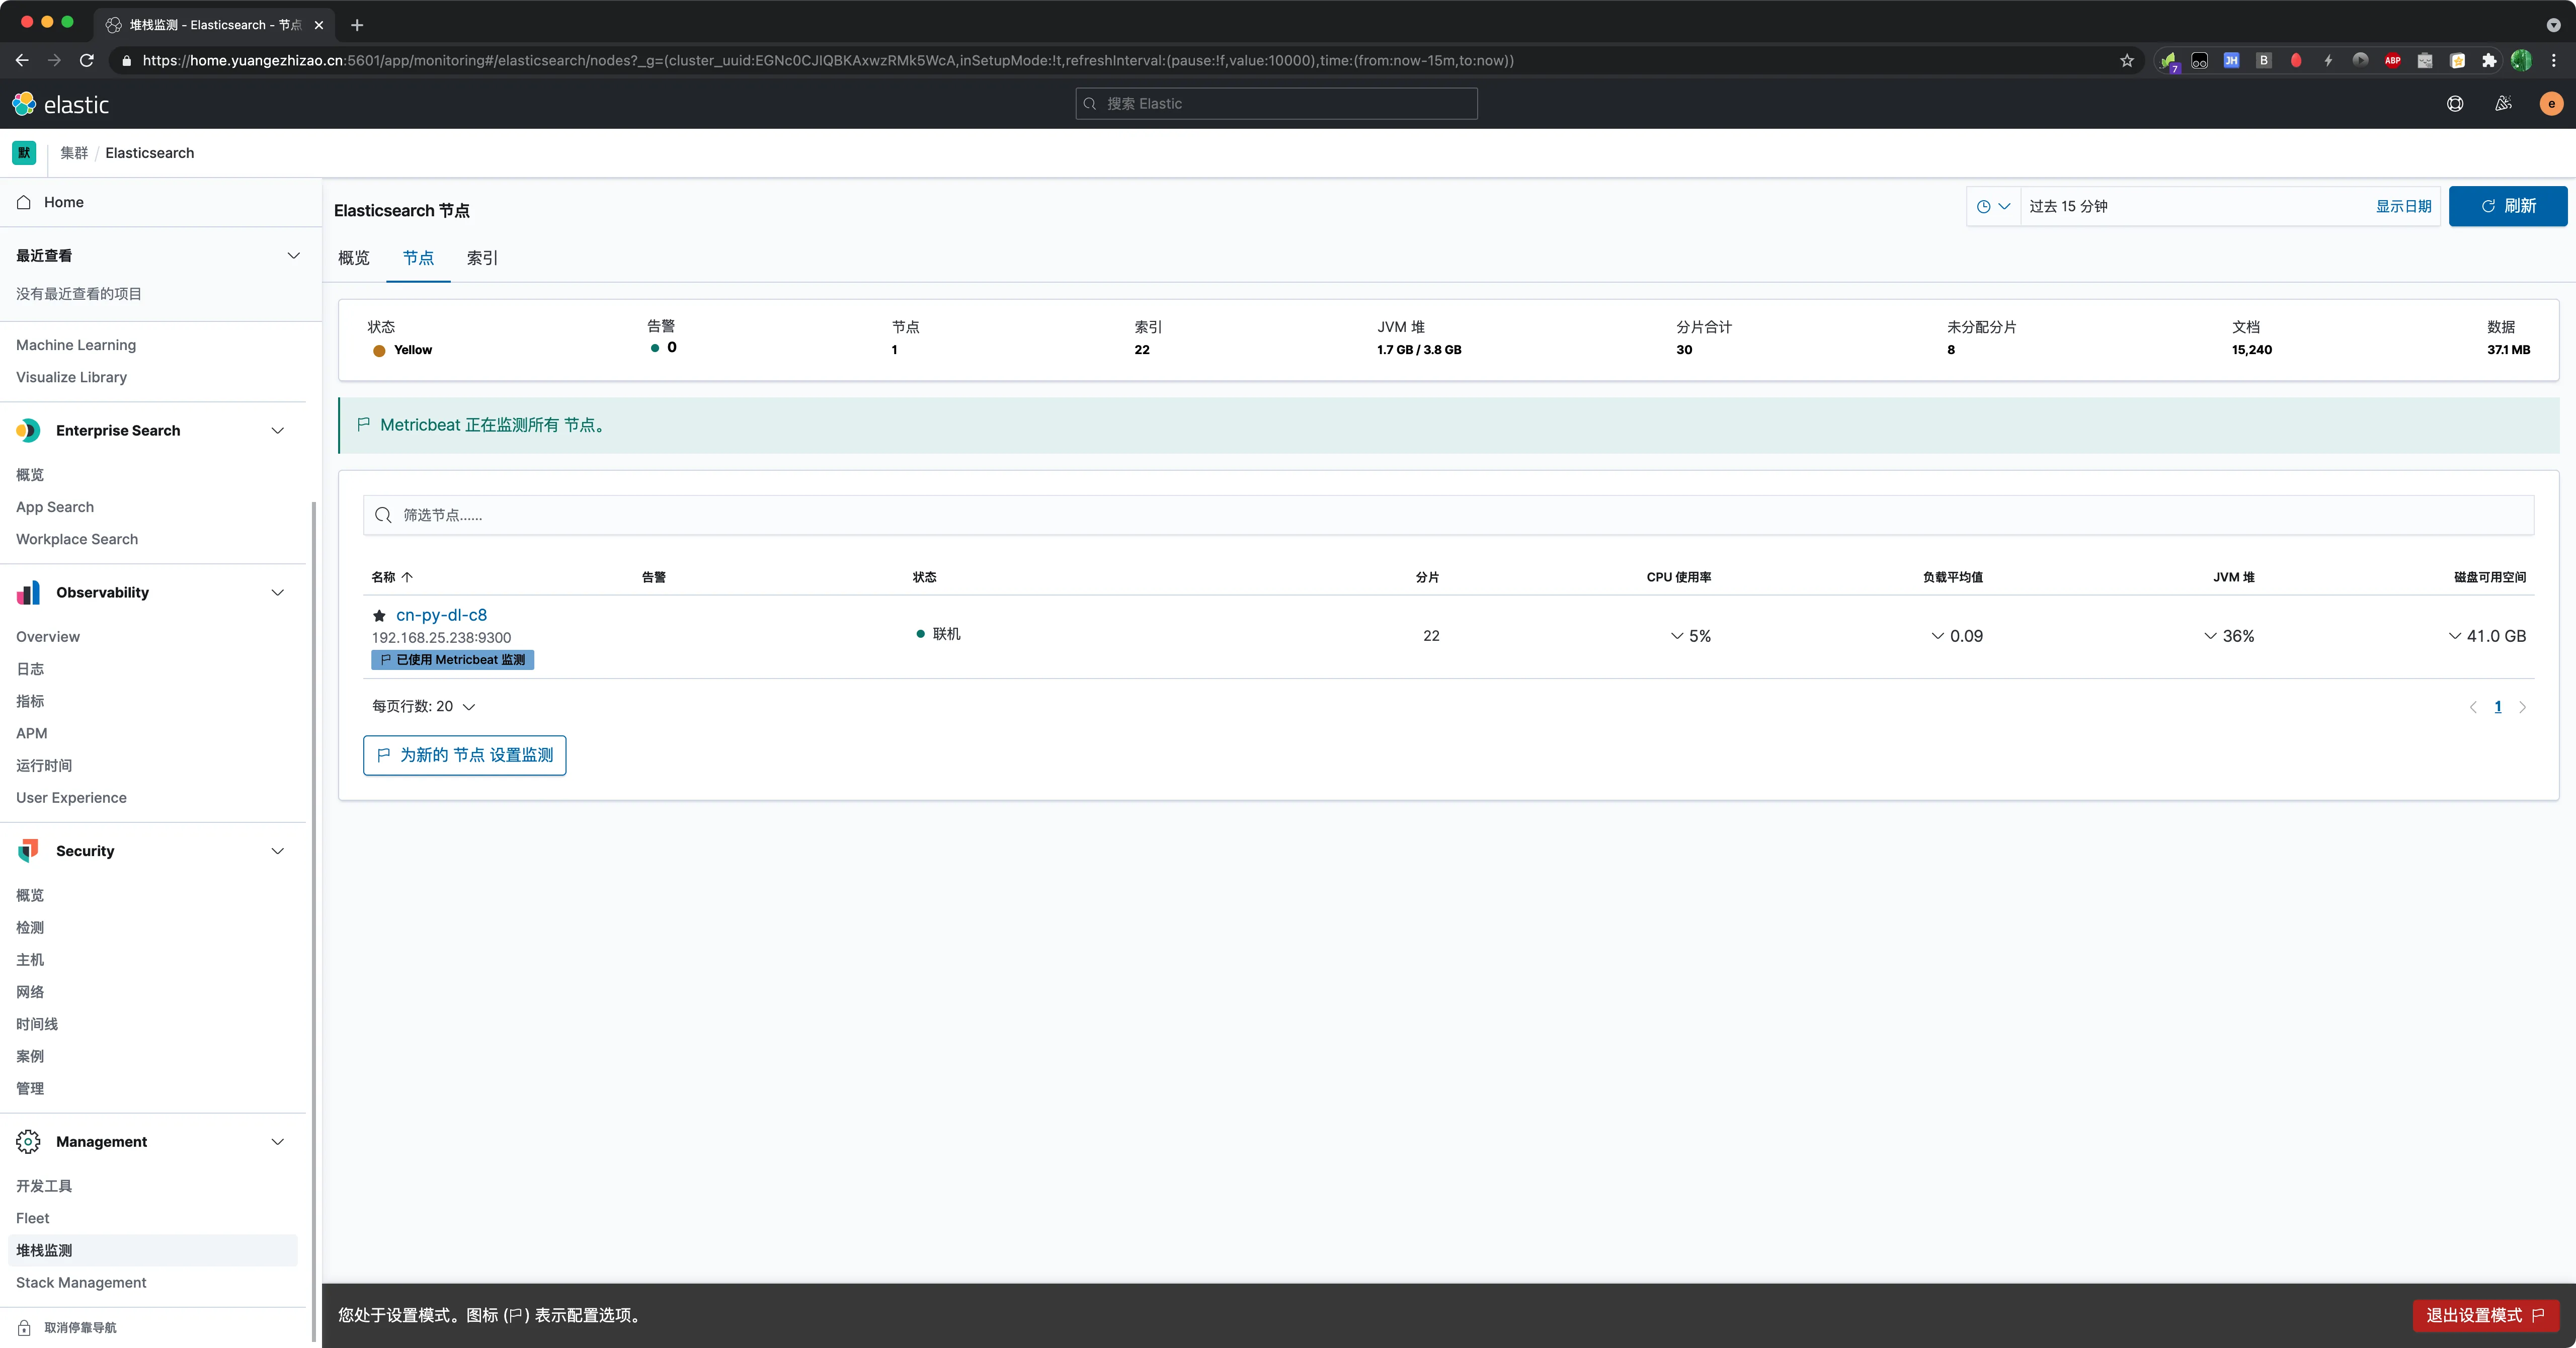
[root@cn-py-dl-c8 ~]# cd /usr/share/metricbeat/bin/
[root@cn-py-dl-c8 bin]# ll
total 128176
-rwxr-xr-x. 1 root root 130191232 Mar 18 14:33 metricbeat
-rwxr-xr-x. 1 root root   1057147 Mar 18 13:59 metricbeat-god
[root@cn-py-dl-c8 bin]# metricbeat modules enable elasticsearch-xpack
Enabled elasticsearch-xpack
[root@cn-py-dl-c8 metricbeat]# cd /etc/metricbeat/
[root@cn-py-dl-c8 metricbeat]# ll
total 1008
-rw-r--r--. 1 root root 911043 Mar 18 14:28 fields.yml
-rw-r--r--. 1 root root  99363 Mar 18 14:28 metricbeat.reference.yml
-rw-------. 1 root root   6899 Mar 18 14:28 metricbeat.yml
drwxr-xr-x. 2 root root   4096 Mar 28 13:16 modules.d
[root@cn-py-dl-c8 metricbeat]# vim metricbeat.yml
# ================================= Dashboards =================================
# These settings control loading the sample dashboards to the Kibana index. Loading
# the dashboards is disabled by default and can be enabled either by setting the
# options here or by using the `setup` command.
setup.dashboards.enabled: true
配置 ES 和 Kibana 的密码
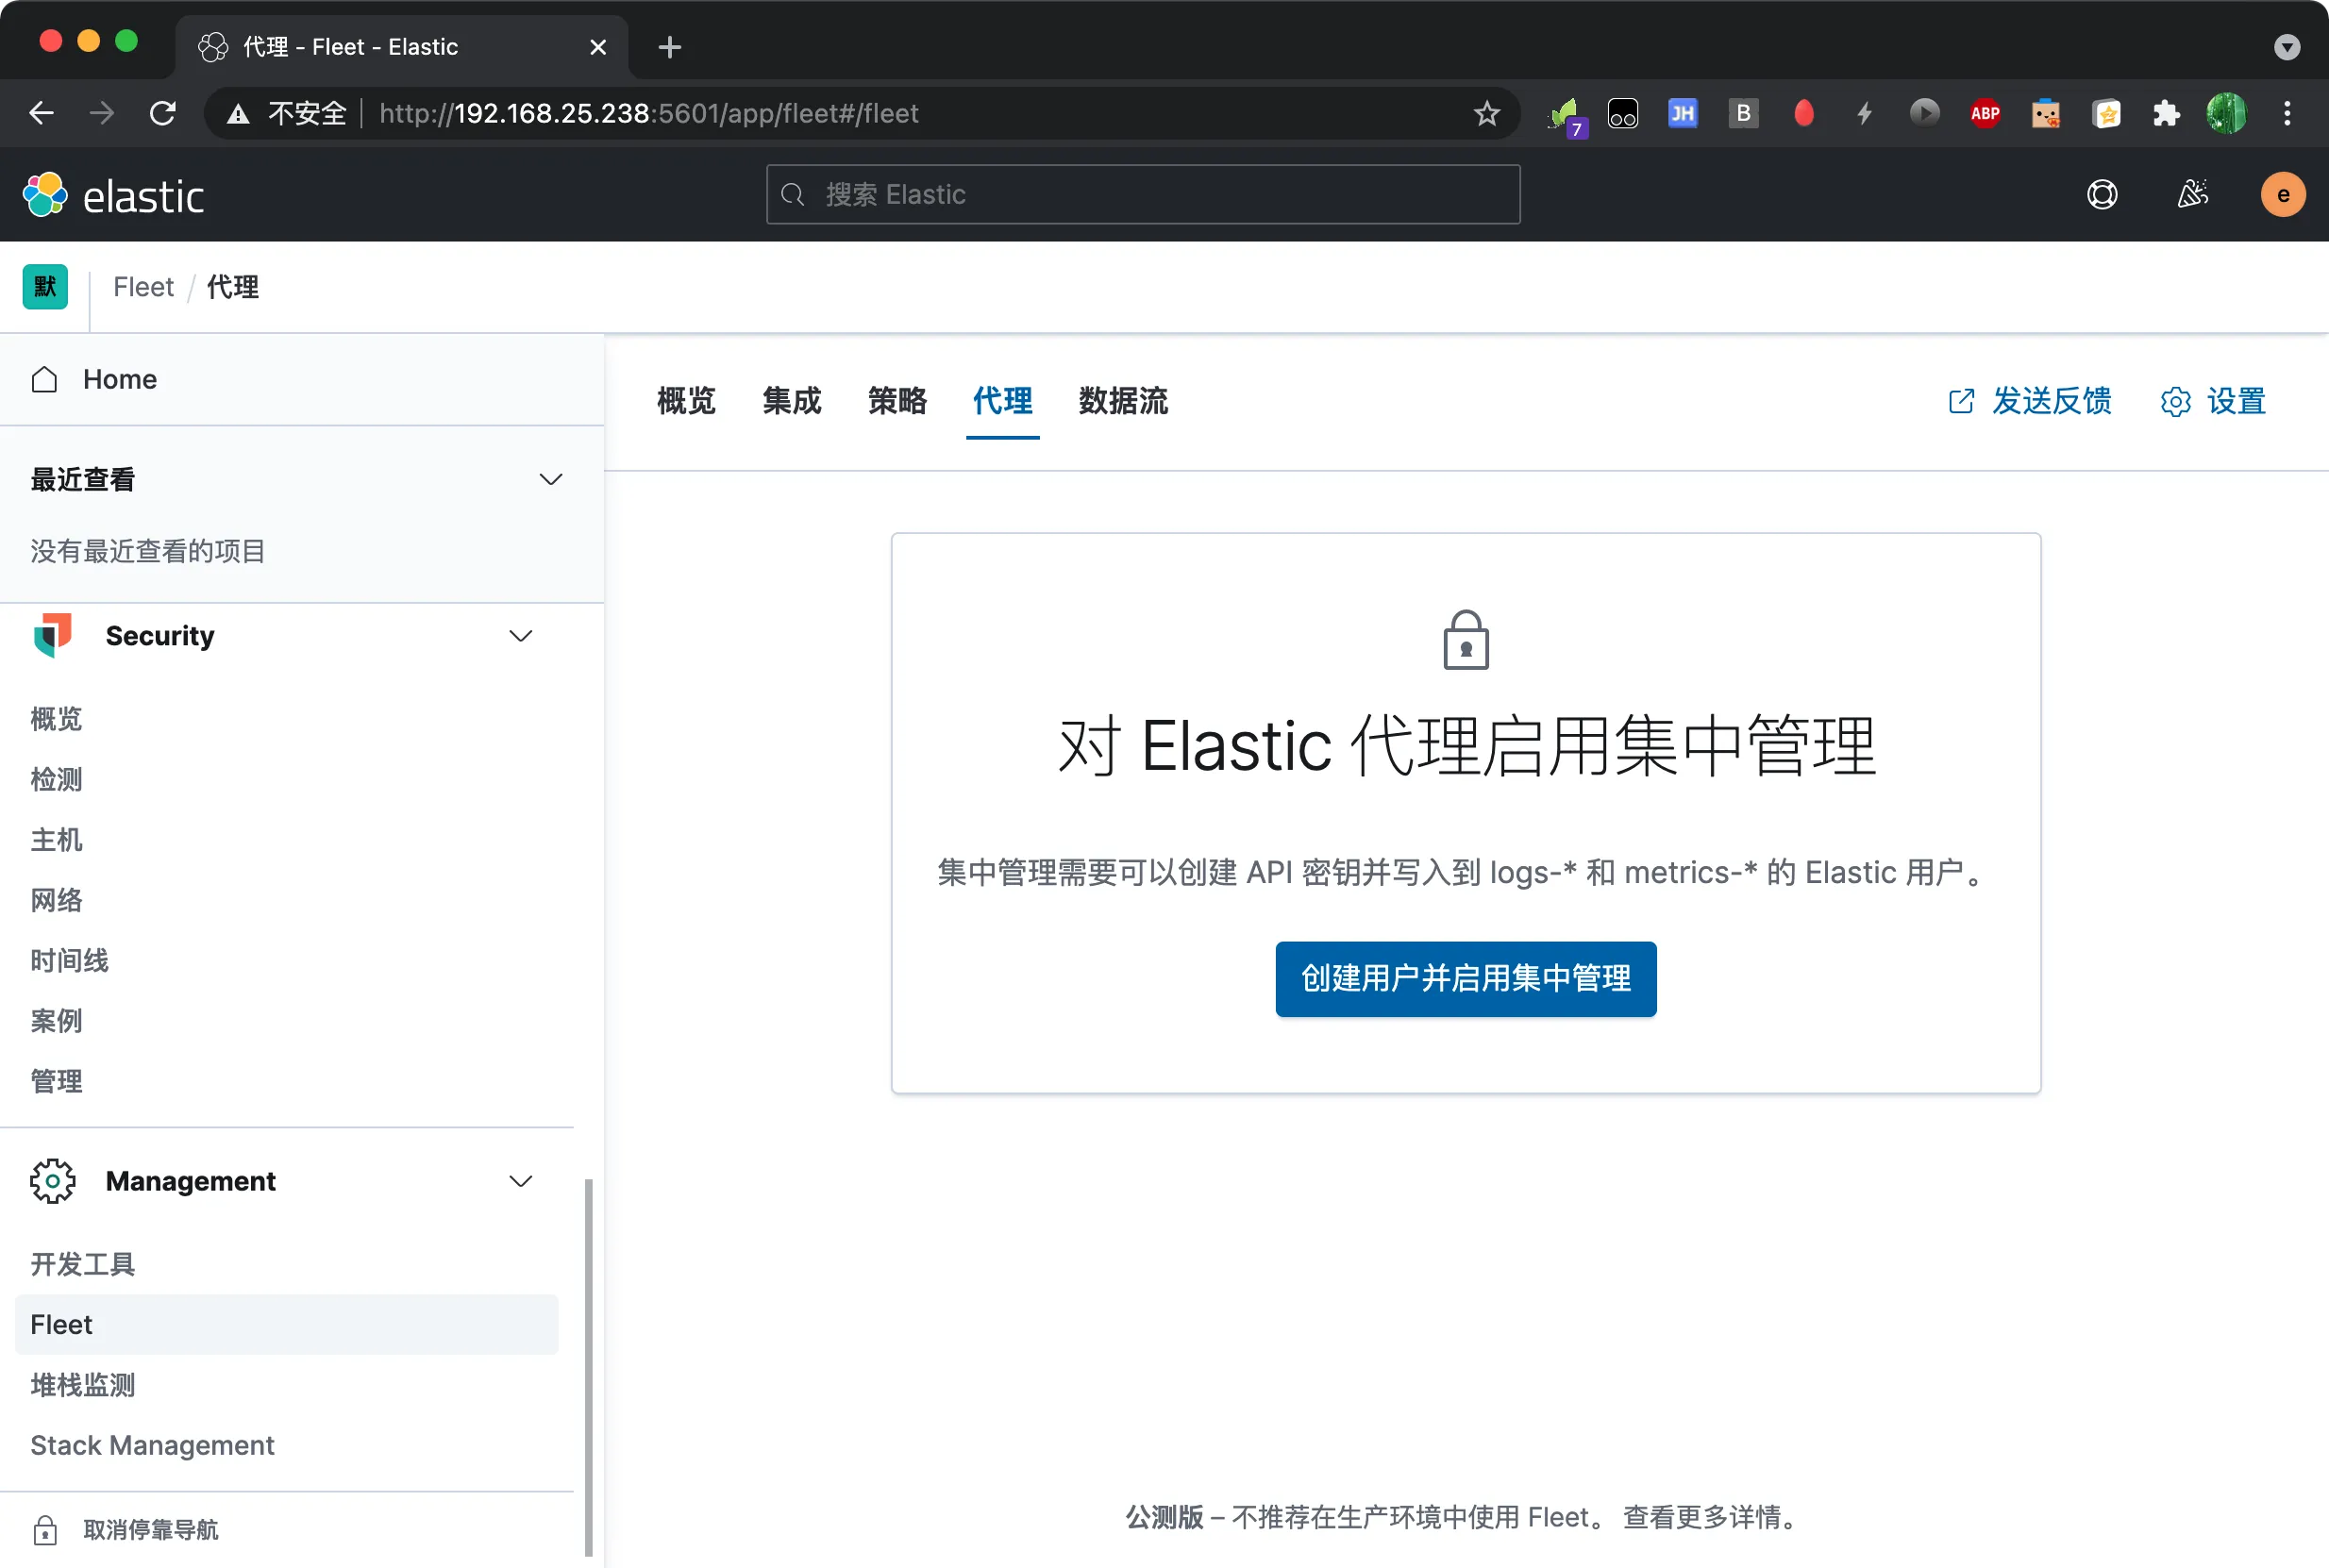 代理
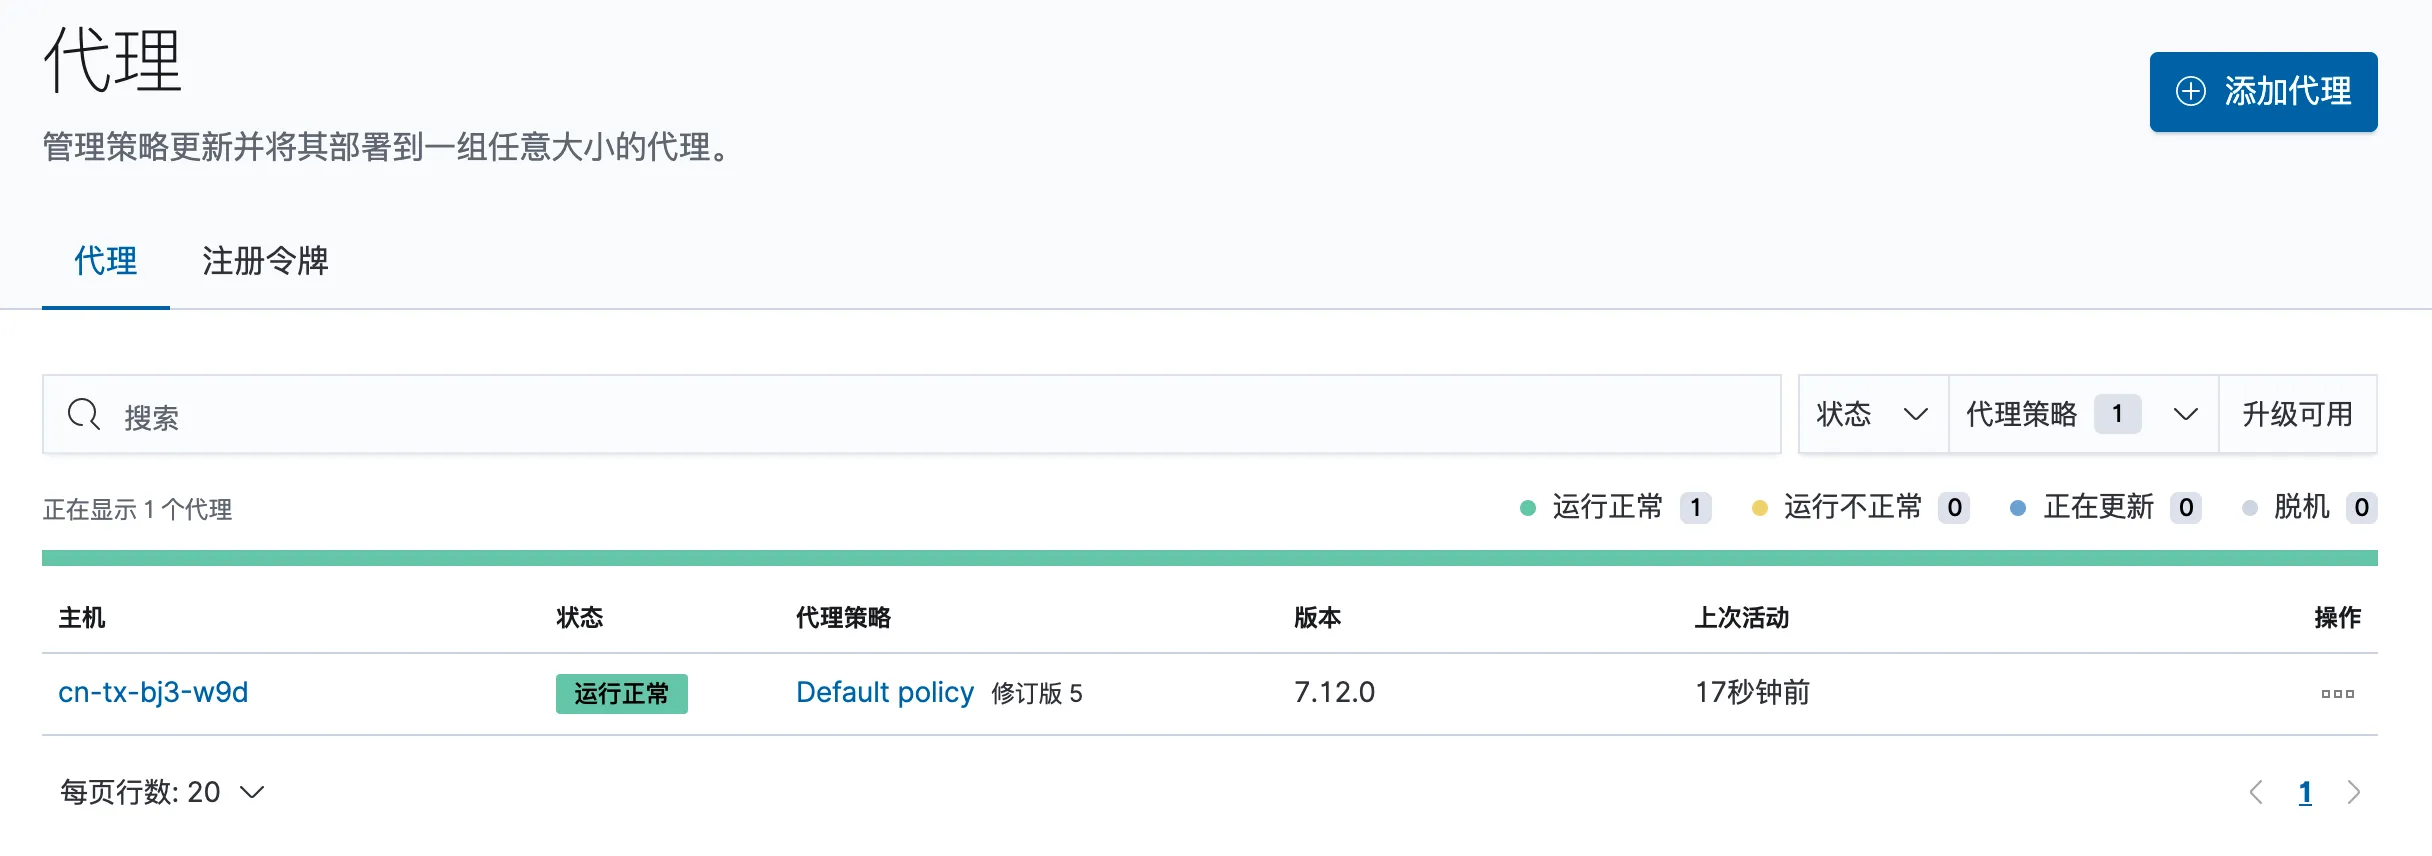
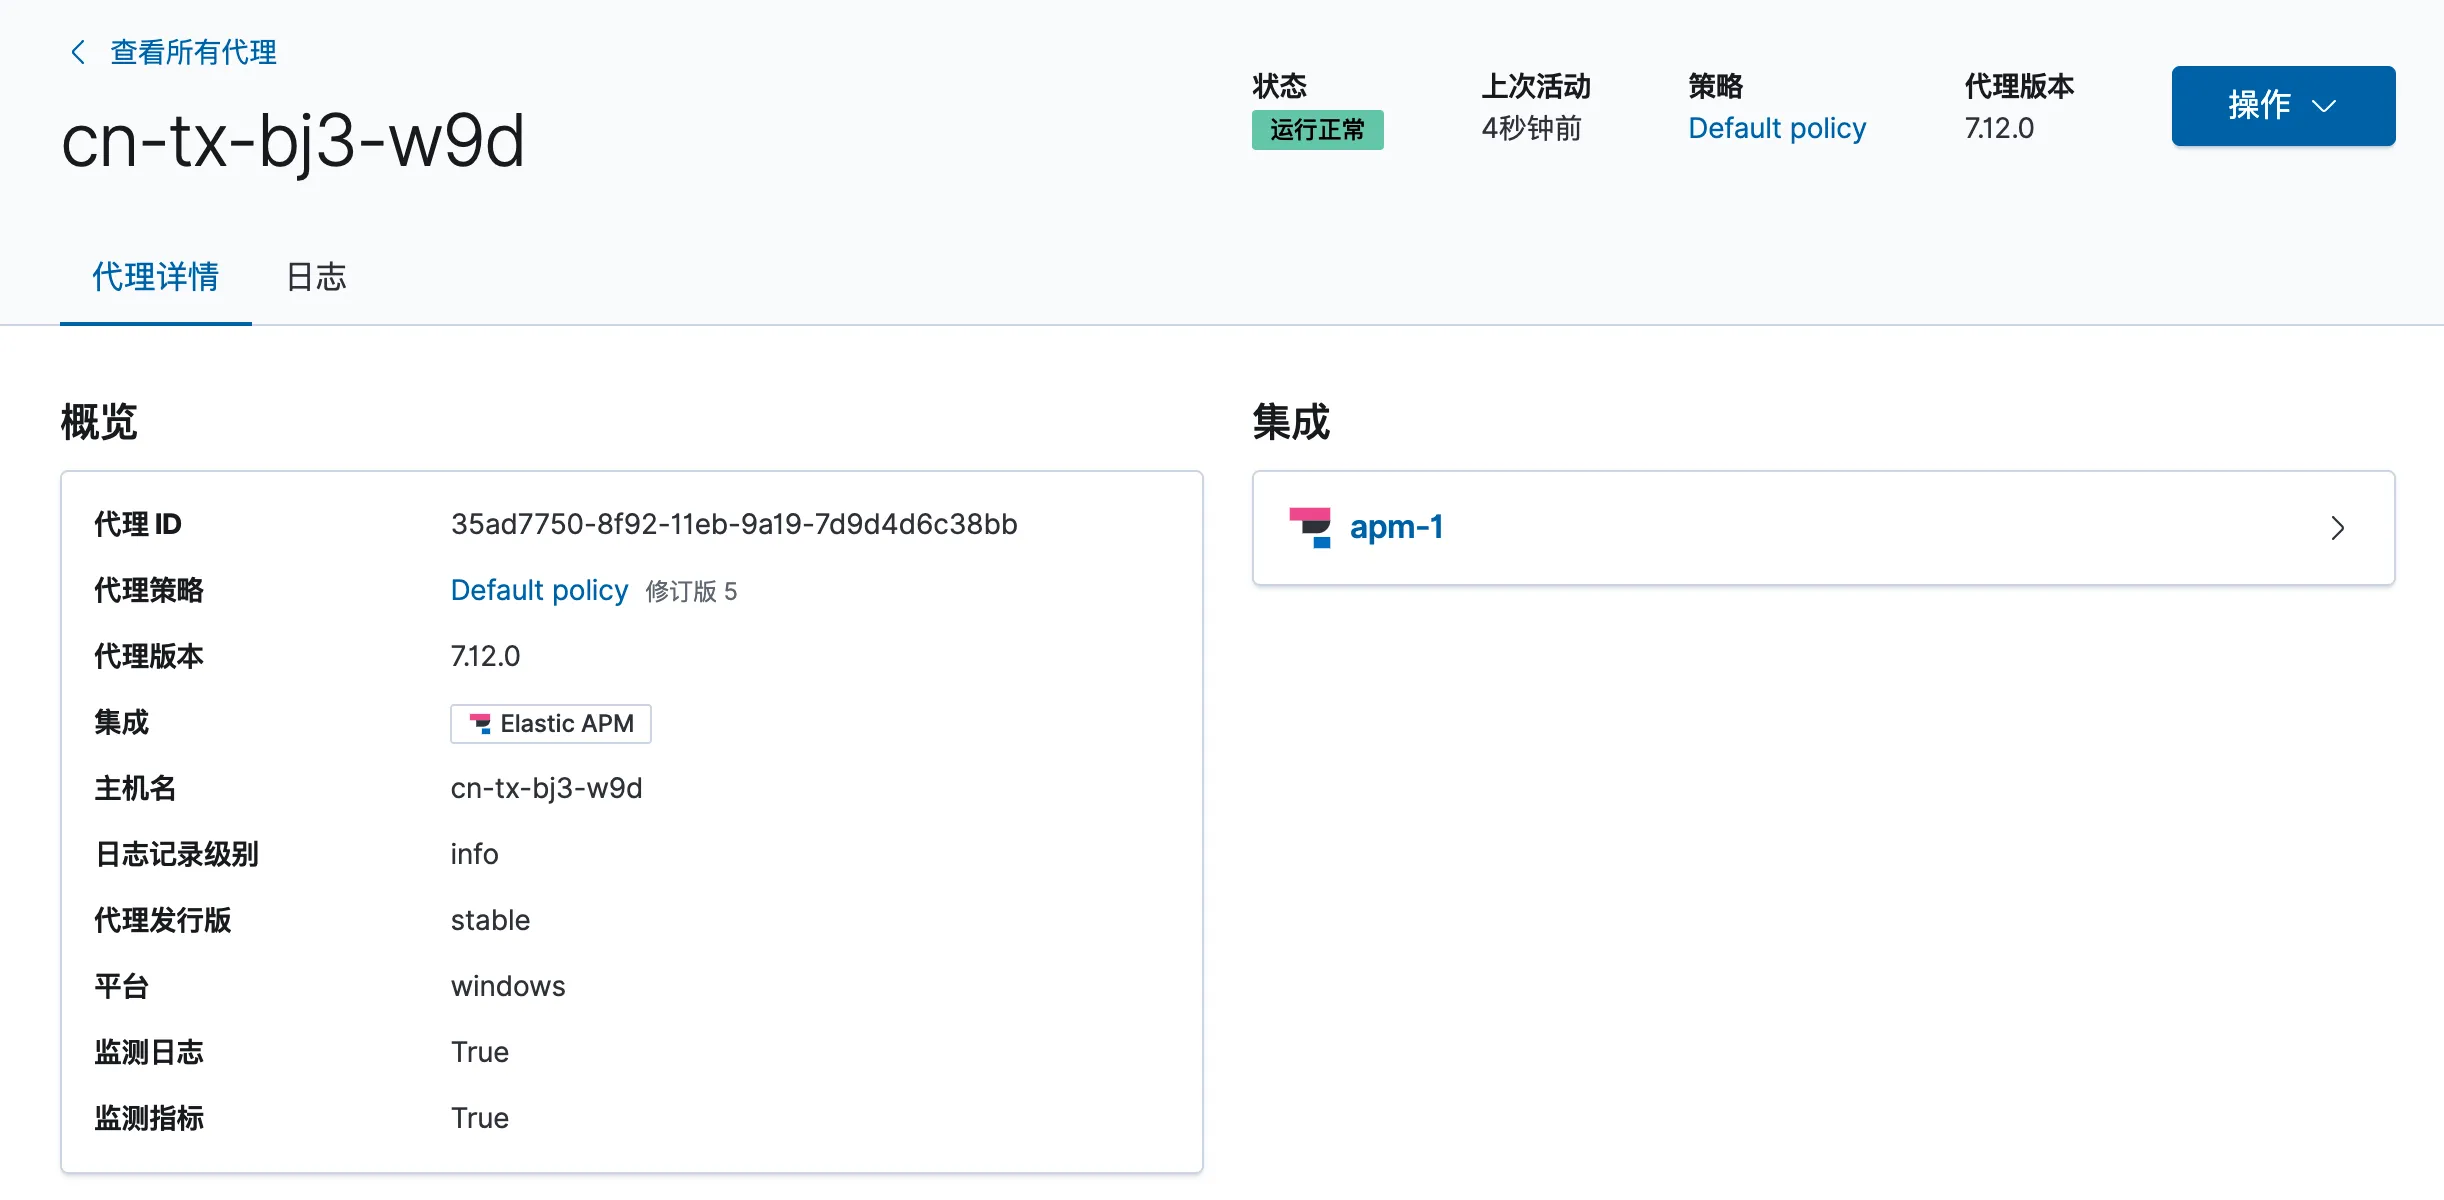
代理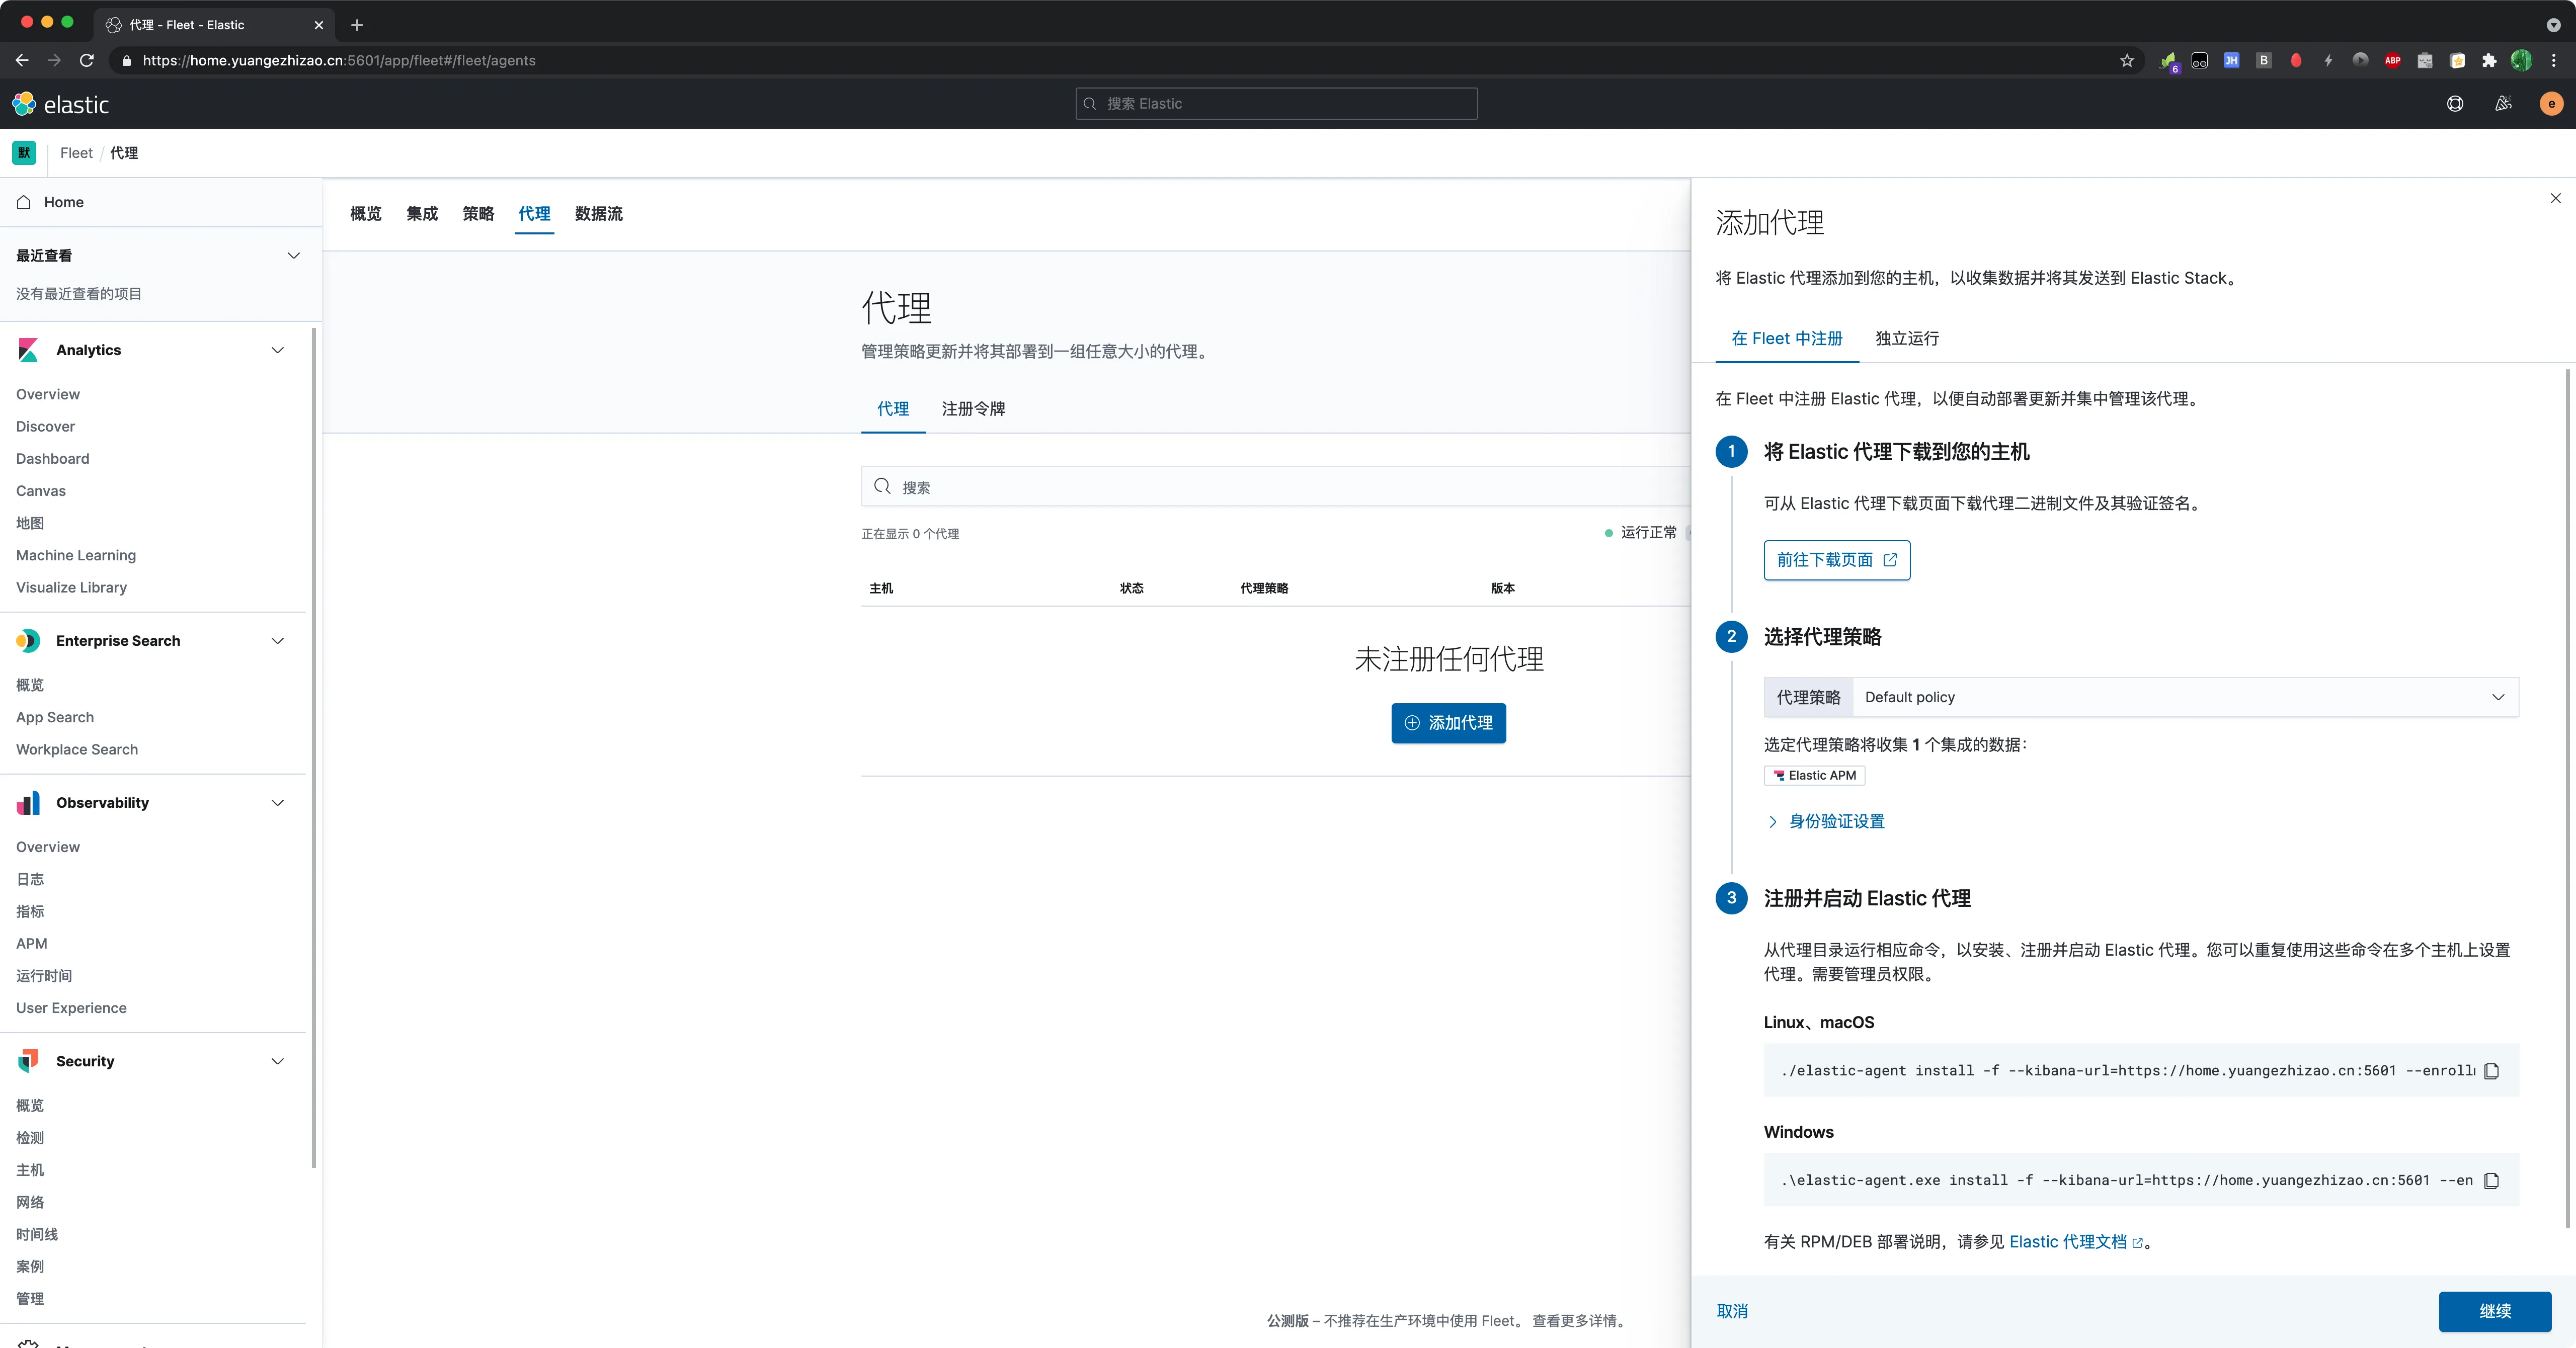
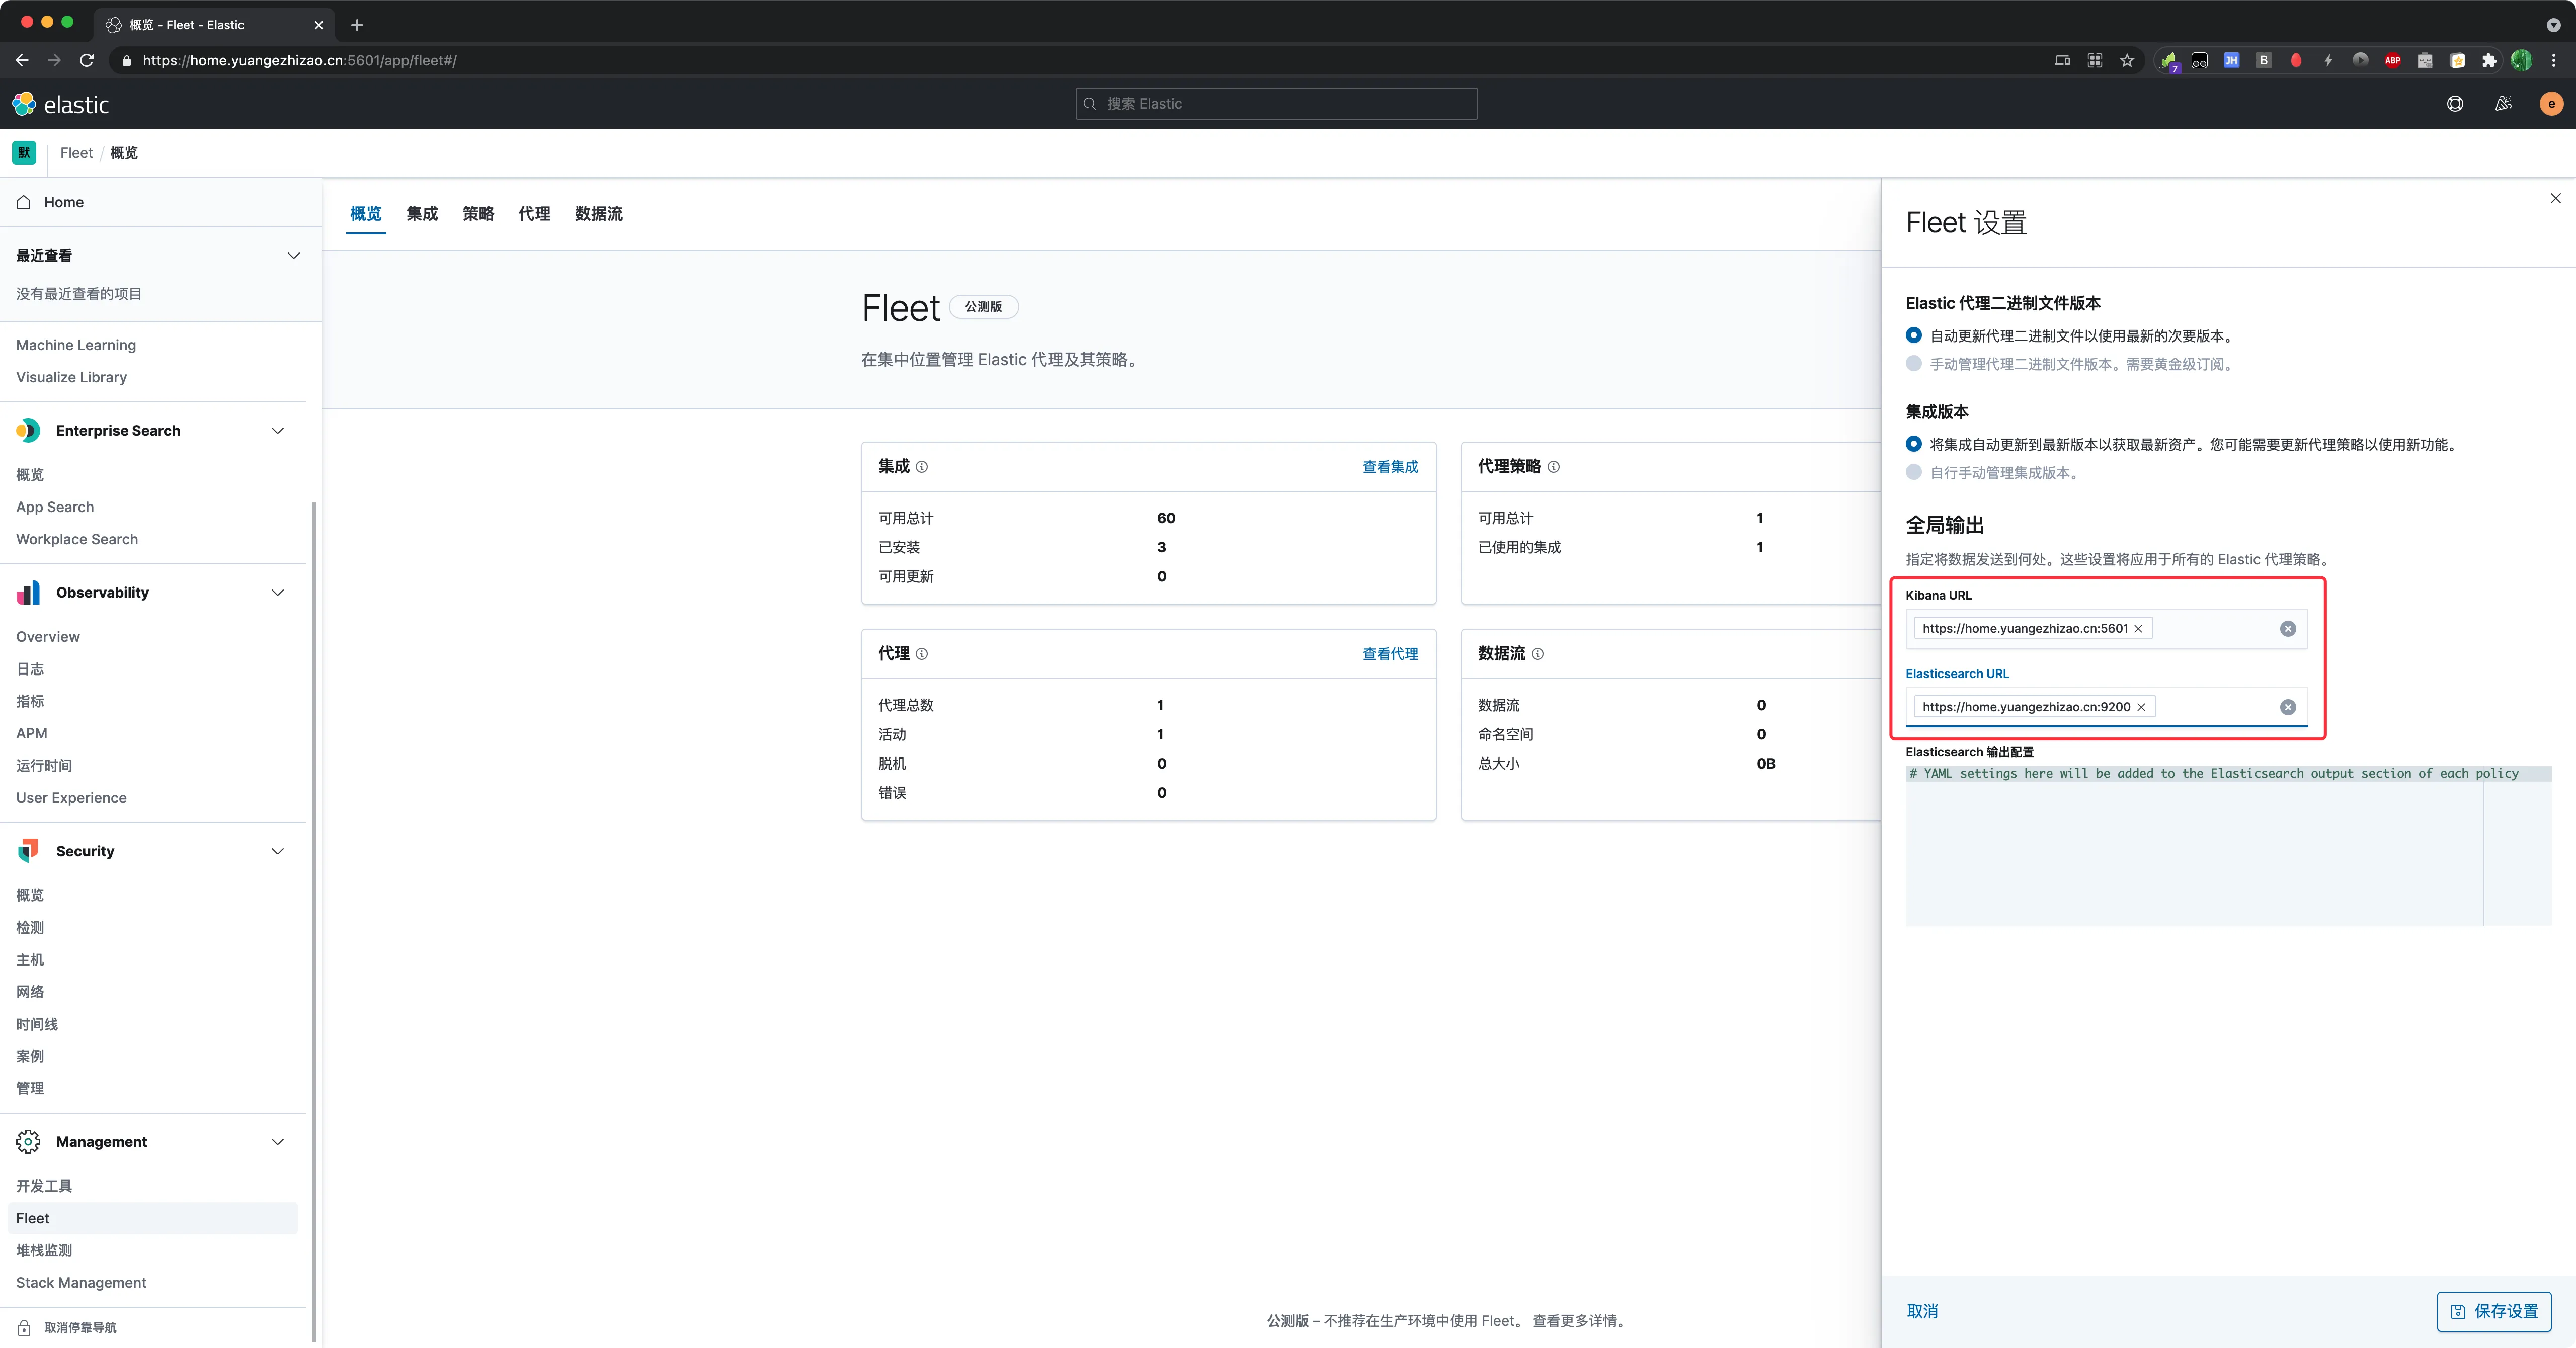 全集设置
全集设置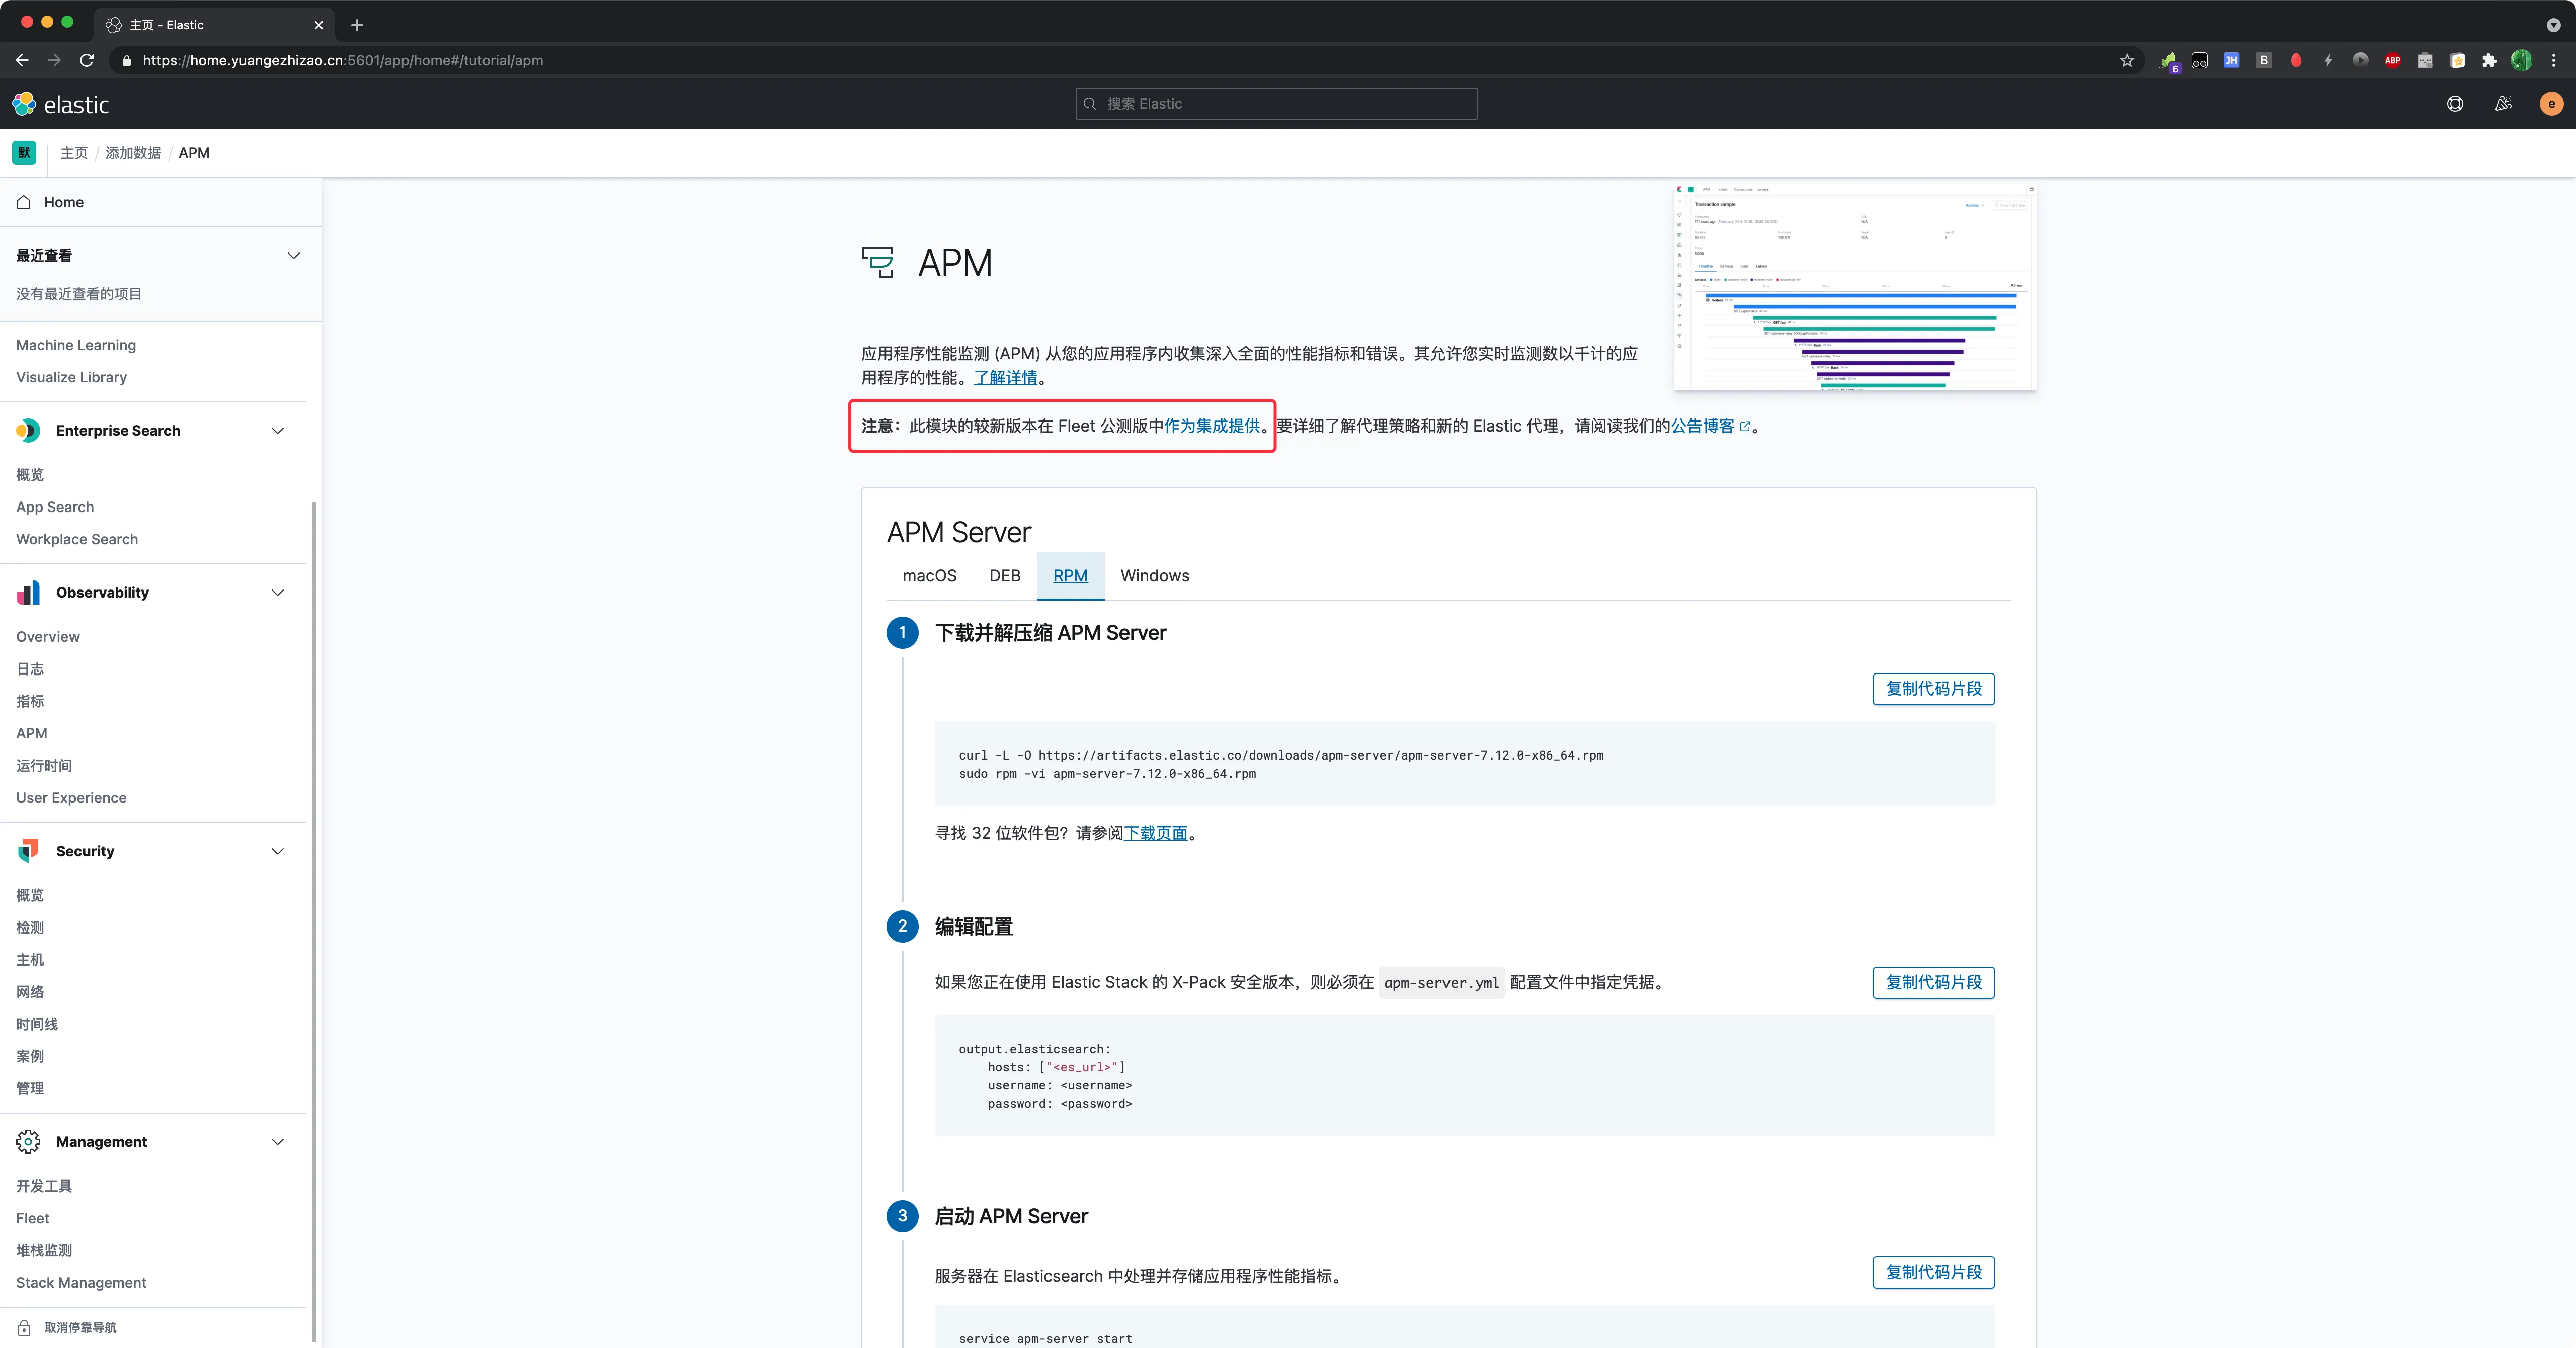 APM Server
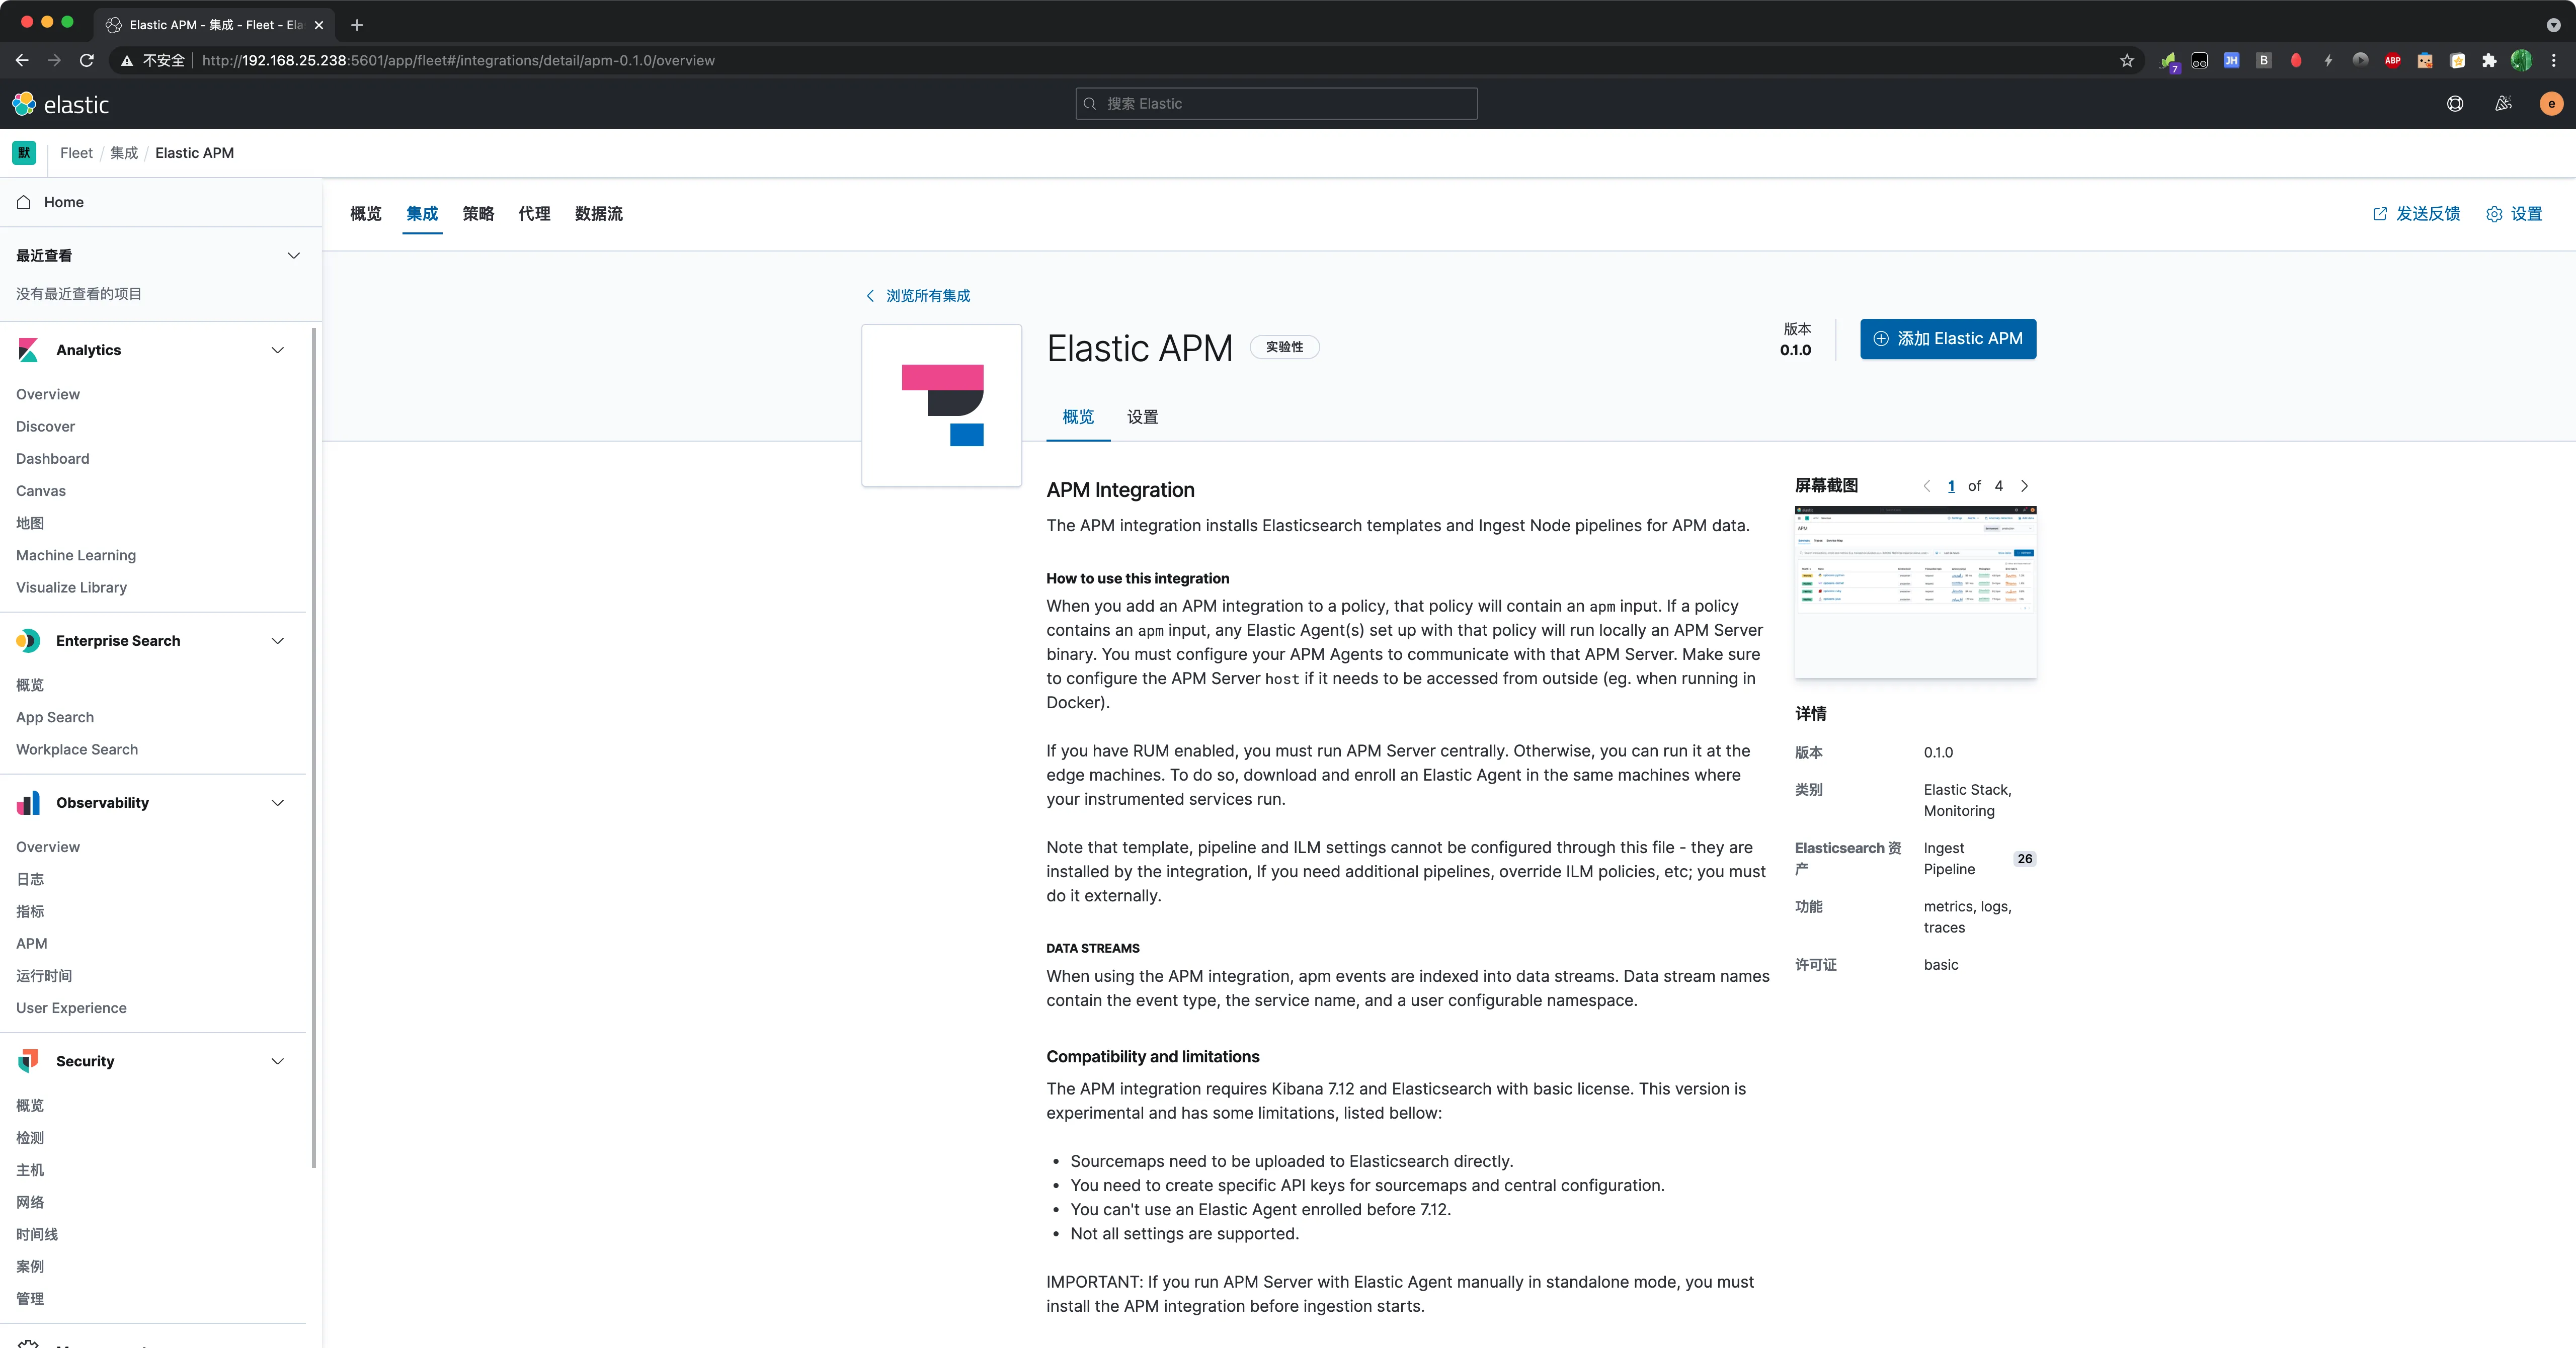 概览
概览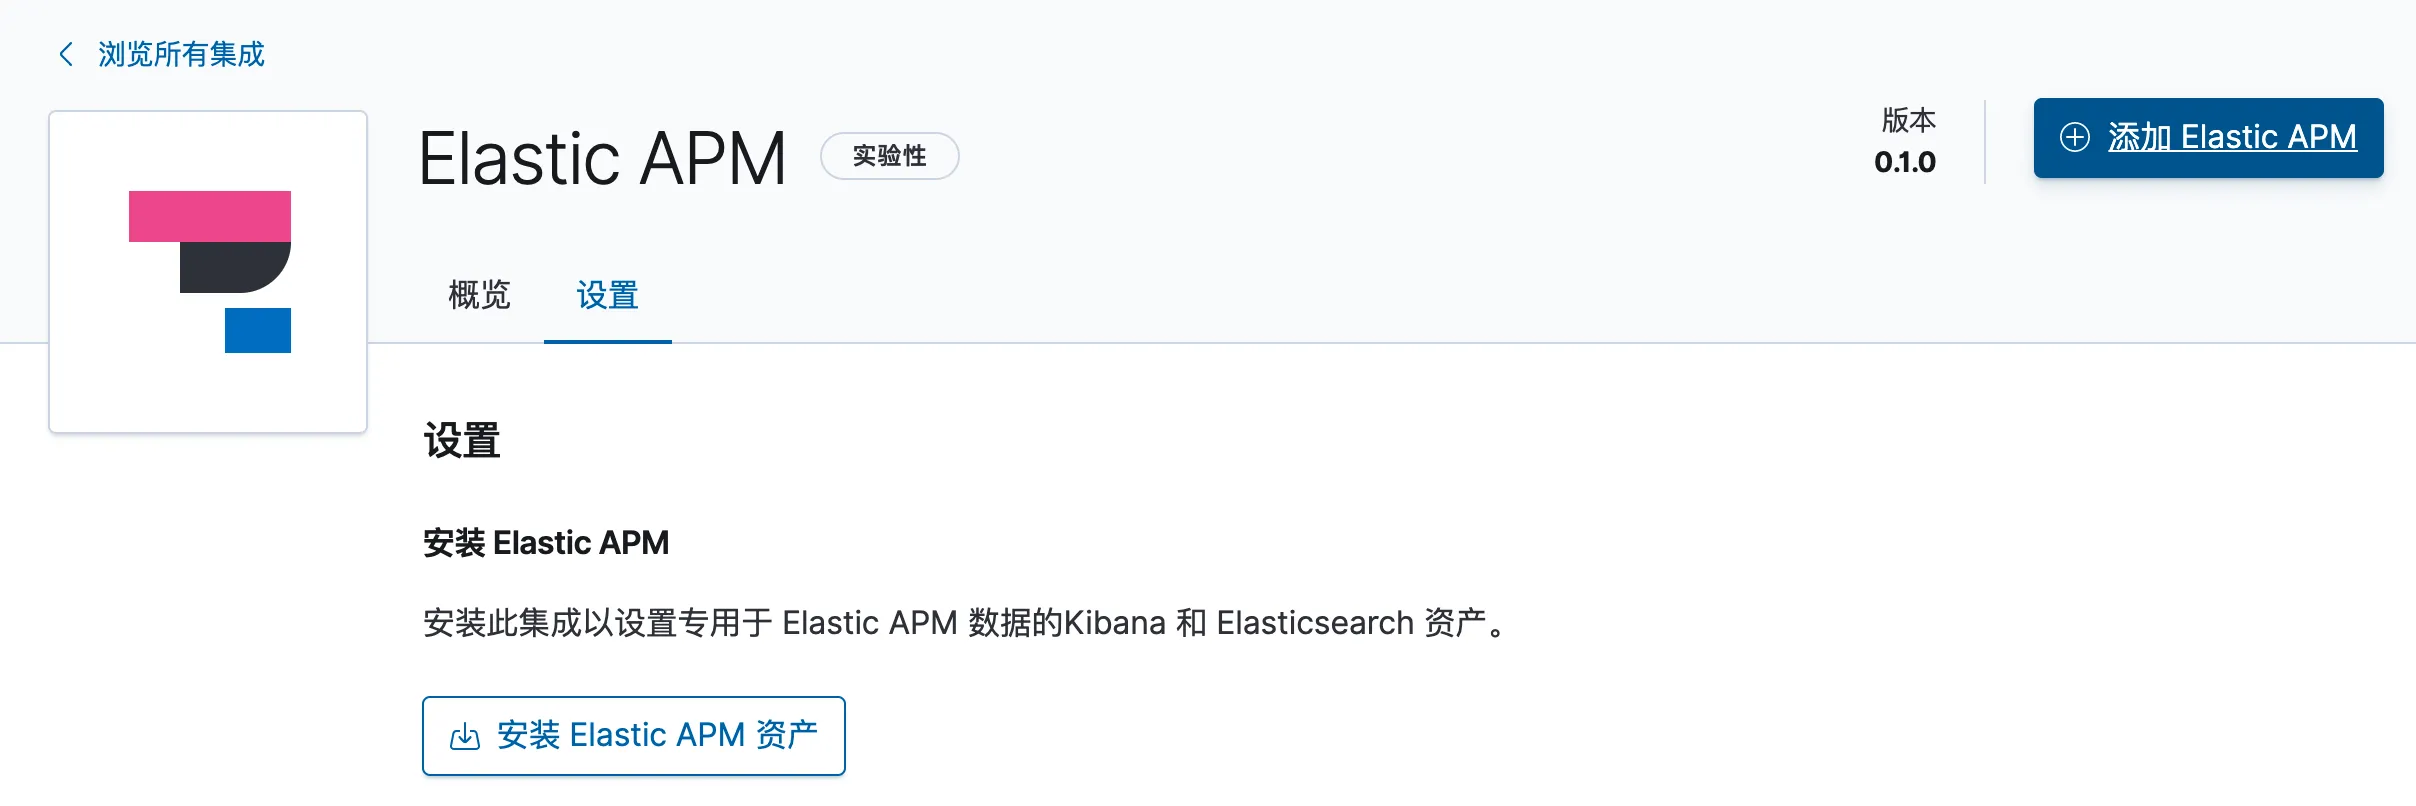 设置
设置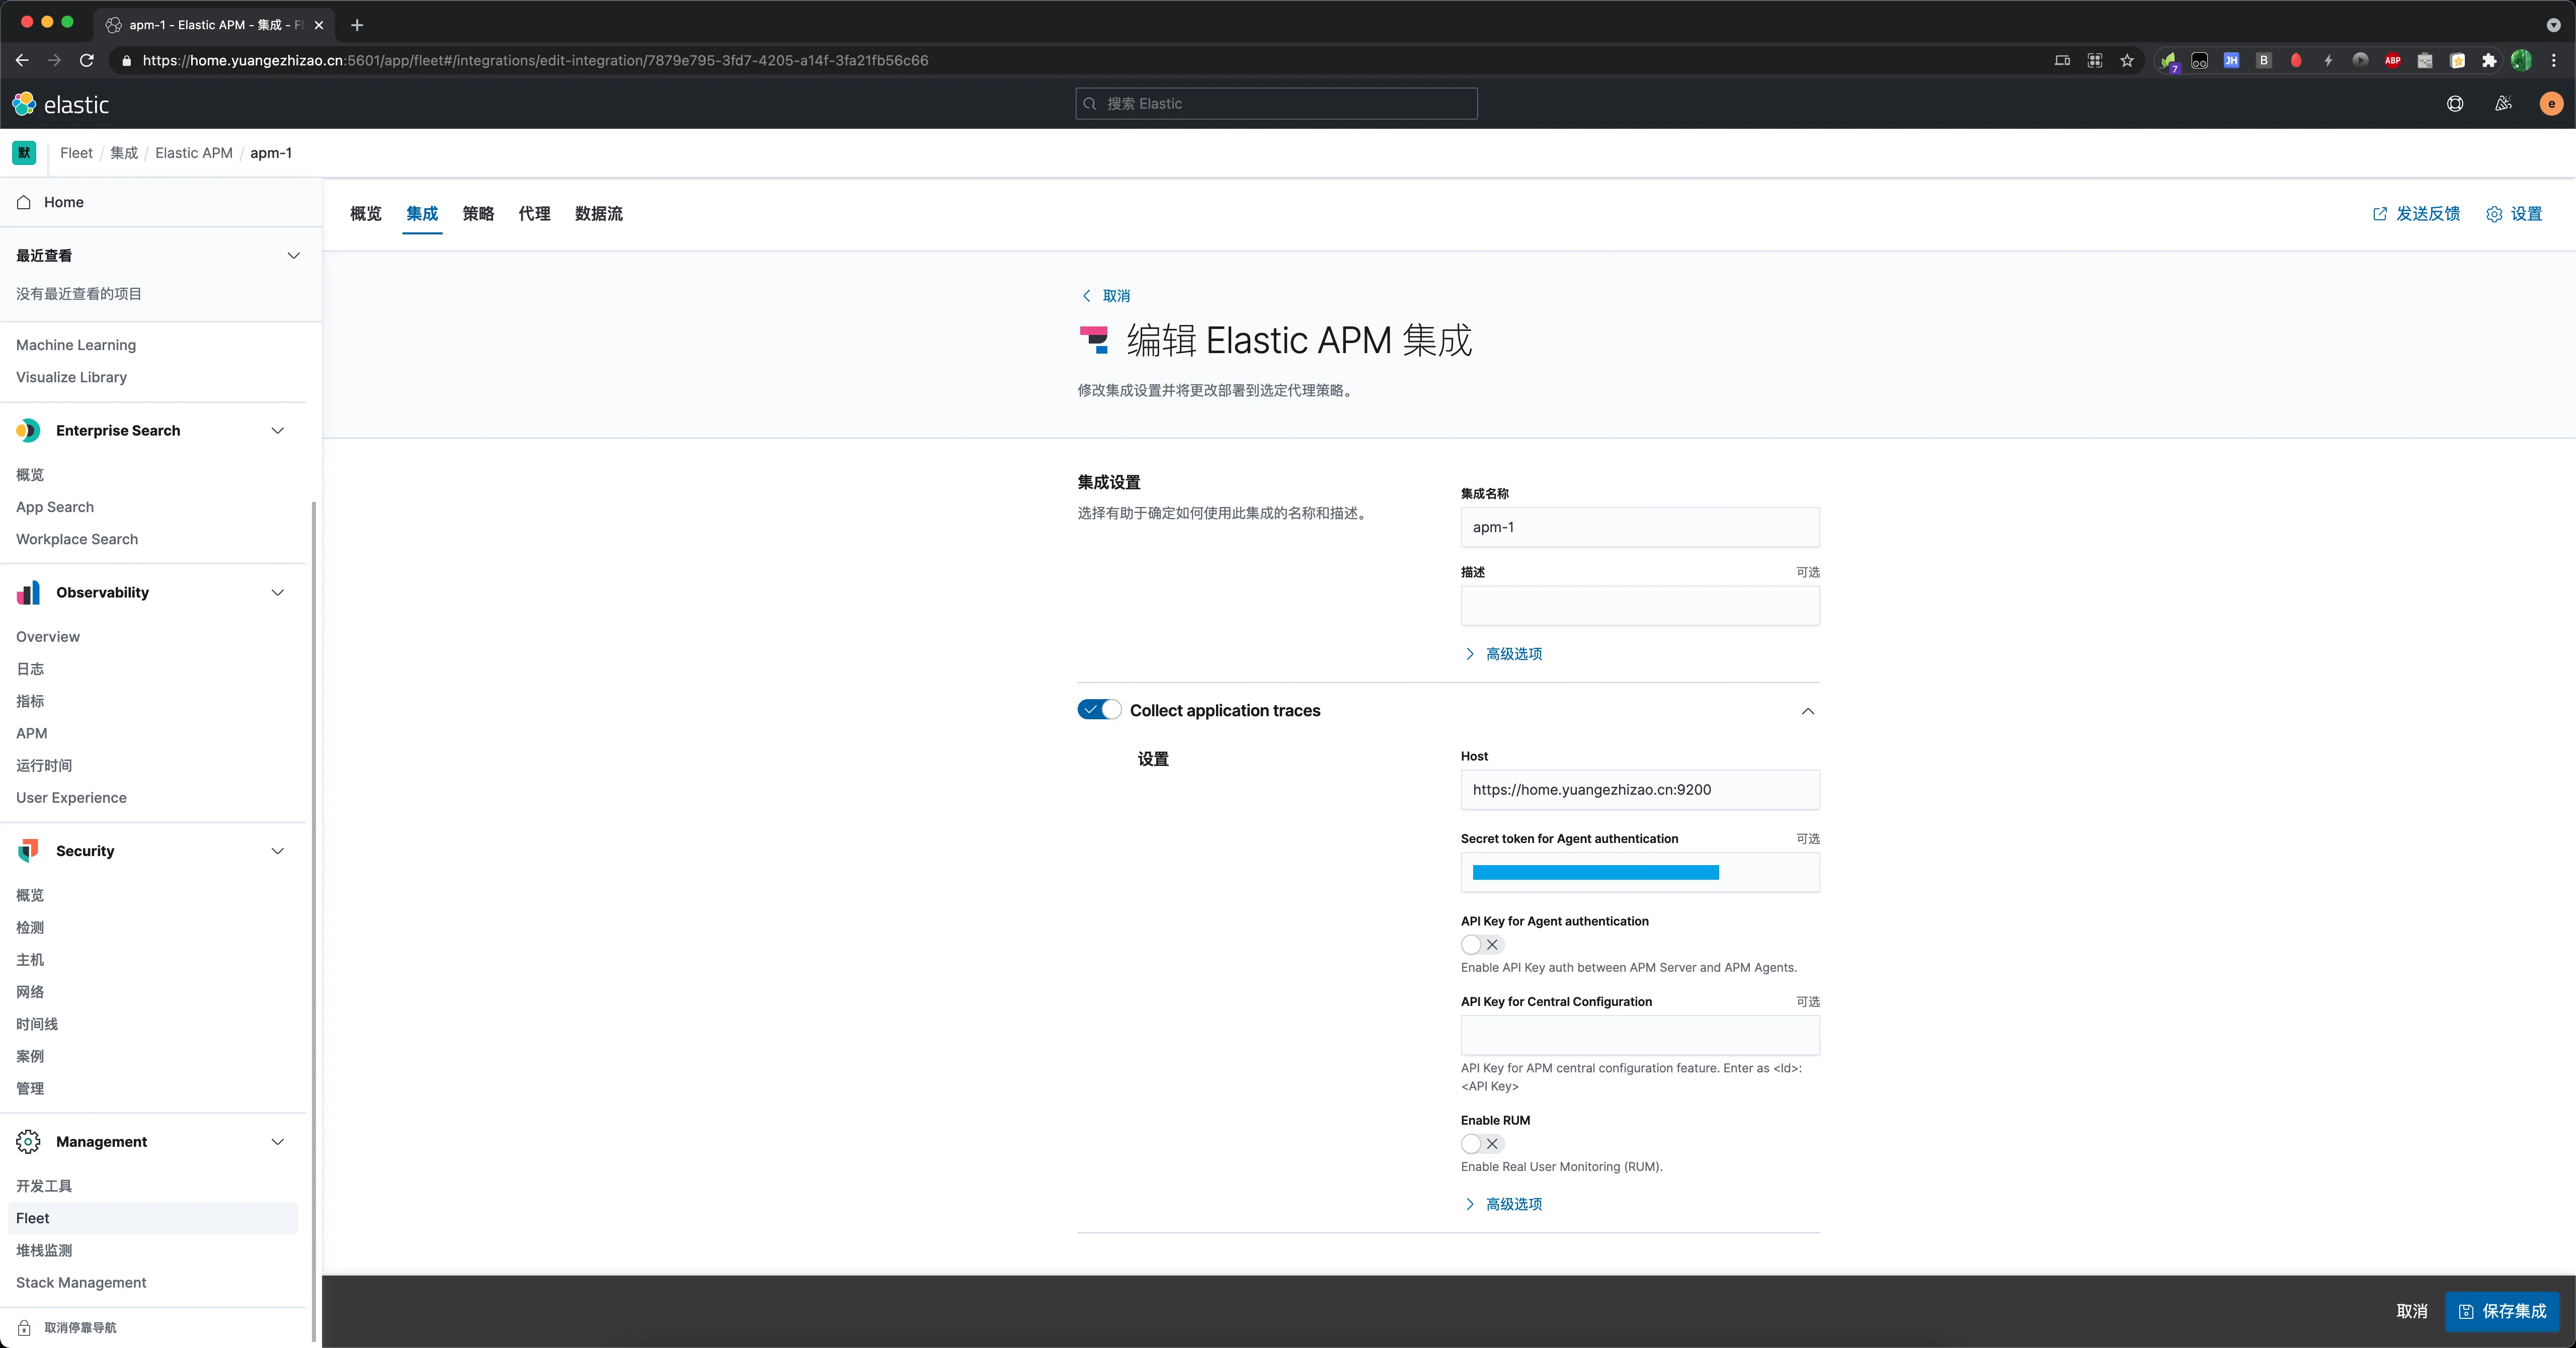 编辑
编辑